Create a level and share it on the Steam Workshop
Contents
Faraday Corridors ships with its own level editor. You draw rooms on a grid, close them with walls and doors, wire doors to switches, drop a pawn and an exit, then play your level in one click. Once you have beaten it, one more click puts it on the Steam Workshop, where other players can subscribe to it and play it straight from the game.
This guide walks through a complete first level, from the empty grid to the Workshop, then shows how to find and play the levels of other players.
1. Open the editor
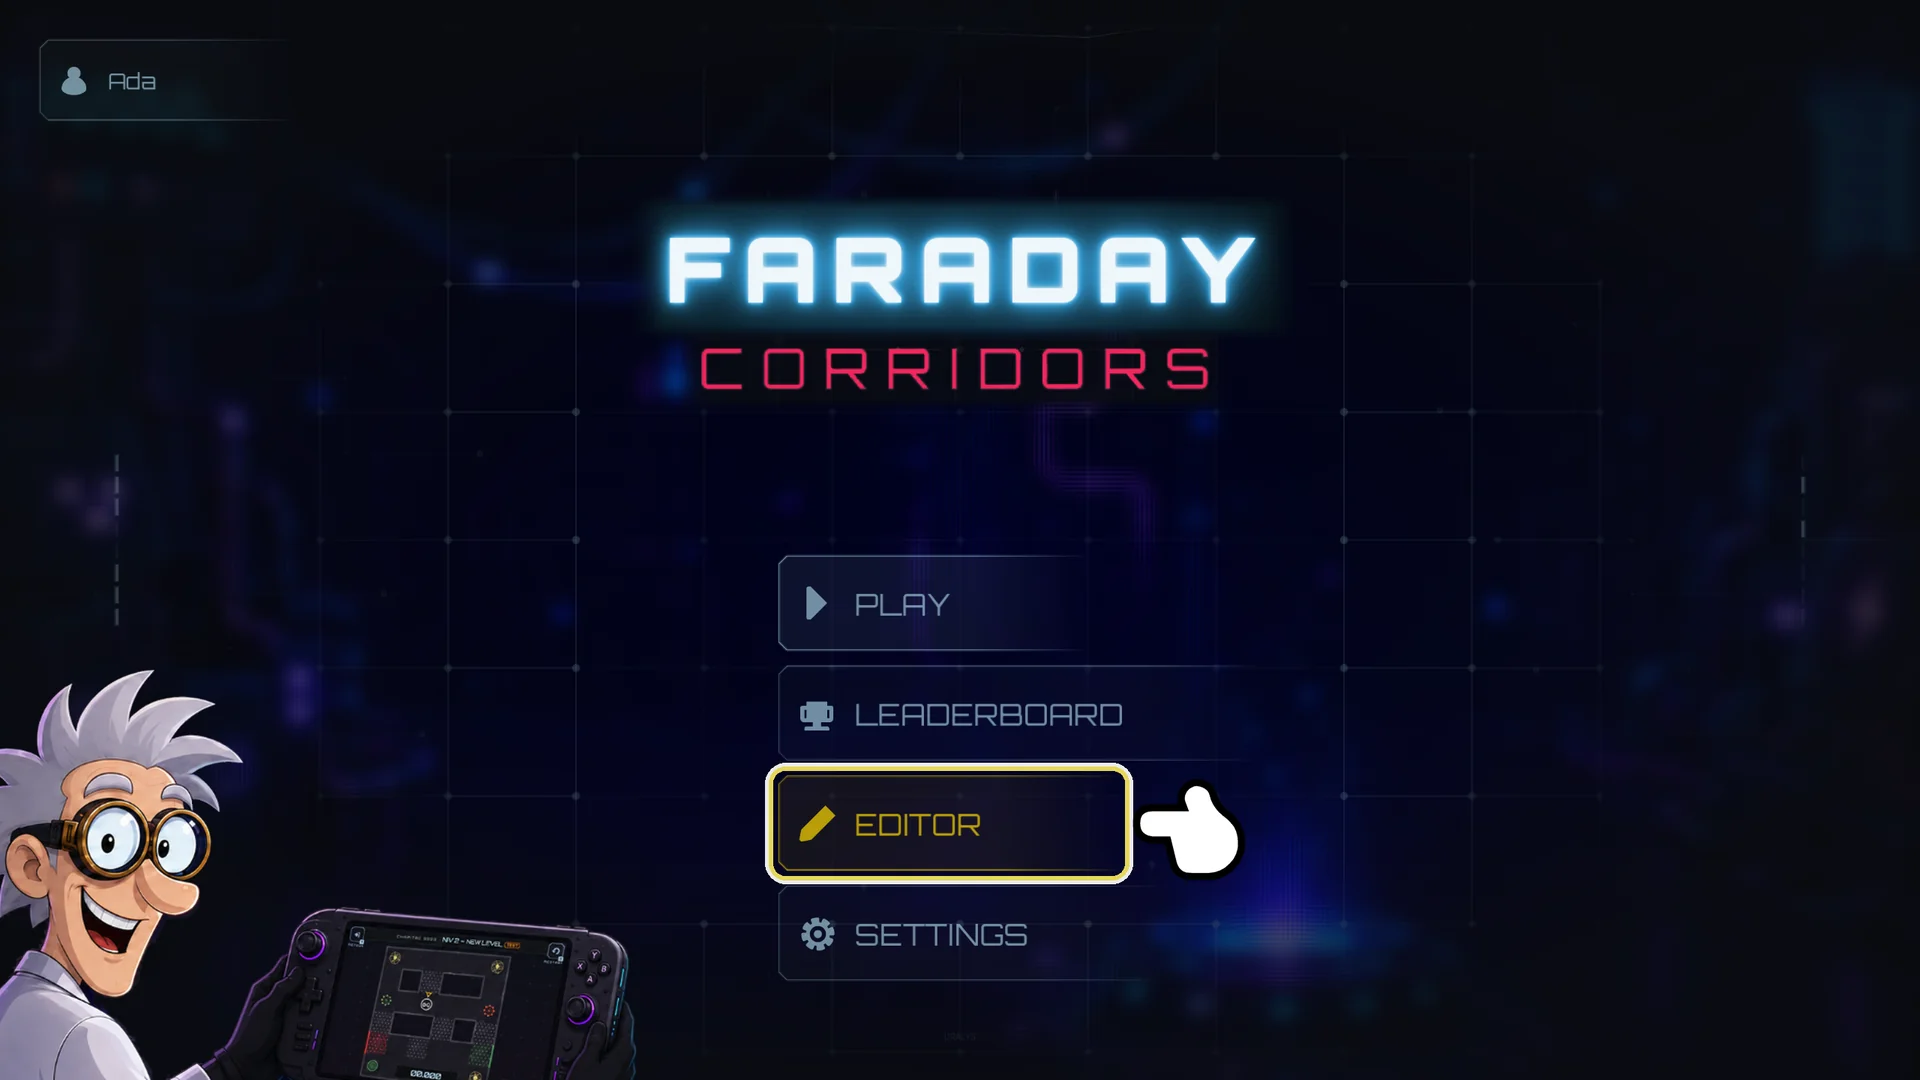
- On the home screen, click EDITOR (the golden pencil button, under LEADERBOARD).
- The editor opens on the last level you edited. The very first time, it creates an empty level for you, named after your profile: Ada.1, then Ada.2, and so on.
Your levels live in their own chapter, MY LEVELS: the editor only opens your levels. The levels of the campaign are not listed there: you cannot open or change them, only create your own.
The editor is made for a mouse and a keyboard, and it works with a gamepad too, Steam Deck included: see "With a gamepad" at the end of section 5.
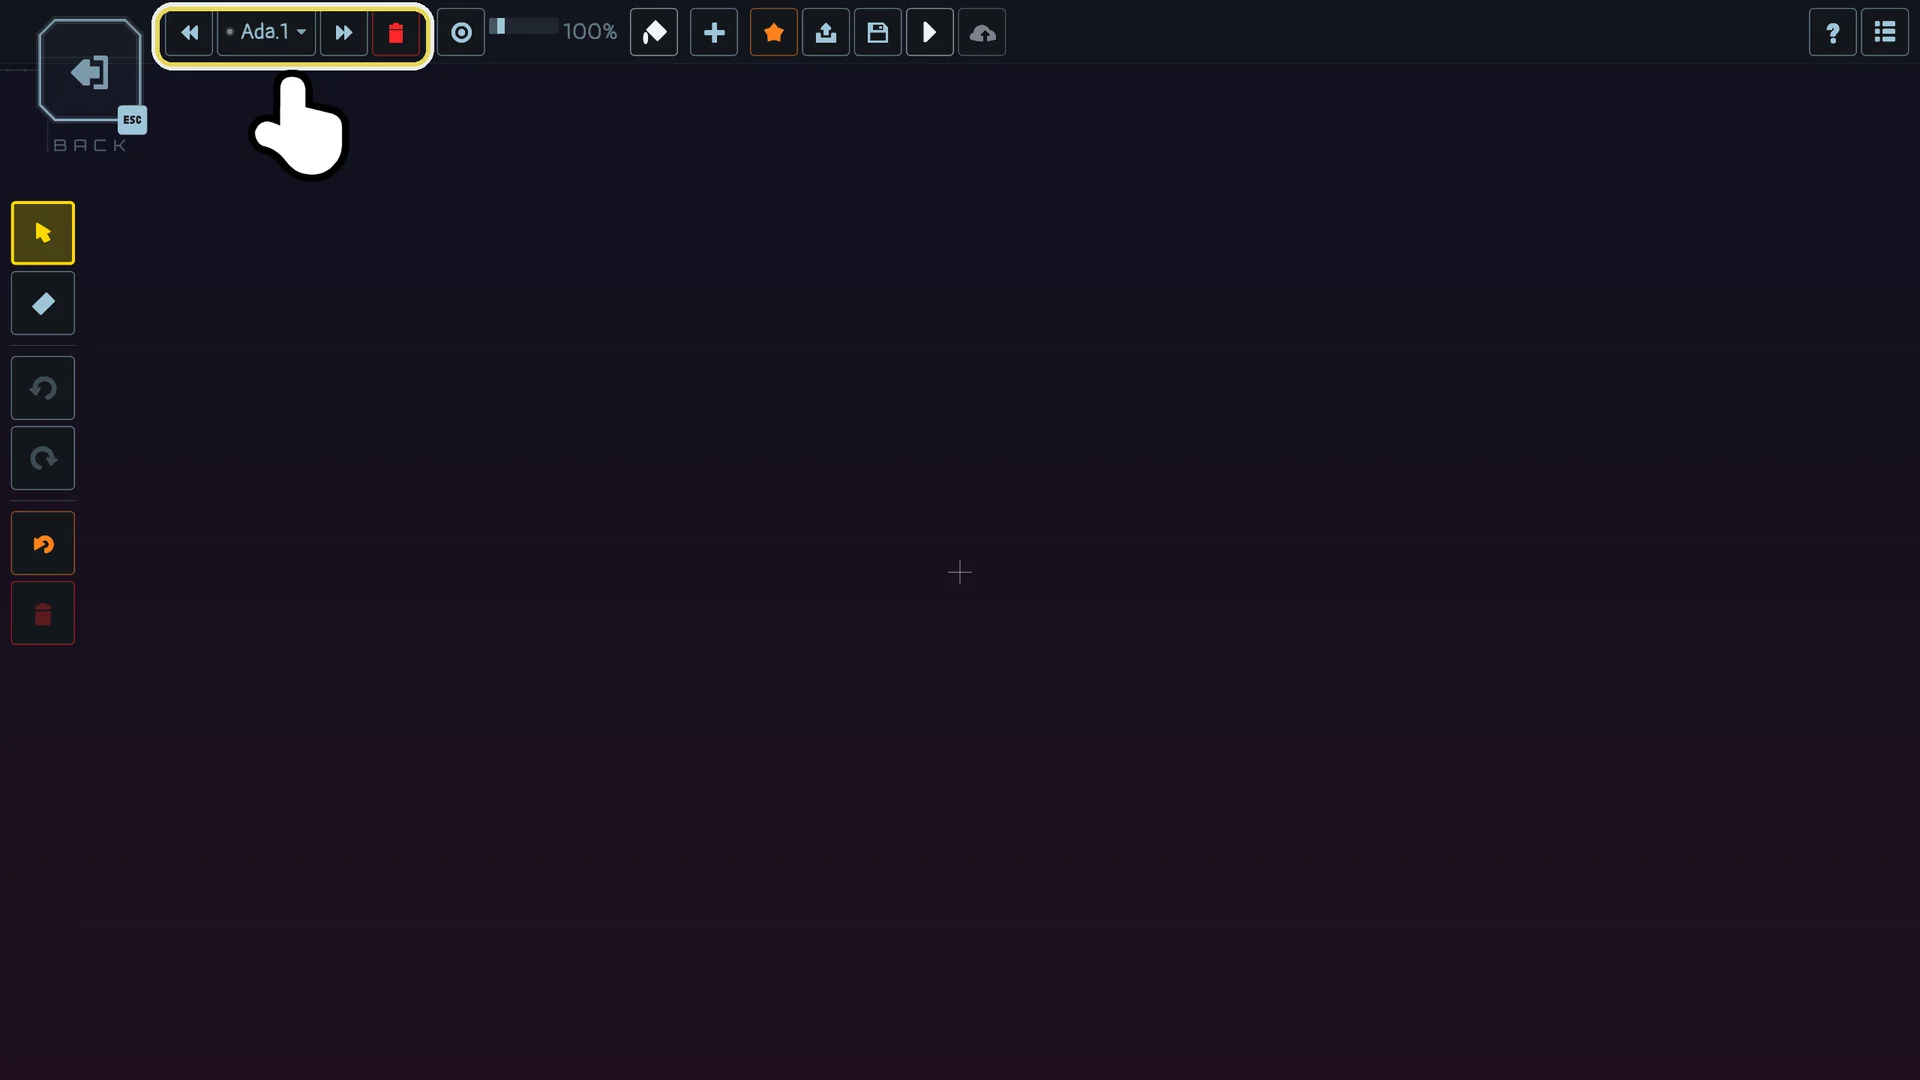
Everything sits around the grid, in one band at the top and one column on the left, so the grid keeps most of the screen, on a Steam Deck too.
The left end of the top band is your level switcher:
- the two arrows go to the previous or next of your levels;
- the chip between them shows the name of the level: click it to pick another one of your levels;
- the red bin deletes the level, after asking (a level you published asks what to do with its Workshop item, see the end of section 10);
- a * after the name means you have unsaved changes.
The rest of the band and the left column hold the tools. Most of them are icons: hover one to read its tooltip, which gives its name and what it does.
| Area | What it holds, left to right or top to bottom |
|---|---|
| Top band | The level switcher; Center view, the zoom slider, Close walls (the paint bucket); the steps of the level (+ adds one, see section 8); NEW (the star), CLONE, SAVE (the disk), TEST (the play arrow), PUBLISH (the cloud); and, at the far right, ? (the list of commands) and the Properties panel toggle |
| Left column | Select, Erase, Undo, Redo, Revert, and the bin that deletes the current selection |
| Properties panel | Hidden until you open it: level title, chrono targets, and the settings of a multiple selection |
Elements are added from the add menu: right-click the grid and it opens where you clicked (X on a gamepad).
In the demo
The demo has the whole editor: you create, test, publish to the Workshop and play the levels of other players, exactly like in the full game. Two things differ:
- you can keep up to three levels of your own. At the limit, NEW and CLONE open a "Demo limit reached" window: WISHLIST NOW opens the Steam page of the full game, OK closes it. Delete one of your levels to make room for a new one. The full game has no limit;
- the demo has its own Workshop (see section 10).
2. Draw the rooms
- Right-click the grid to open the add menu.
- Open STRUCTURE and pick ROOM.
- Click on the grid to place a room. Hold the button and drag to paint several rooms in one stroke.
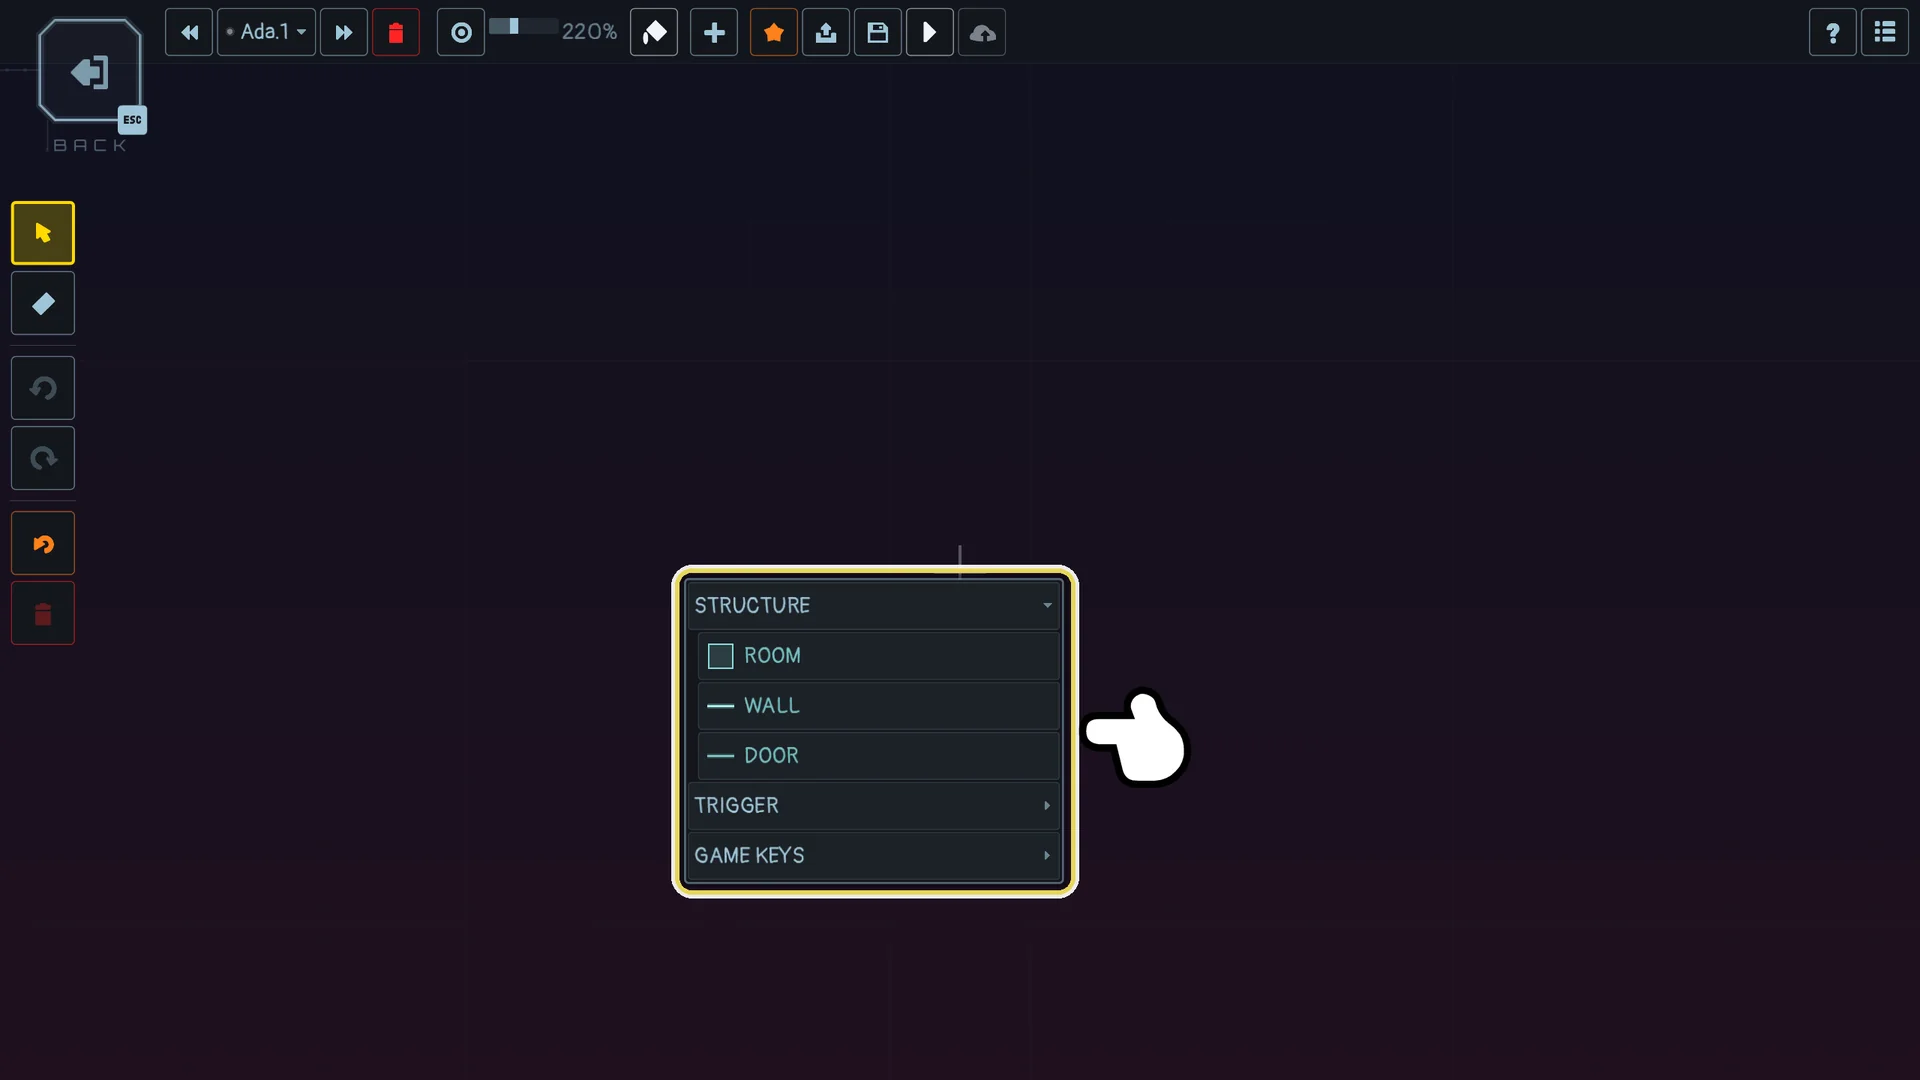
The element stays armed: every click places another one, and a chip next to the left column reminds you what the next click will place. Right-click again to pick another element. Press Esc (or click the chip) to stop placing.
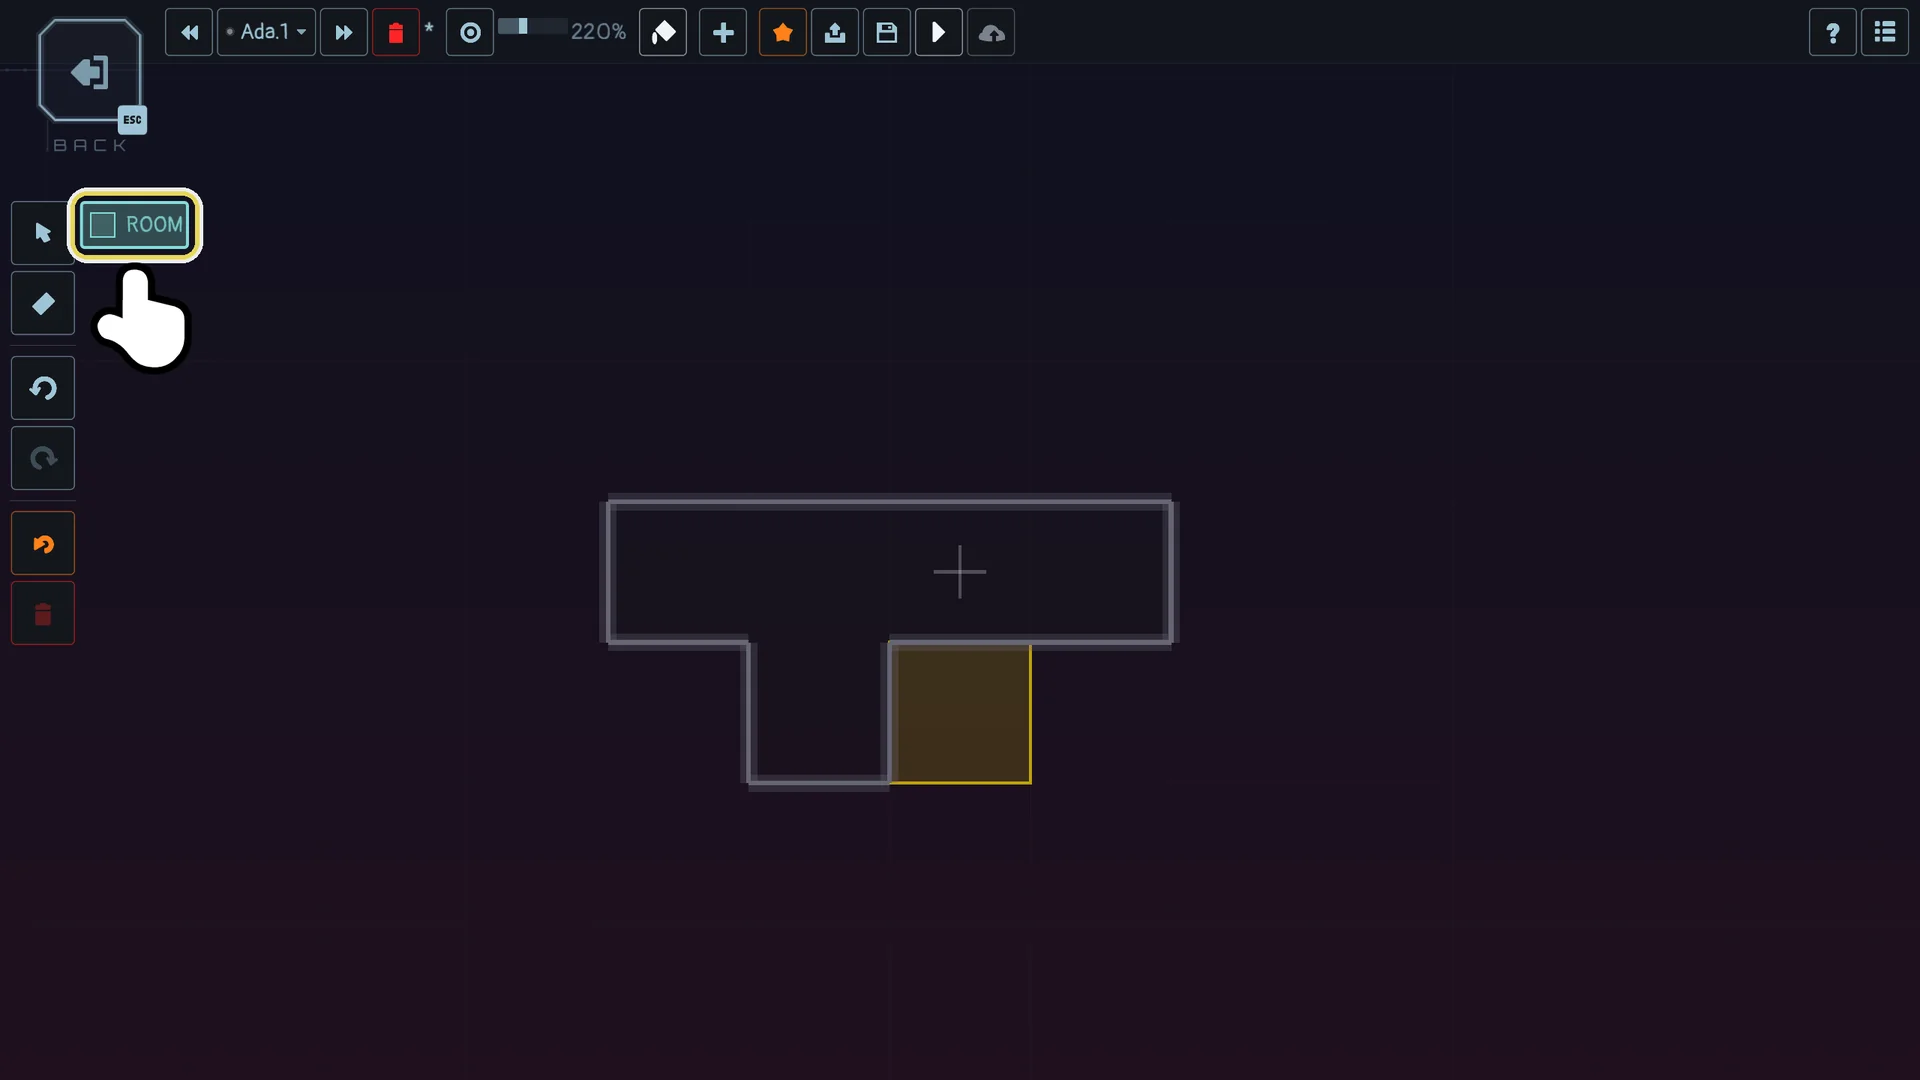
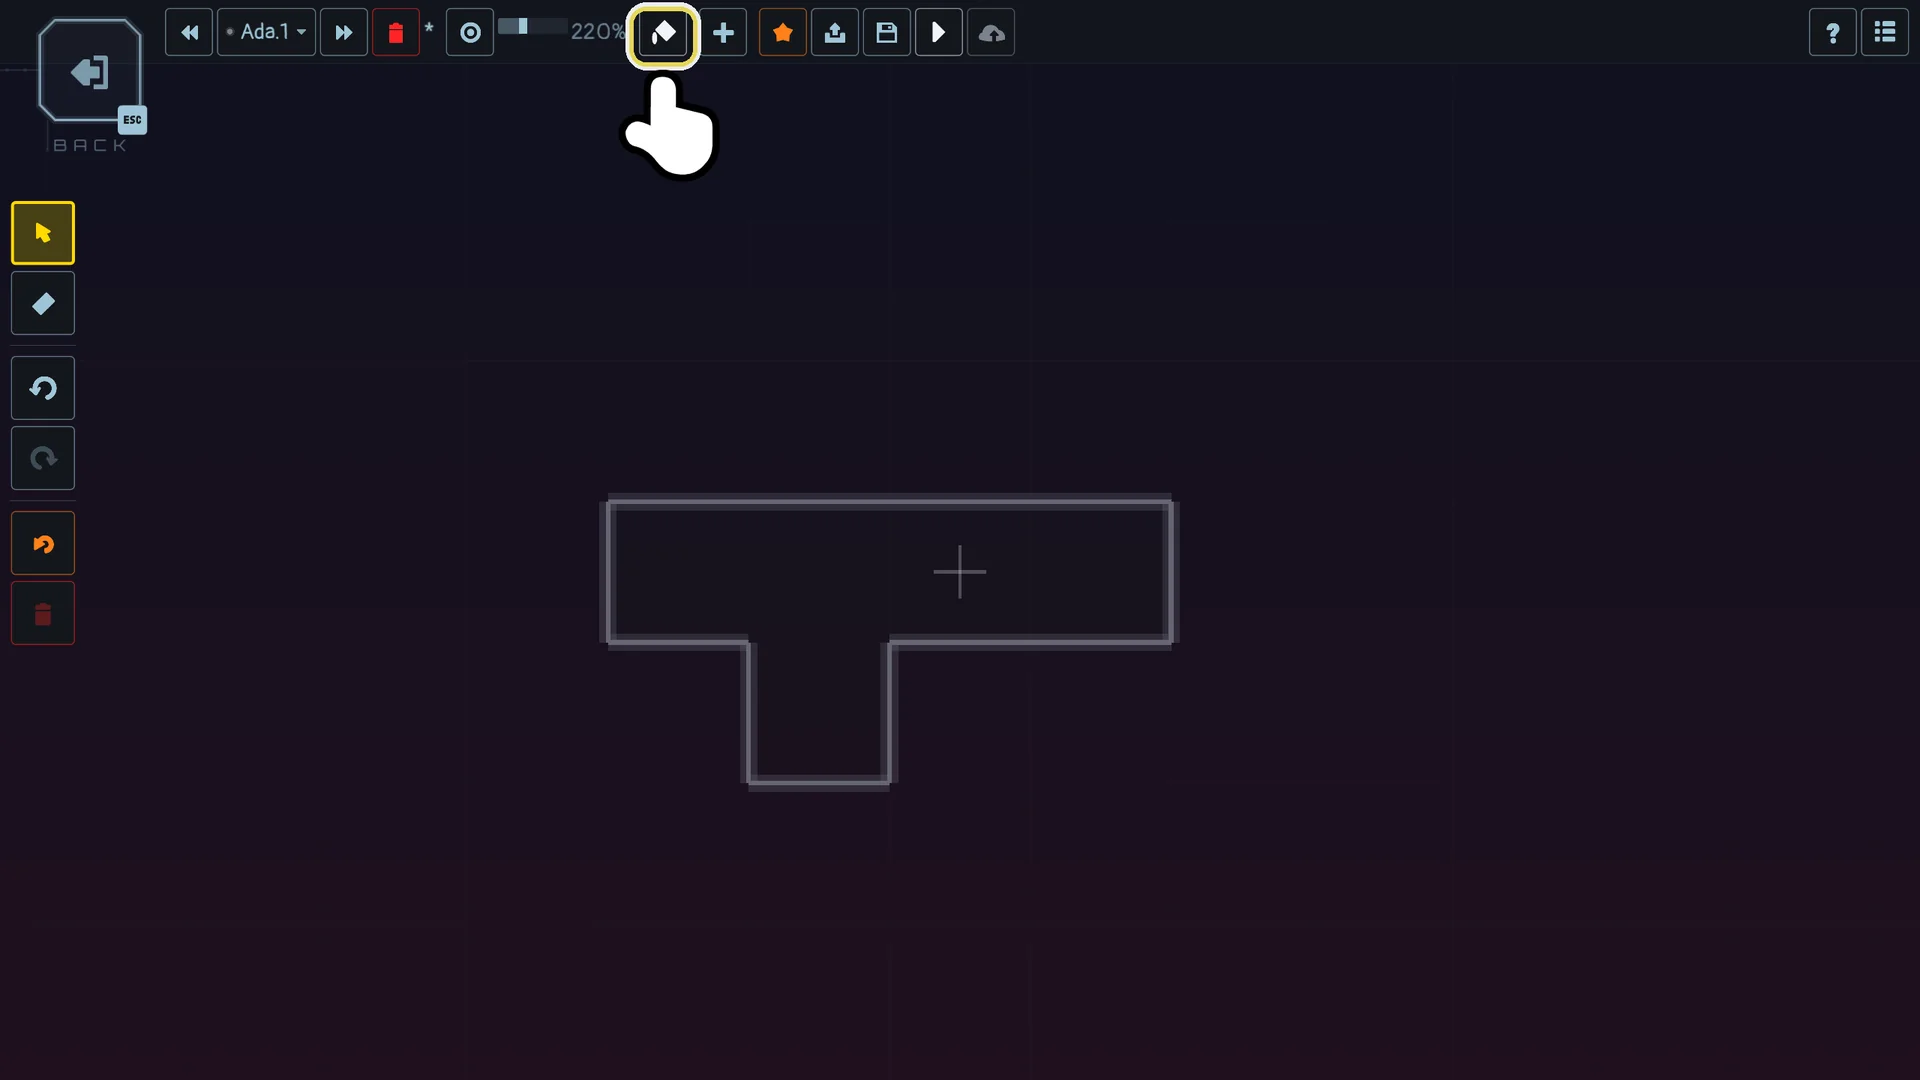
Rooms wall themselves: each new room closes its outer sides, and two neighbouring rooms open onto each other. If some sides are left open after your edits, the Close walls button of the toolbar (the paint bucket) puts a wall on every open side of every room.
3. Doors and triggers
Doors
A door is placed on the side of a room, like a wall.
- Right-click to open the add menu, then STRUCTURE, and pick DOOR.
- Click close to the side of a room where the door goes. A new door starts closed. Clicking an existing door with DOOR armed toggles it open or closed.
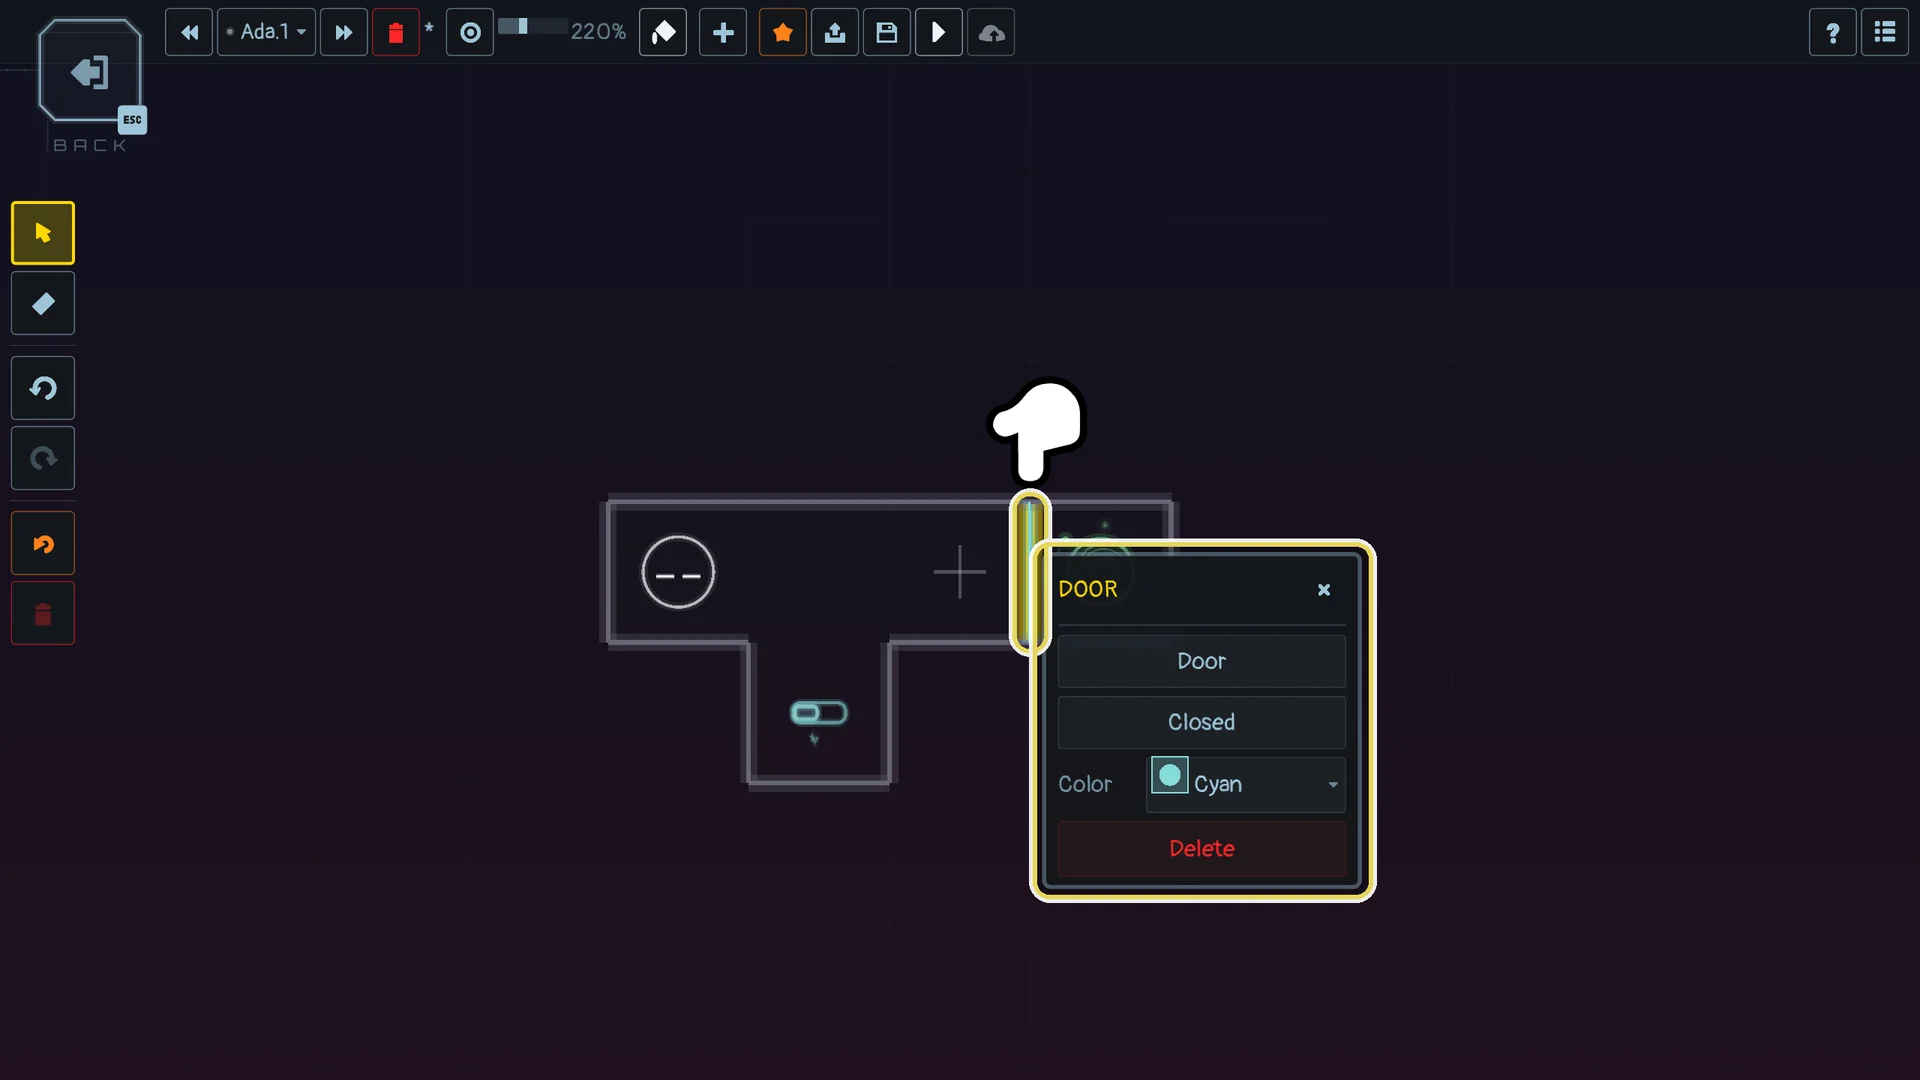
Click a door with the Select tool to open its pop-up (see section 5): Door or Wall, Open or Closed (how it starts), its colour, and Delete.
A door is opened and closed by the triggers of its colour. Colours are Cyan, Red, Yellow, Green and Blue. A new door and a new switch are both Cyan: give each door the colour of the trigger that drives it.
A door can also carry a Step number. Select the door with Shift + click, then open the Properties panel: its SELECTION section shows the Step of the door (0, the default, means none). A door with a step is drawn dashed: it is the frontier of a step that is not revealed yet, and it opens by itself when that step appears (see section 8).
Triggers
Triggers sit in the middle of a room. A pawn sets one off by walking into its room.
- Right-click to open the add menu, then TRIGGER.
- Pick one and click inside a room.
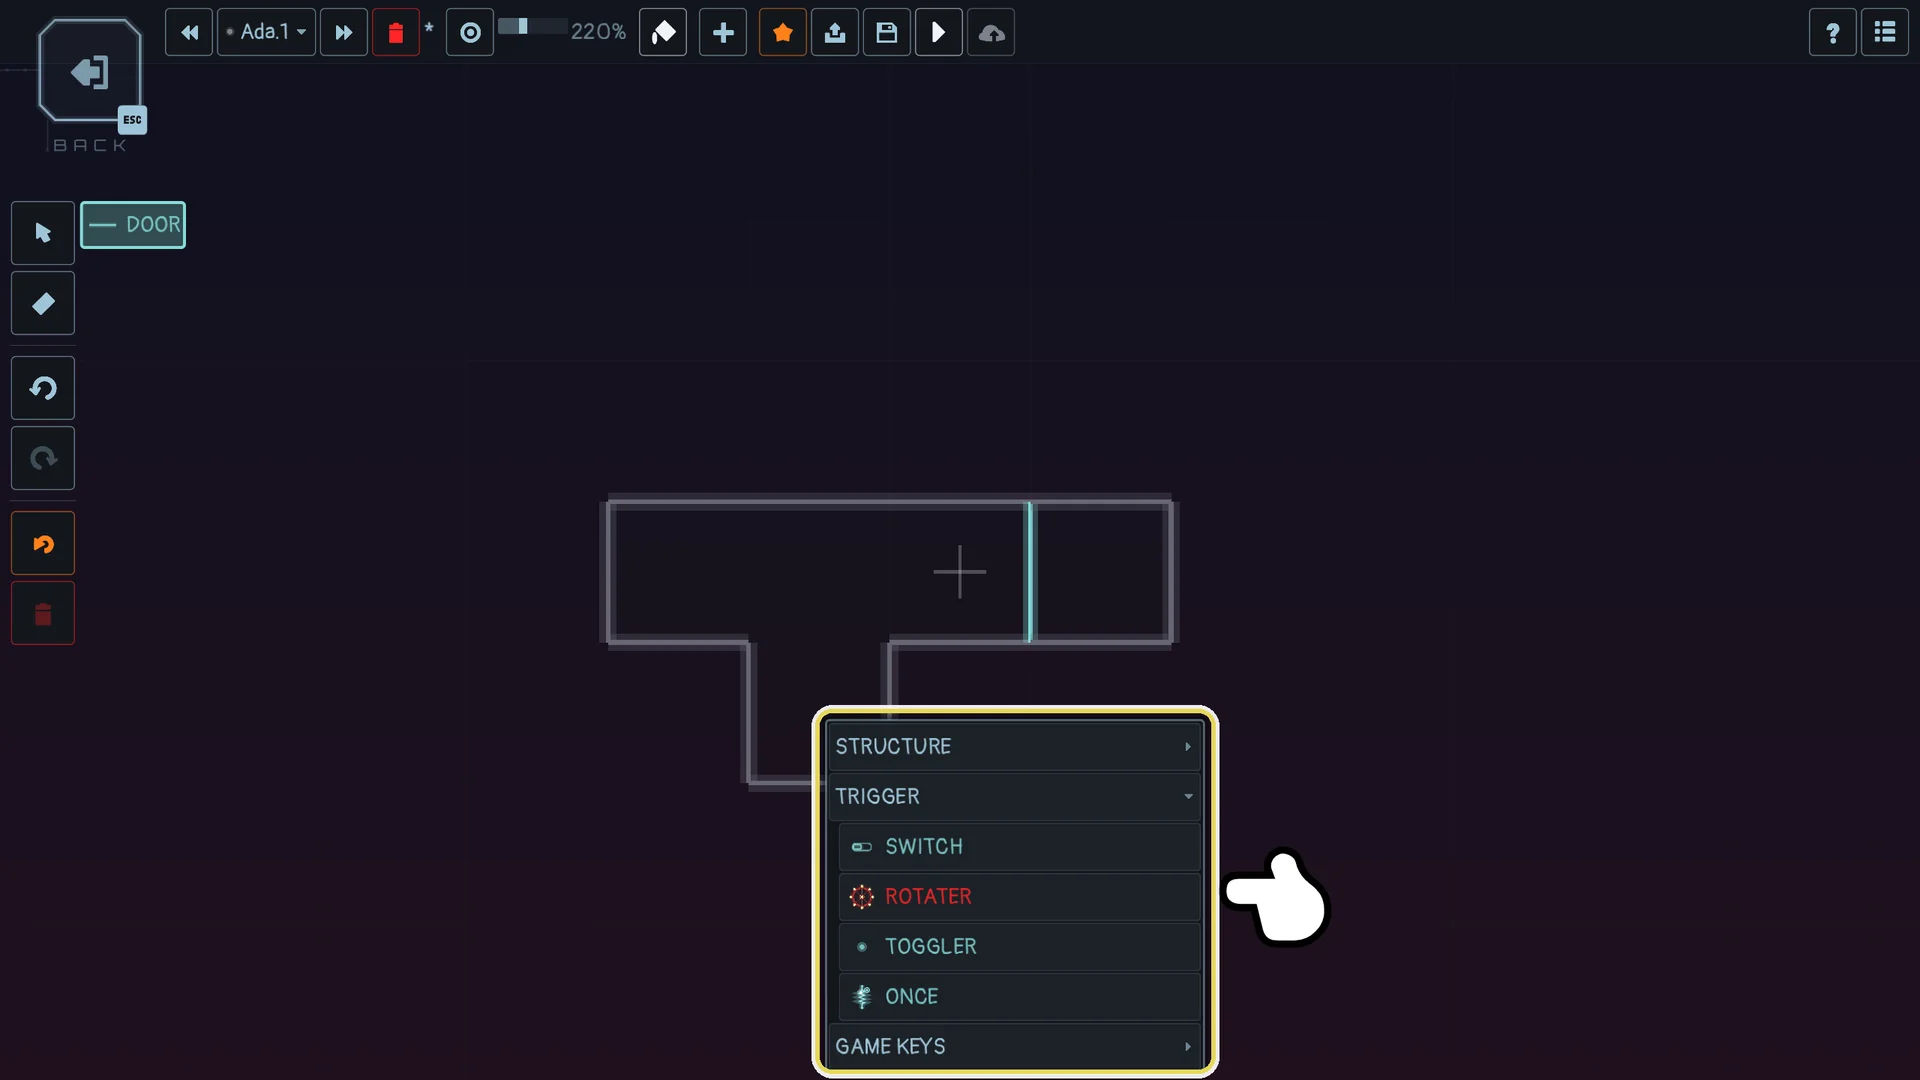
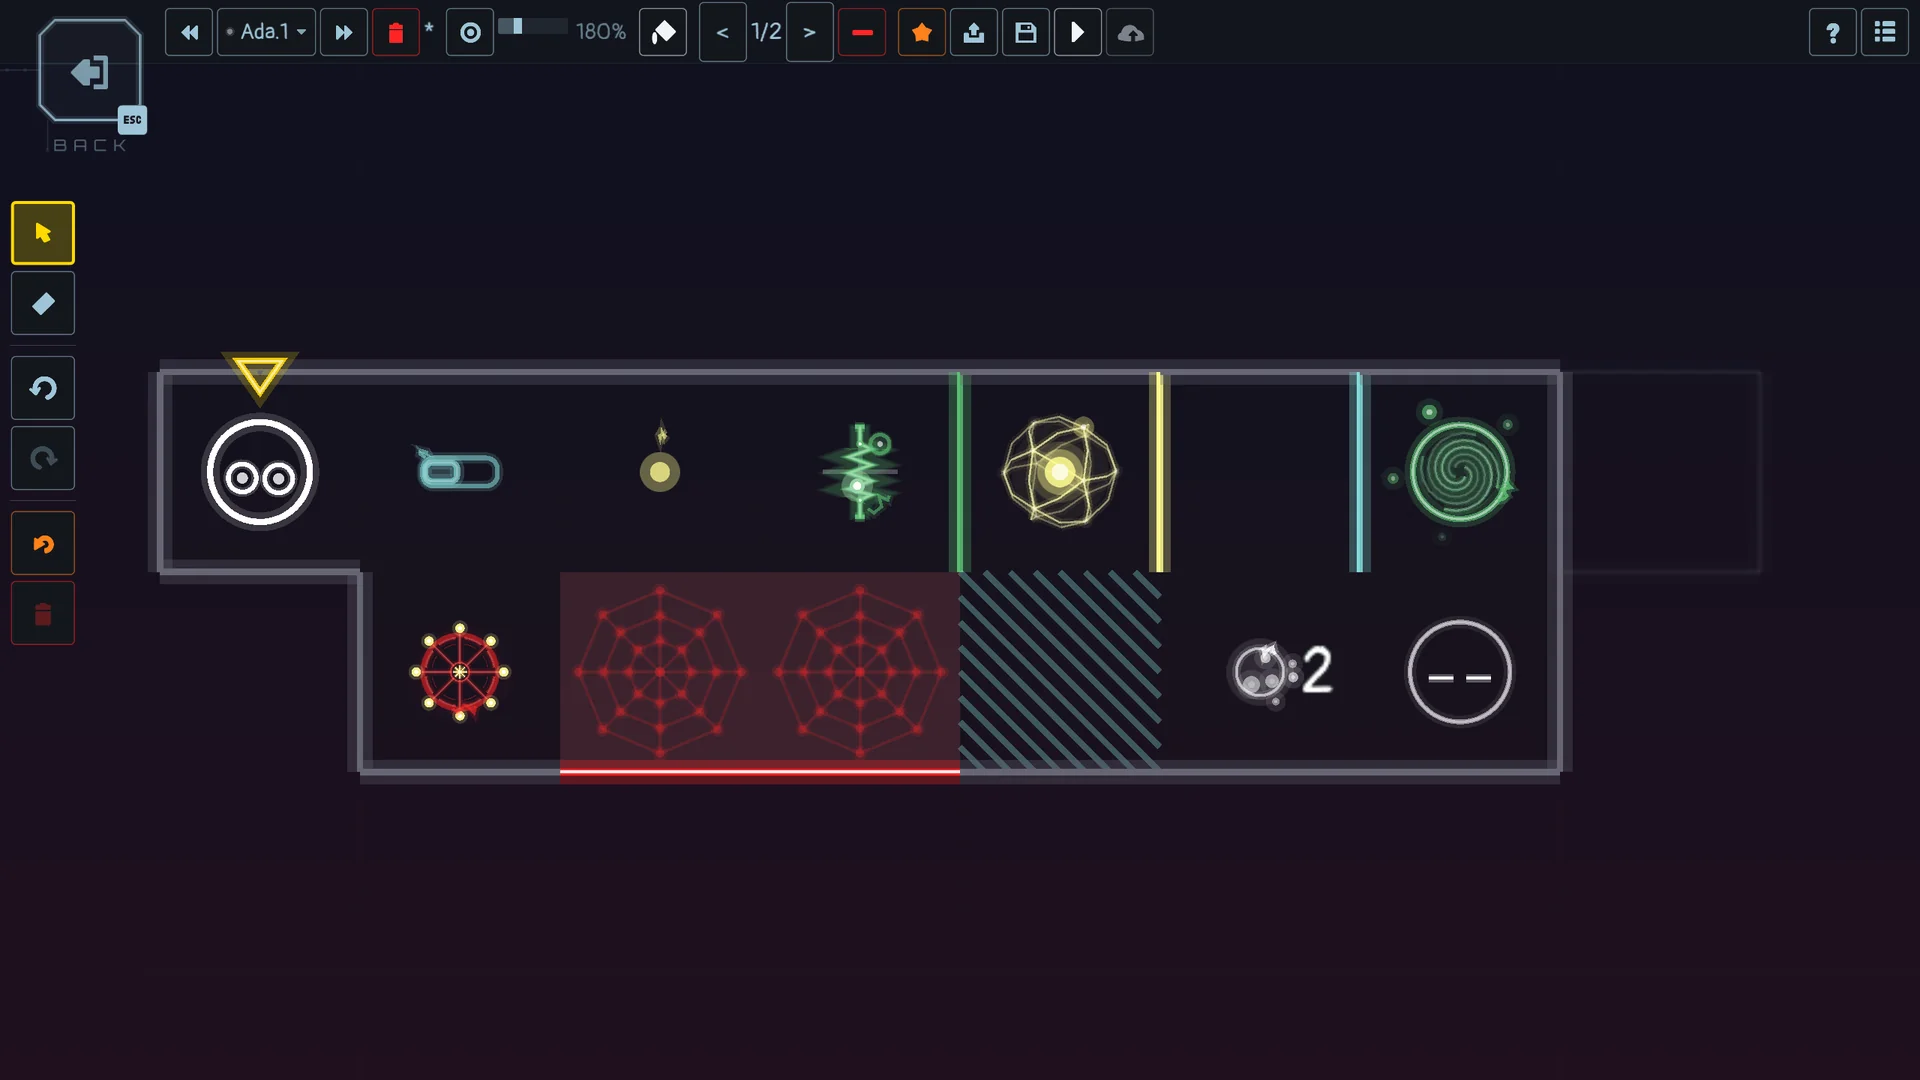
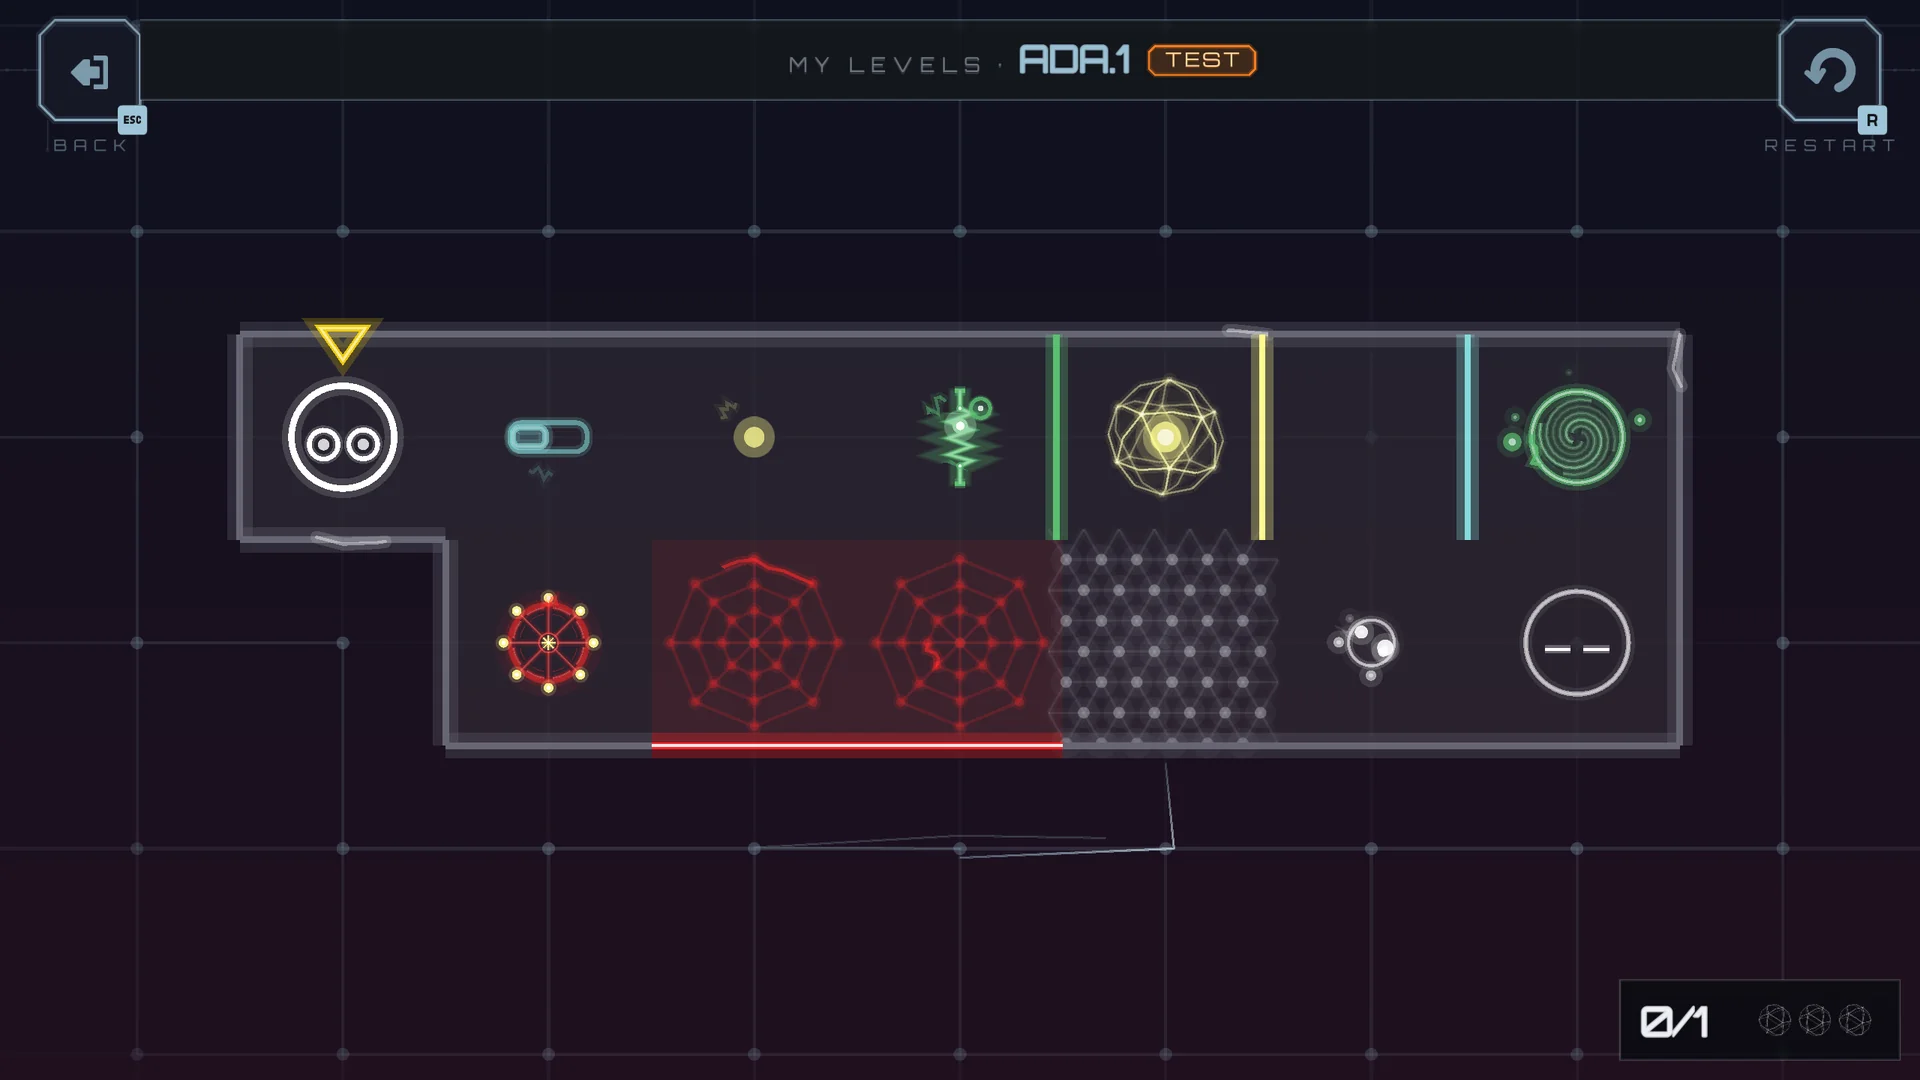
Here is a level that holds all four, with the doors they drive. On the top row, after the pawn: a cyan SWITCH, a yellow TOGGLER and a green ONCE, then a collectible, and the green, yellow and cyan doors in front of the exit. On the bottom row: a red ROTATER next to its red block of two rooms, a break room, a portal and a second pawn.
| Trigger | What it does when a pawn enters its room |
|---|---|
| SWITCH | Toggles every door of its colour, each time a pawn enters |
| ROTATER | Turns the rooms of its colour a quarter turn clockwise, each time a pawn enters |
| TOGGLER | Toggles the doors of its colour when a pawn enters, and back when that pawn leaves |
| ONCE | Toggles the doors of its colour a single time, then breaks and disappears |
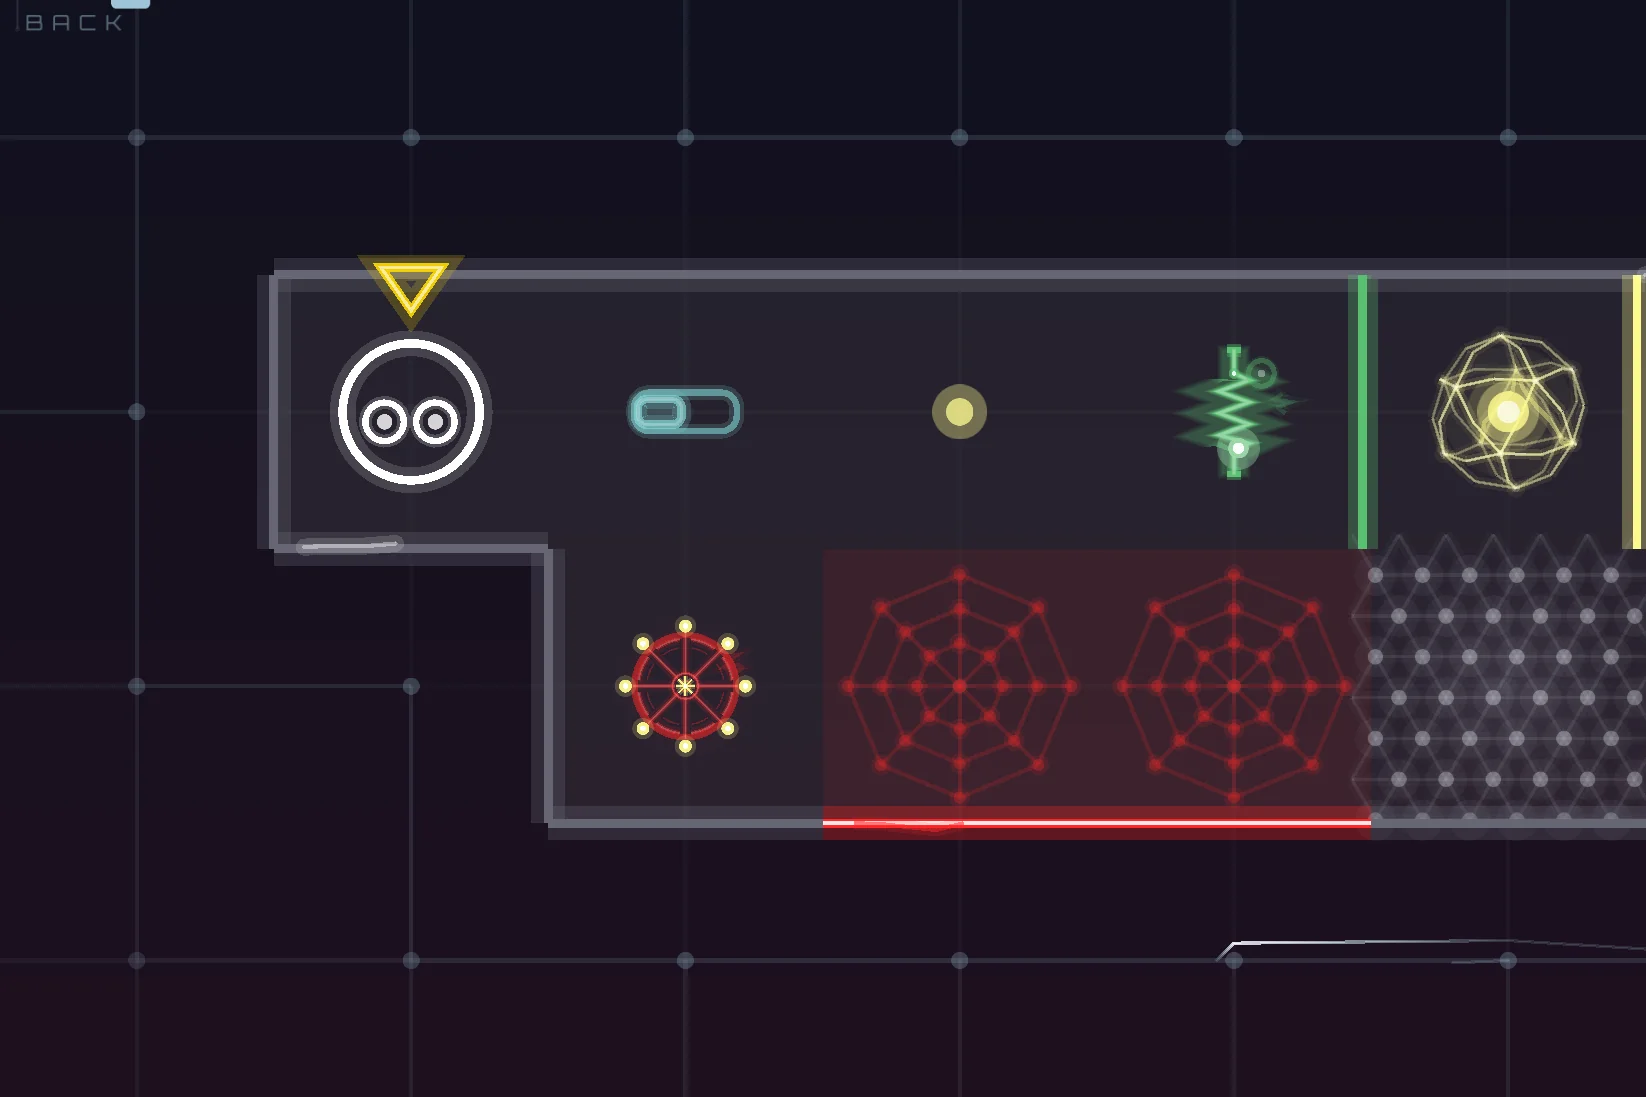
In the game, each trigger has its own symbol: the SWITCH is a small switch, the TOGGLER a dot that draws a ring around the pawn standing on it, the ONCE a green zigzag, and the ROTATER a wheel with spokes. The rooms a ROTATER turns wear a web pattern of its colour.
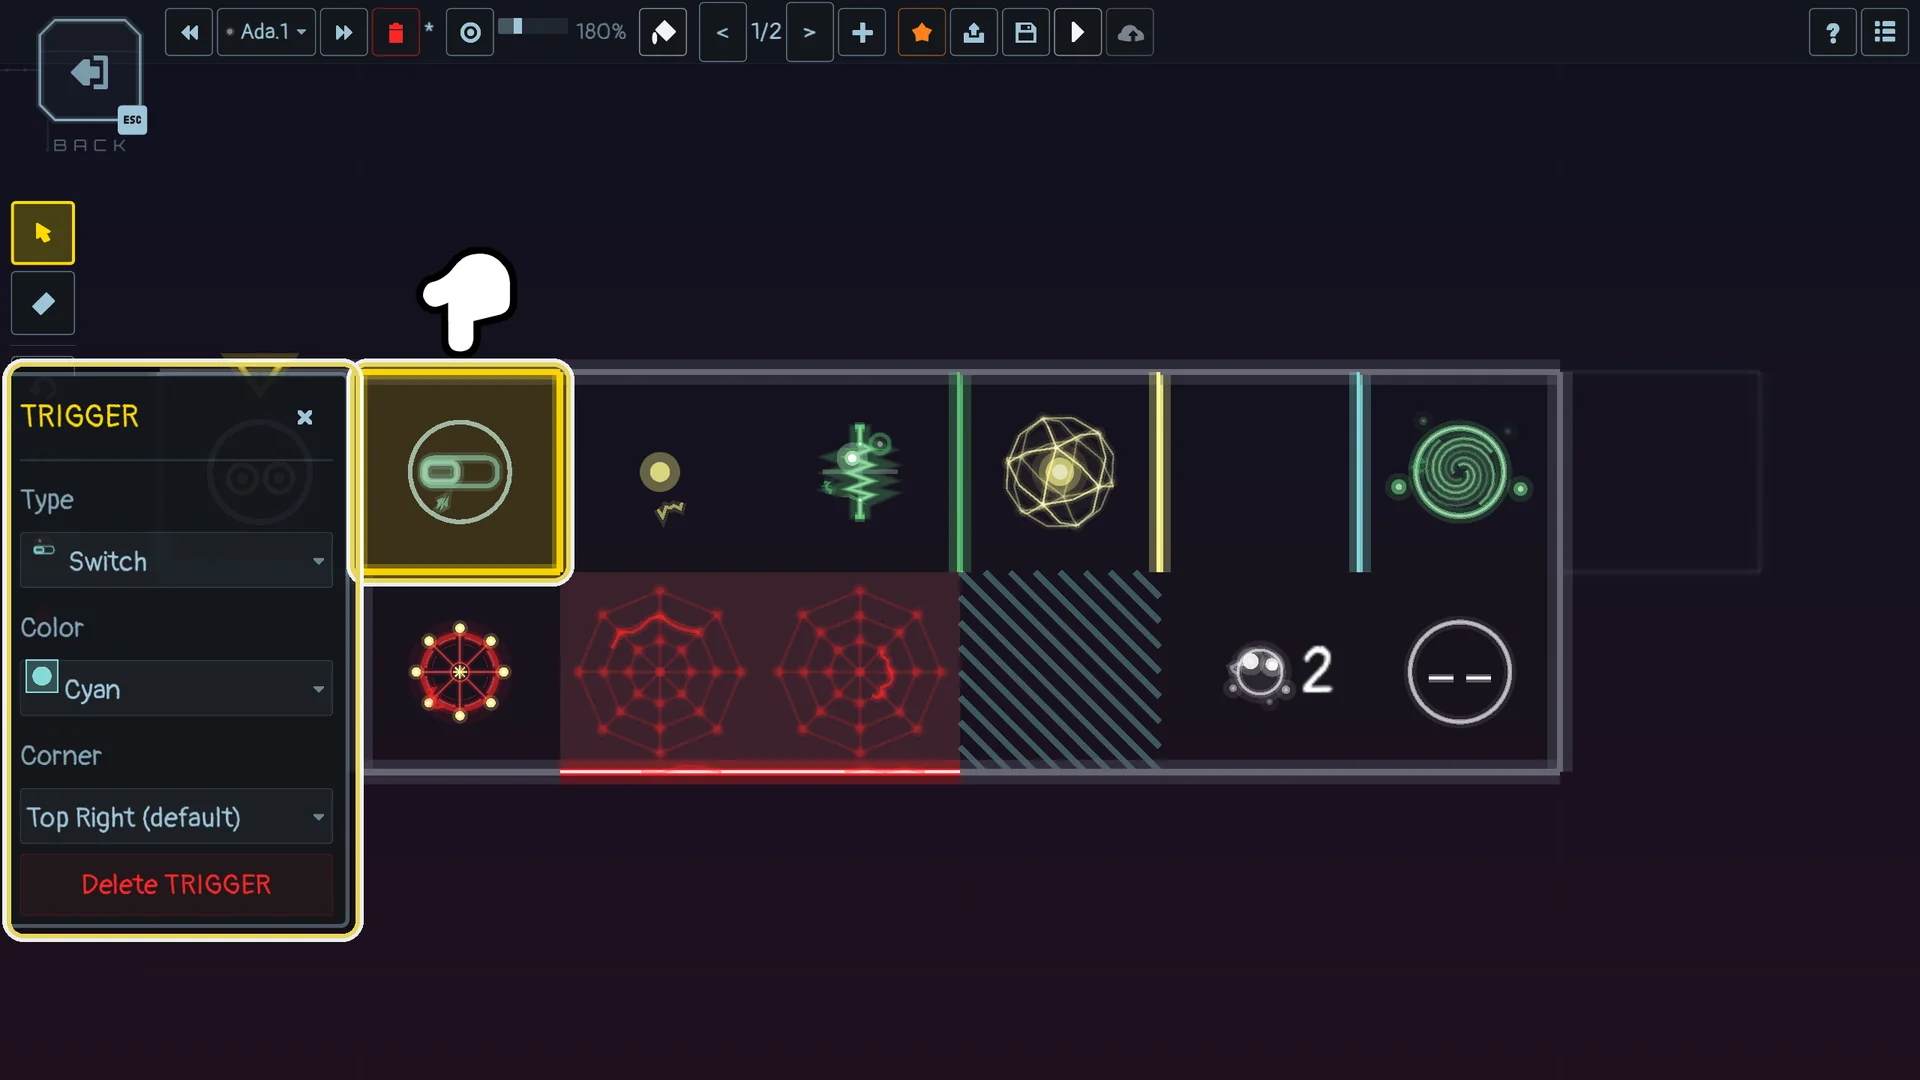
Click a trigger with the Select tool to open its pop-up:
- Type: SWITCH, ROTATER, TOGGLER or ONCE. You can change a trigger into another without placing it again;
- Color: the doors (or, for a ROTATER, the rooms) it drives;
- Corner (SWITCH and ROTATER only): the corner of the room where its replay button appears, see below;
- Delete.
SWITCH
The basic trigger. Every time a pawn enters its room, every door of its colour flips: closed doors open, open doors close. Two switches of the same colour drive the same doors.
ROTATER
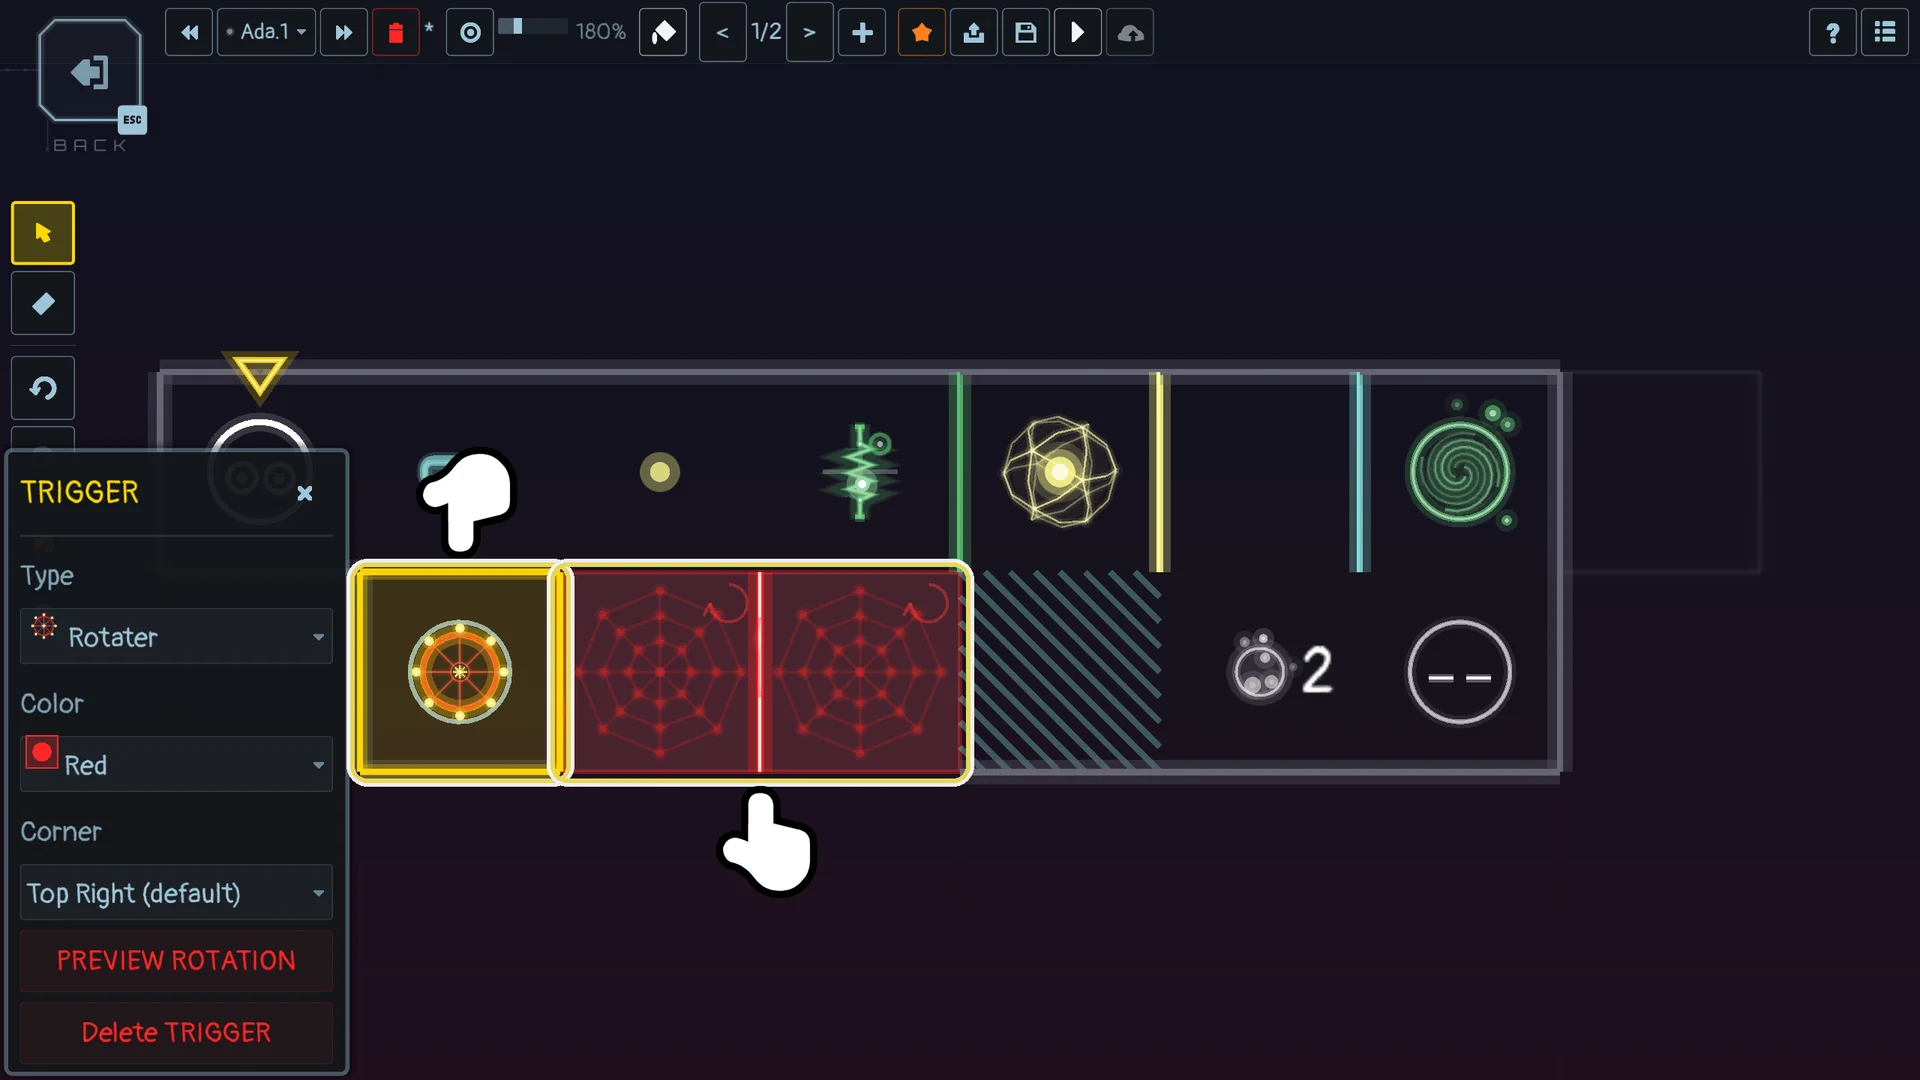
A ROTATER does not touch doors: it turns rooms. Paint some rooms in a colour (click a room, then its Color field), and a ROTATER of that colour turns every wall and every door of those rooms a quarter turn clockwise each time a pawn enters its room. Four entries bring them back where they started. The rooms of a colour turn together, as one block, and the game marks them with a web pattern of their colour so the player can tell them apart.
- A ROTATER takes Red, Yellow, Green or Blue, never Cyan: Cyan is the colour of ordinary rooms, which never turn.
- In its pop-up, PREVIEW ROTATION shows the next quarter turn on the grid, so you can check where the openings go. The preview is undone at your next edit, save or test.
- A ROTATER whose rooms only arrive in a later step is allowed: the rooms appear already turned.
TOGGLER
A pressure pad. When a pawn enters its room, the doors of its colour flip; when that same pawn leaves, they flip back. To keep a door open, leave a pawn standing on it, which is what several pawns are for (see section 4).
ONCE
A switch that works a single time: the first pawn to enter flips the doors of its colour, then the trigger breaks and disappears. Use it for a door the player must not be able to close again, or must think about before opening.
Replay a SWITCH or a ROTATER from anywhere
Once a SWITCH or a ROTATER has been set off, a button appears in the corner of its room (the Corner of its pop-up decides which corner). The player can click it, or press a number, to set the trigger off again without walking back: 1 to 9 on the keyboard, A, X, L1 and R1 on a gamepad, numbered in the order of the triggers already set off. Each replay counts as one action. TOGGLER and ONCE have no replay button.
4. Game elements
Right-click to open the add menu, then GAME KEYS:
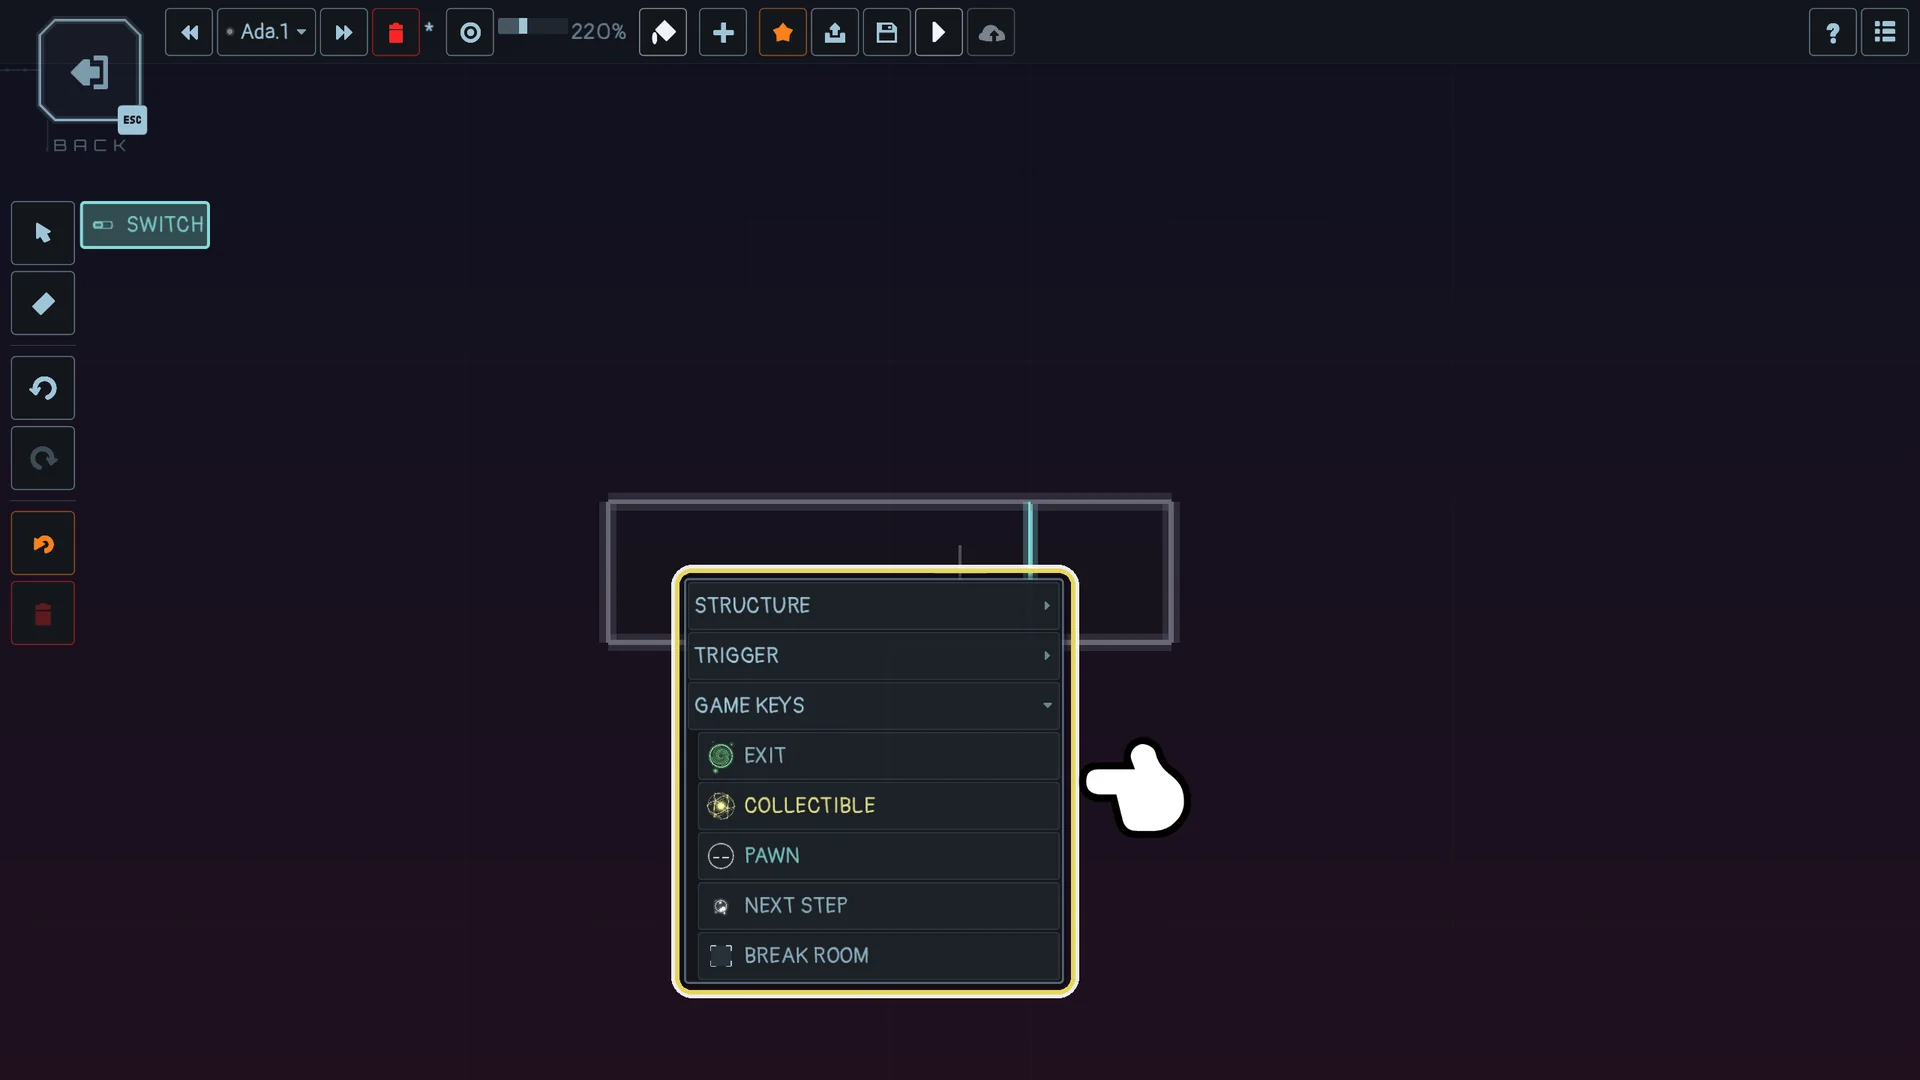
A room holds one centre element at a time: one pawn, or one exit, or one trigger, or one collectible, or one portal. BREAK ROOM is a property of the room, so it adds to whatever the room holds.
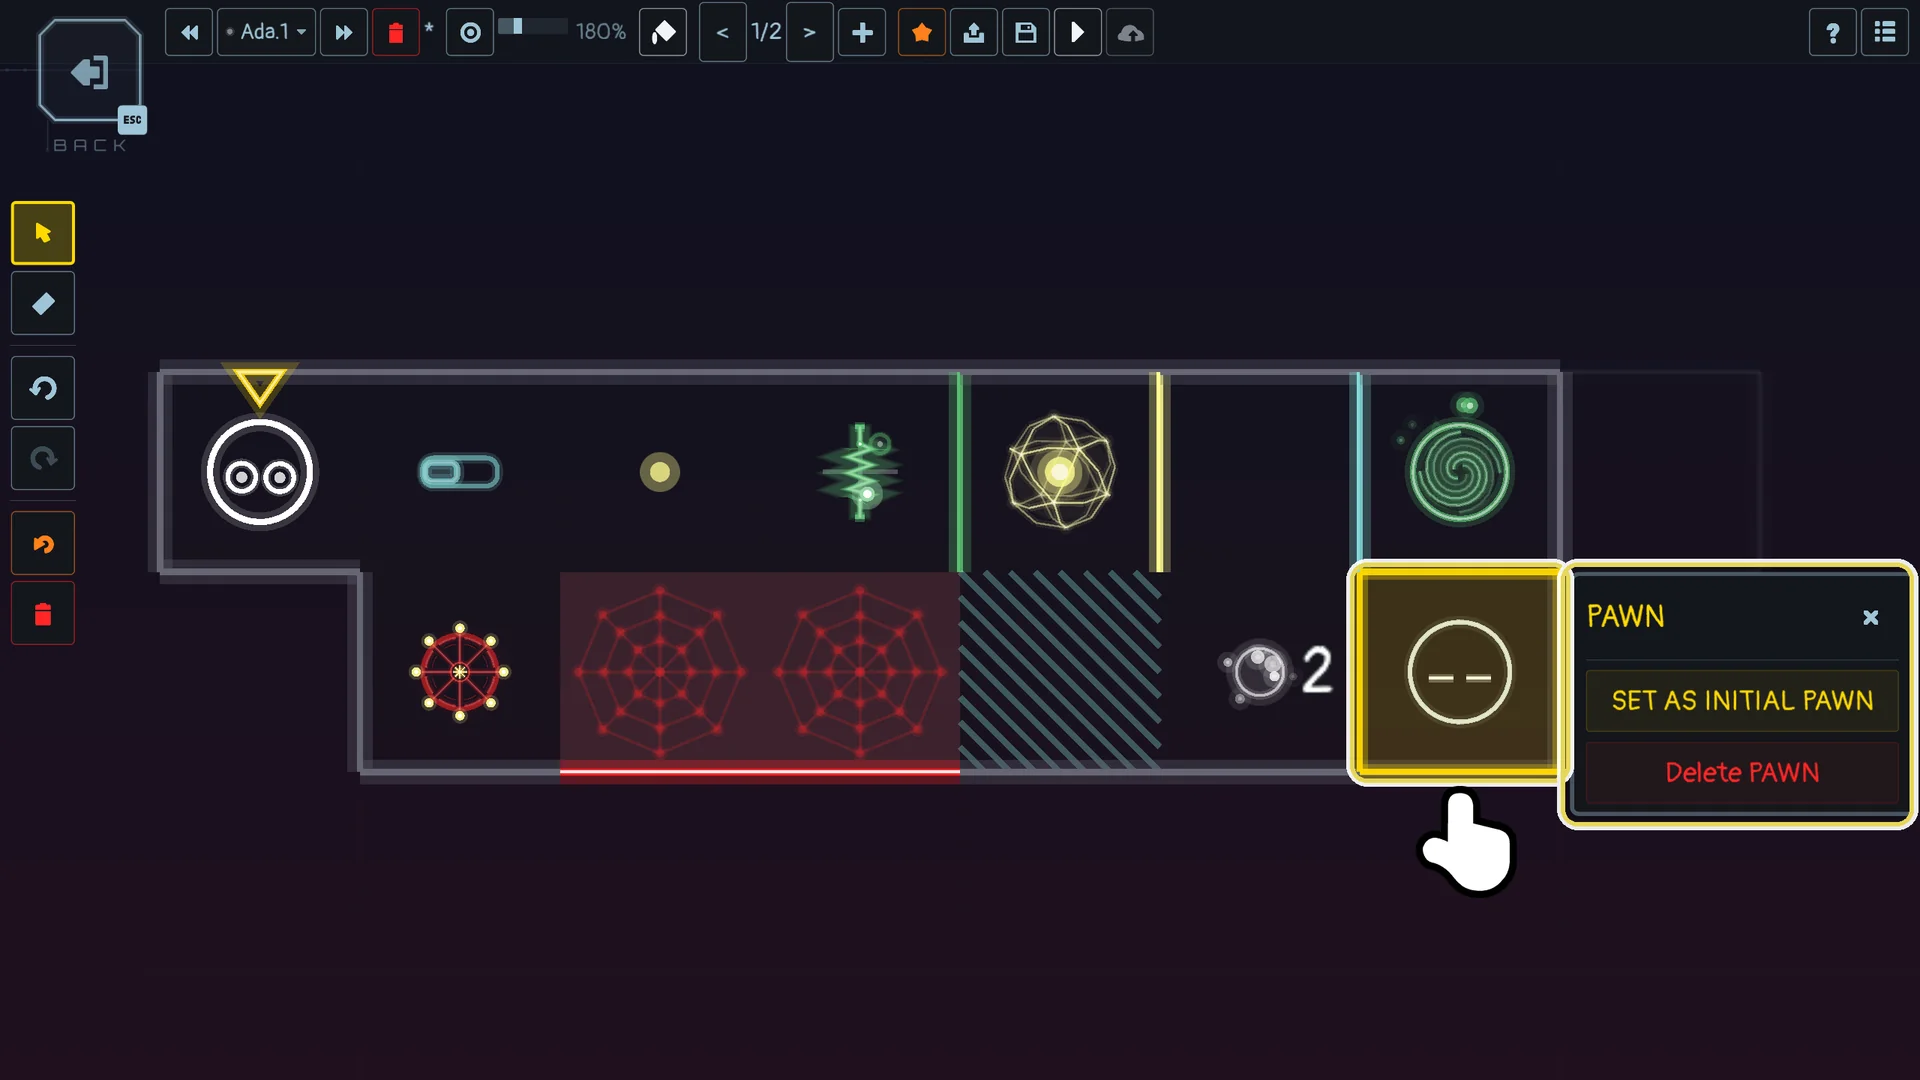
PAWN
What the player moves. Every level needs at least one pawn on step 1.
A level can hold several pawns. The player switches from one to the next with SHIFT (L2 on a gamepad), and with three pawns or more, holds CTRL (L2) and presses a direction to pick one. Several pawns make a level about cooperation: one pawn stands on a TOGGLER while another goes through the door it holds open.
The level starts on one pawn. Click a pawn to open its pop-up: the starting pawn reads INITIAL PAWN; on any other pawn of step 1, SET AS INITIAL PAWN makes it the starting one. A pawn placed on a later step joins the game when that step appears.
EXIT
Where a pawn must go to finish the level. The level ends as soon as any pawn reaches an exit. A level can hold several exits.
COLLECTIBLE
An optional pick-up: a pawn collects it by walking into its room, and consecutive pick-ups chime higher and higher. Collectibles decide the score: a run that reaches the exit without every collectible ends on LEVEL INCOMPLETE, with no time, so it earns no trophy and no place on the leaderboard of a published level.
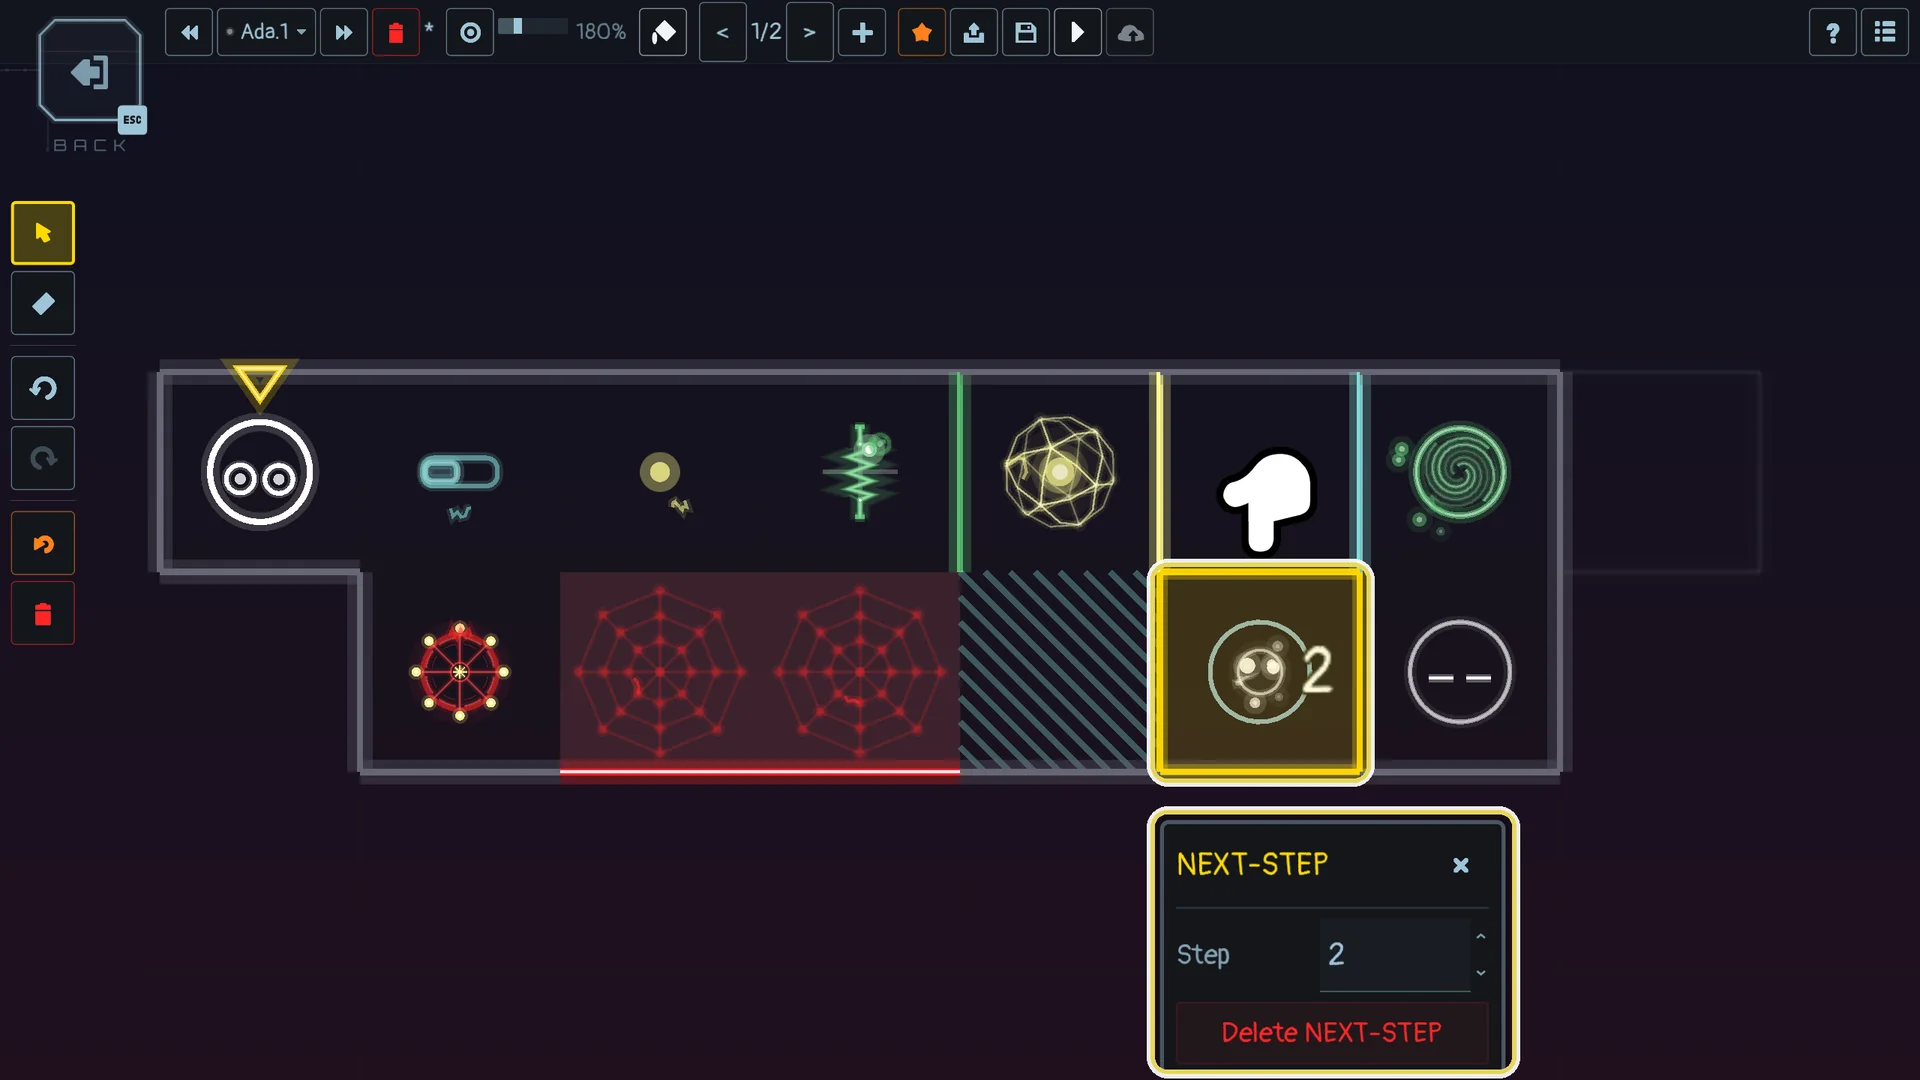
NEXT STEP
A portal to another step of the level (section 8 explains steps). When a pawn walks into its room, the layout of the step it names appears around the current one, and the pawn carries on. Its pop-up has one field, Step: the step it opens. A new portal opens the step after the highest one the level already opens (section 8). A portal works once.
BREAK ROOM
A room that collapses once a pawn has walked out of it. When a pawn enters, the room tilts as a warning; when the pawn leaves, the room vanishes, and the rooms around it close their sides with walls. It does not collapse while another pawn still stands in it. Use it to make a passage one-way, or to force the order of a route.
Add it from GAME KEYS onto an existing room, or switch Break Room to ON in the pop-up of the room, next to its Color.
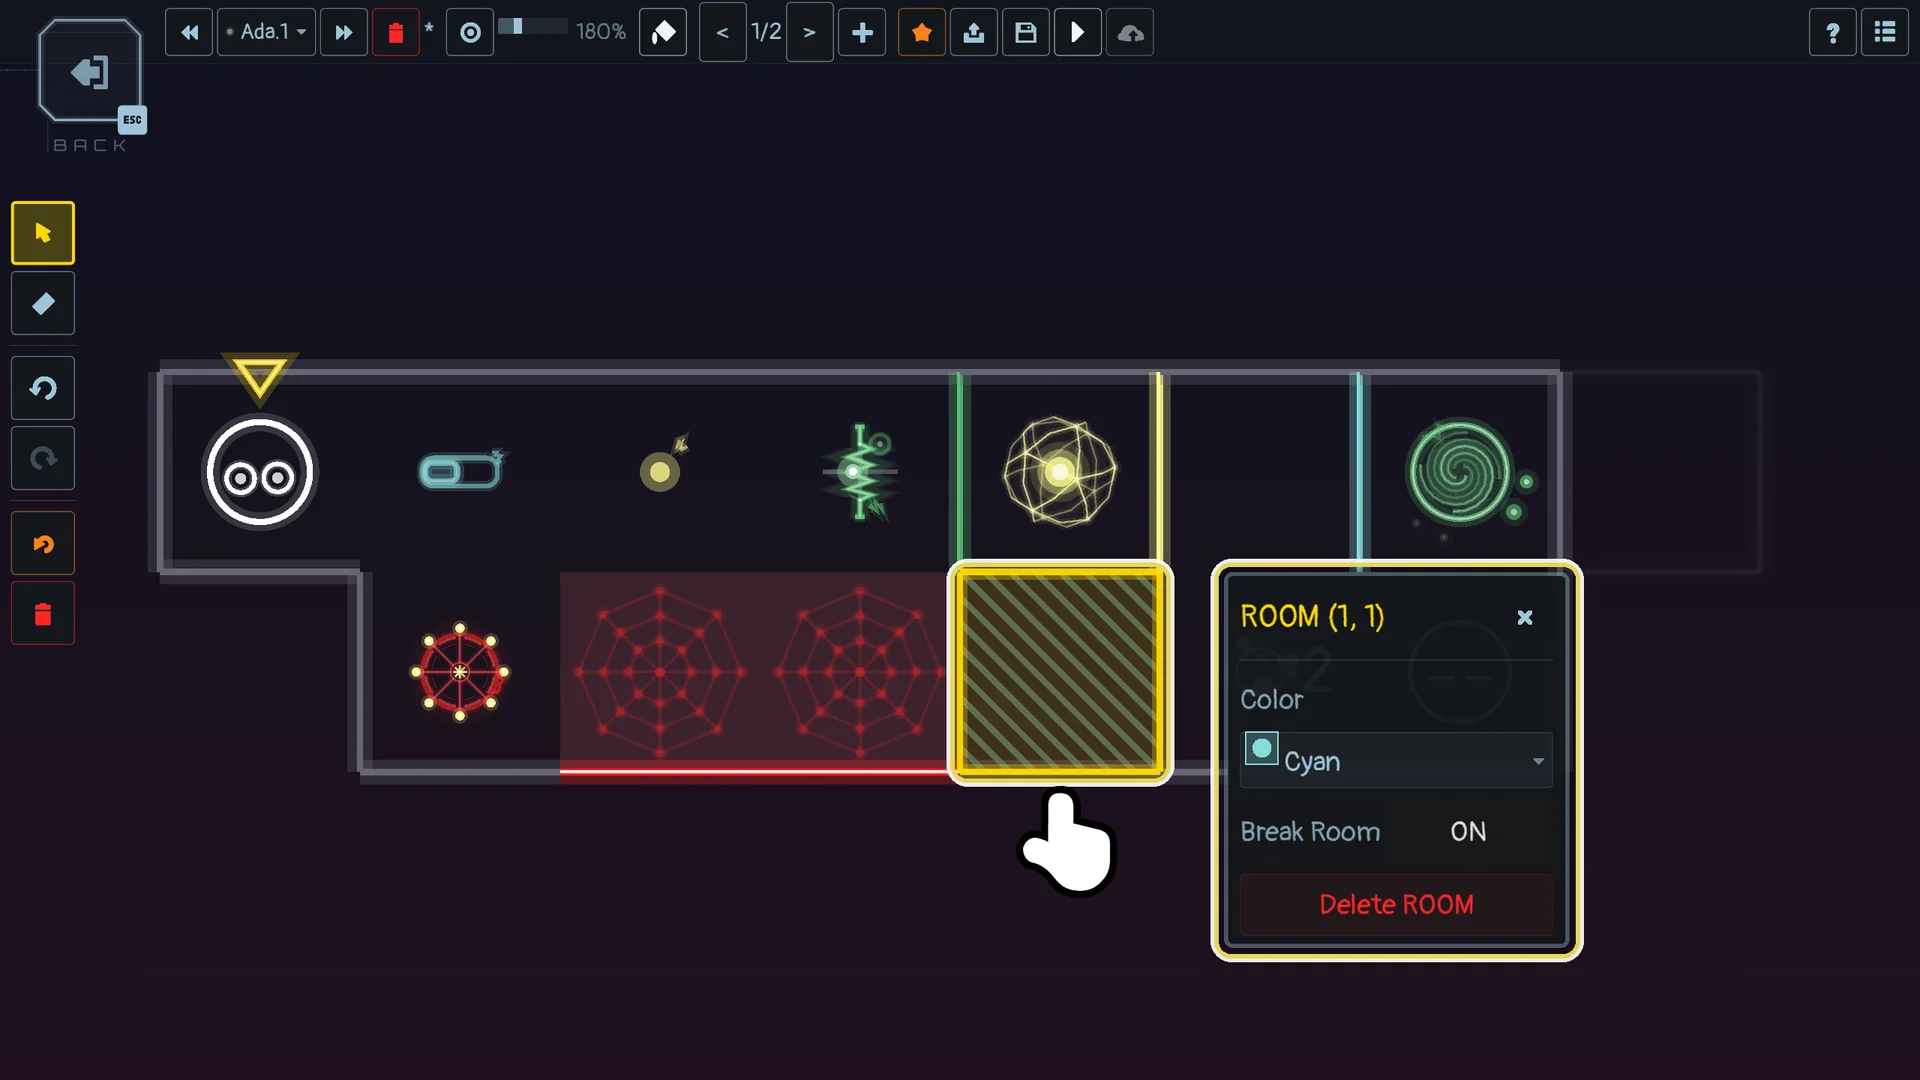
The level built for this guide
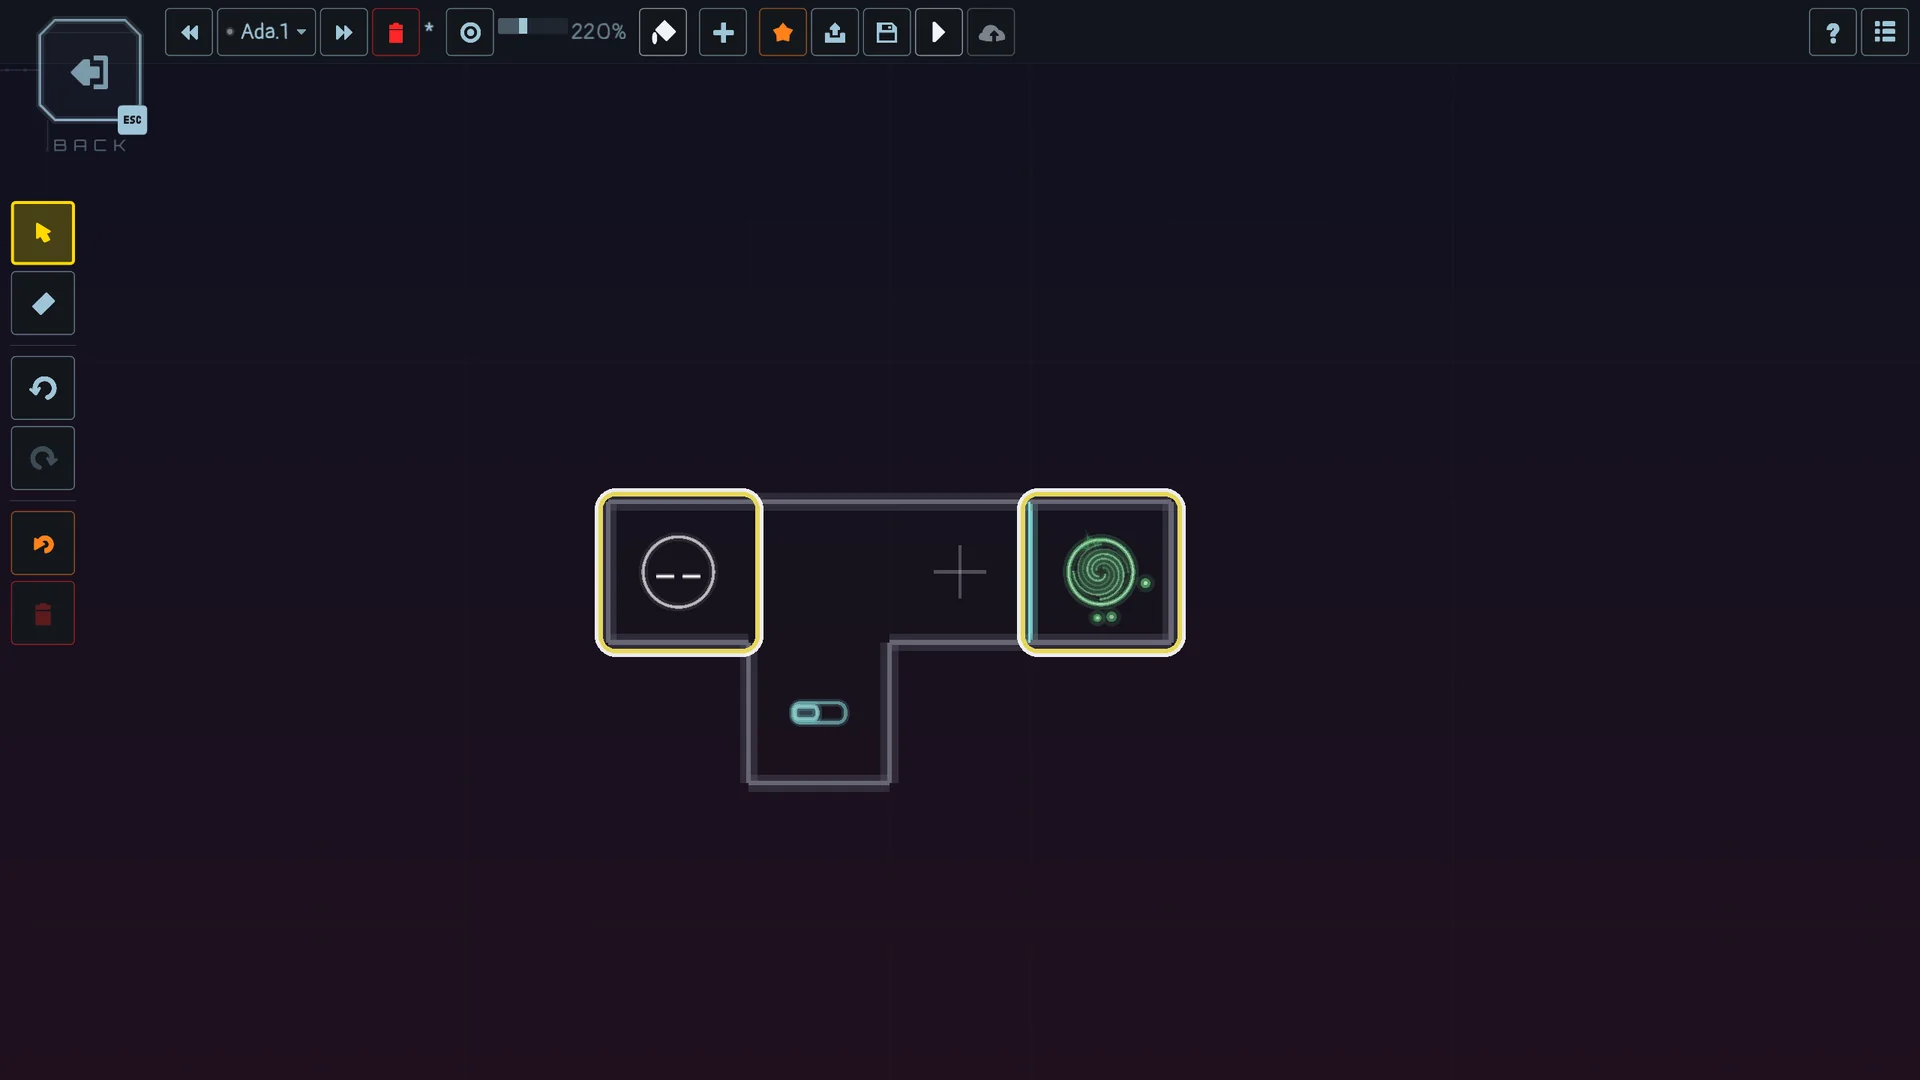
Here is the level built in sections 2 to 4: the pawn on the left, the exit on the right behind a closed cyan door, and a cyan switch in the room below. The pawn has to step on the switch to open the way.
5. Select, move and fix
Pick the Select tool (the arrow of the left column), or press Esc while placing, then:
- click a room, a wall, a door or an element to open its pop-up: type, state (Open or Closed), colour, and Delete;
- drag a room or an element to move it, and hold Alt while dragging to copy it instead (section 6 tells it all);
- drag on empty space to select every room the frame touches; hold Shift to add to the selection or take from it;
- press Delete or Backspace to remove the selection.
The Erase tool (under Select) deletes what you click: first the element in the middle of a room, then the wall or door you point at, then the room itself. It does not ask for confirmation, but Undo does.
The ? at the right end of the top band, or F1, opens the list of the commands: mouse and keyboard, or the gamepad buttons when you play with a pad.
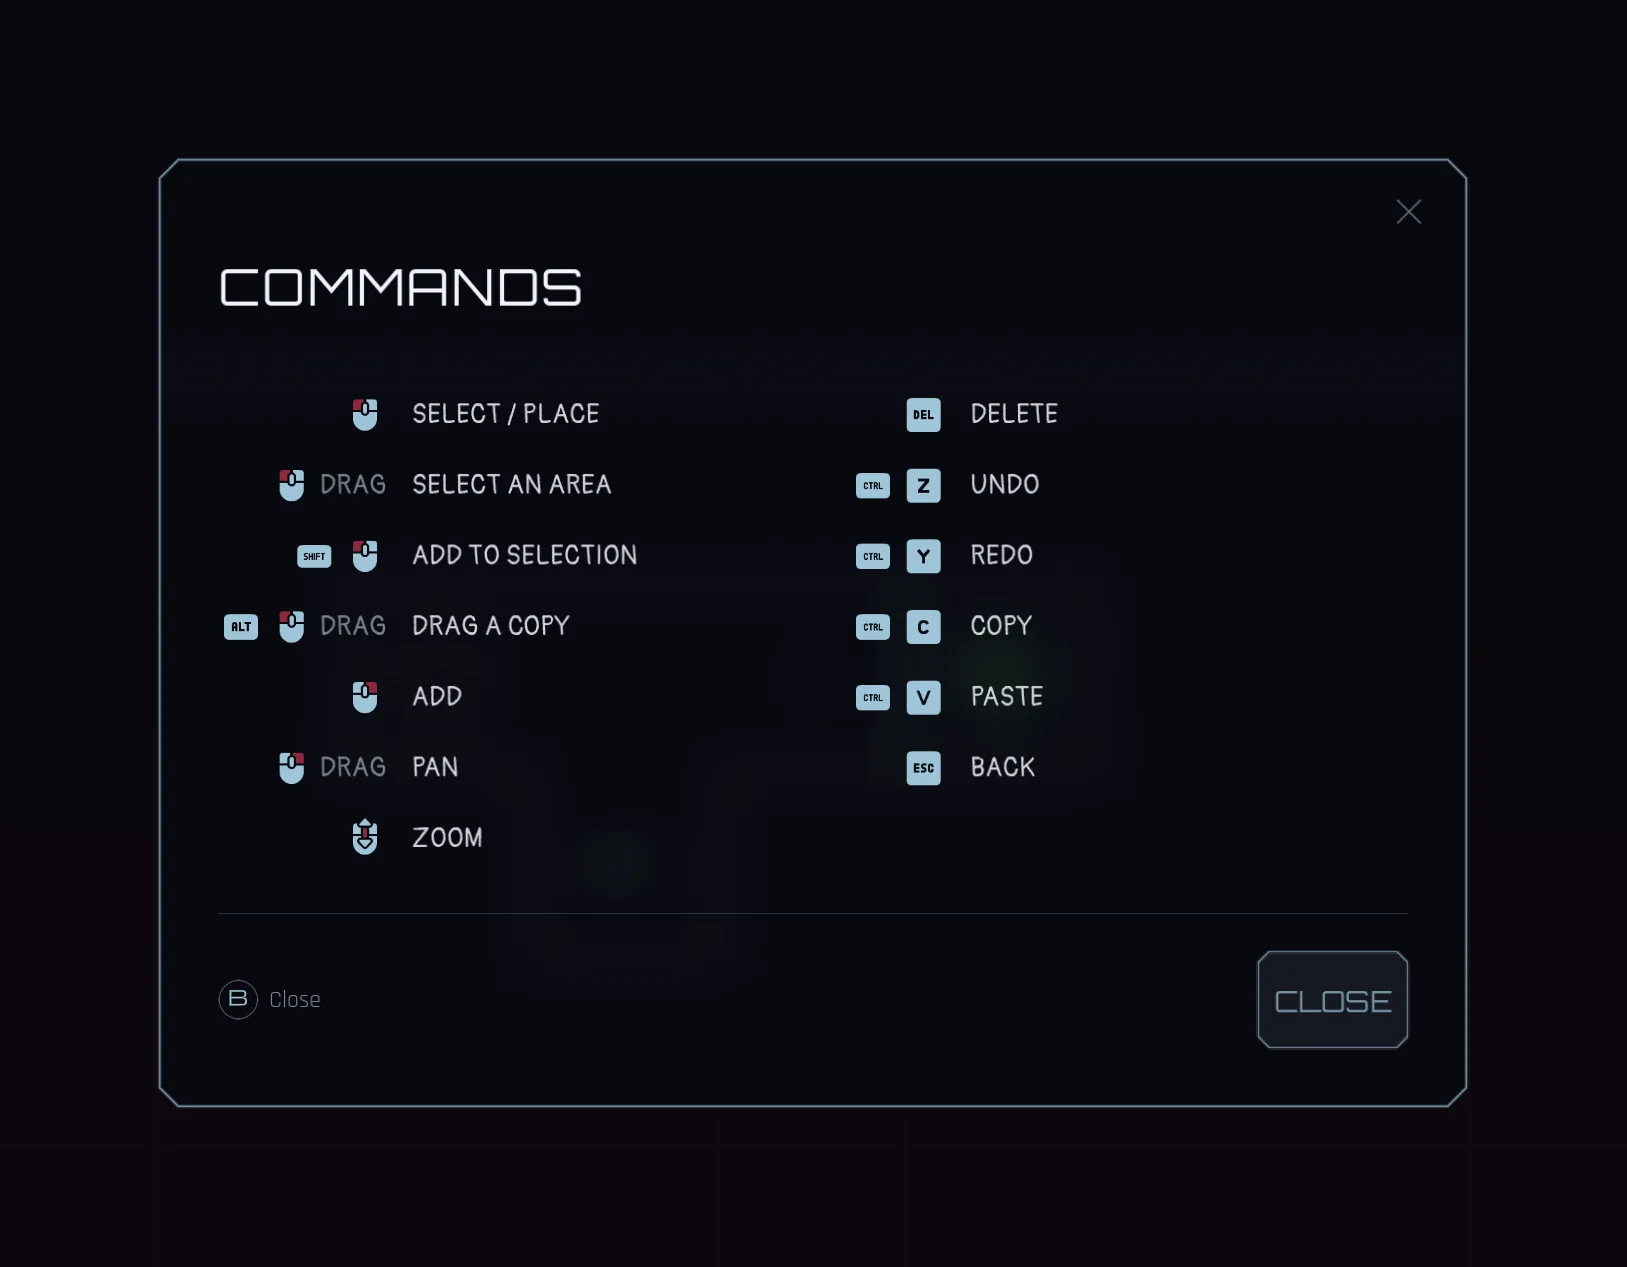
To move around the grid: the mouse wheel zooms, dragging with the middle or right button pans, and Center view (the first toolbar icon) fits the whole level on screen.
| Shortcut | Action |
|---|---|
| Ctrl/Cmd + Z | Undo |
| Ctrl/Cmd + Y or Ctrl/Cmd + Shift + Z | Redo |
| Ctrl/Cmd + C, then Ctrl/Cmd + V | Copy the selection, paste it under the mouse |
| Delete / Backspace | Delete the selection |
| Esc | Close the menu or pop-up, cancel a drag, stop placing, clear the selection, then leave the editor |
| Right click | Open the add menu where you clicked |
With a gamepad
Every tool of the editor answers the gamepad. The screen has two areas, and START switches between them: the grid, where a pointer stands in for the mouse, and the menus (the top band, the left column and the Properties panel). As soon as you press a gamepad button, a line at the bottom of the screen names the buttons of the area you are in, the most useful first. When the line cannot hold them all (in some languages, or on the smaller screen of a Steam Deck), it ends with R2: hold it to see every button. On a Steam Deck, the trackpad stays a mouse: the gamepad pointer hides as soon as it moves, and comes back at the next button press.
On the grid:
| Button | Action |
|---|---|
| D-pad | Move the pointer to the next cell (hold to keep going) |
| L2 + D-pad | Point at a side of the cell, to place or pick a wall or a door |
| Left stick | Move the pointer freely |
| A | Action: click, so place the armed element; hold A to paint rooms, draw a selection frame from empty space, or drag what is under the pointer |
| X | Open the add menu under the pointer (the right click) |
| Y | Delete the selection |
| L1 / R1 | Undo / Redo |
| L2 + X, then L2 + Y | Copy the selection, paste it under the pointer |
| Right stick | Pan the view; with L2 held, up and down zoom |
| R3 (press the right stick) | Center view |
| B | Like Esc: close the menu or pop-up, cancel a drag, stop placing, clear the selection, then leave the editor |
| START | Go to the menus |
| SELECT (View) | TEST the level |
| R2 (hold) | Show every button of the area, not only the line at the bottom |
In the menus, the D-pad walks the buttons, A presses the one that is lit, B works like Esc, START goes back to the grid and SELECT tests the level. From the left column, Right crosses to the Properties panel and Left comes back. The pop-ups and lists (the add menu, colours, types, the pop-up of a selected room, wall or element) take the gamepad while they are open: the D-pad walks them, A picks, B closes, and Y deletes the element of a selection pop-up.
Two kinds of fields take the D-pad differently:
- Numbers (the chrono targets, the Step of a portal or a door): Left and Right lower and raise the value, hold them to go faster. On the ZOOM slider of the toolbar, whose row Left and Right already walk, press A first, then Left and Right zoom; A or B lets go.
- The level title: press A to type. On a Steam Deck the Steam keyboard opens over the game; elsewhere, type on your keyboard. Press A or B when you are done.
Adding rooms to a selection one by one with Shift + click stays a mouse gesture: with a gamepad, draw a frame with A held from empty space instead.
6. Move and copy with drag and drop
Everything is dragged with the Select tool and the left mouse button. Dragging moves; holding Alt (Option on a Mac) turns the same drag into a copy.
One room or one element
- A room: click it to select it, then press on it again and drag it to an empty cell of the grid. The room takes its doors and its element along, opens onto its new neighbours and closes its sides that face the void.
- An element (pawn, exit, trigger, collectible, portal): click it, then press on it again and drag it into another room. That room must not already hold a centre element.
A drop on a cell that does not accept it flashes red, and nothing moves. Walls and doors are not dragged: to copy one, Shift + click it, press Ctrl/Cmd + C, point at another room and press Ctrl/Cmd + V. It lands on the same side of that room, in place of what was there.
A group of rooms
- Select the group. Press on empty space and drag a frame: every room it touches joins the selection. Hold Shift to build a group in several strokes: a Shift frame adds the rooms it touches, or takes them out when they are all selected already, and Shift + click adds or removes a single room.
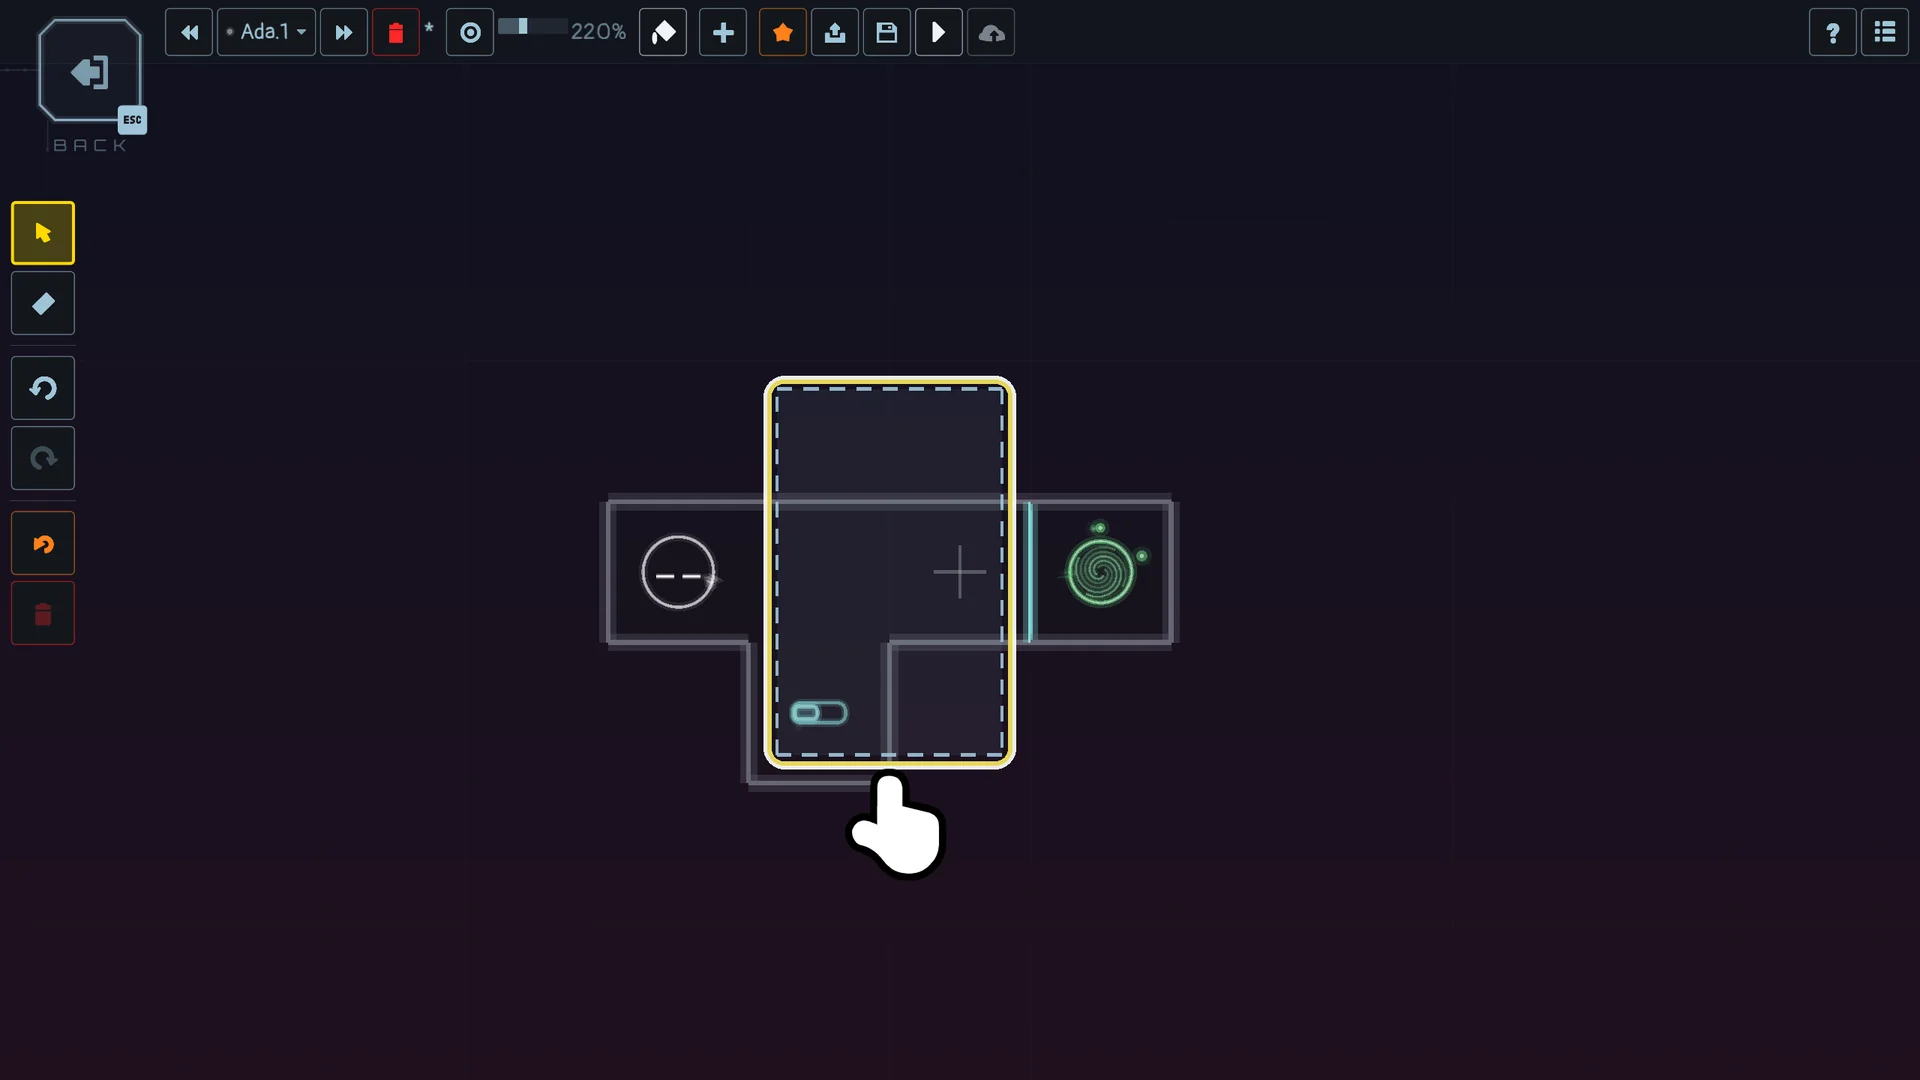
- Drag it. Press on any room of the group and move the mouse: a ghost of the whole group follows it, and the cells where it will land light up. Release to drop it.
- Hold `Alt` to copy. The originals stay in place under the ghost, and a + on the ghost says the drop will copy. You can press or release Alt during the drag: the key counts at the moment you let go of the mouse.
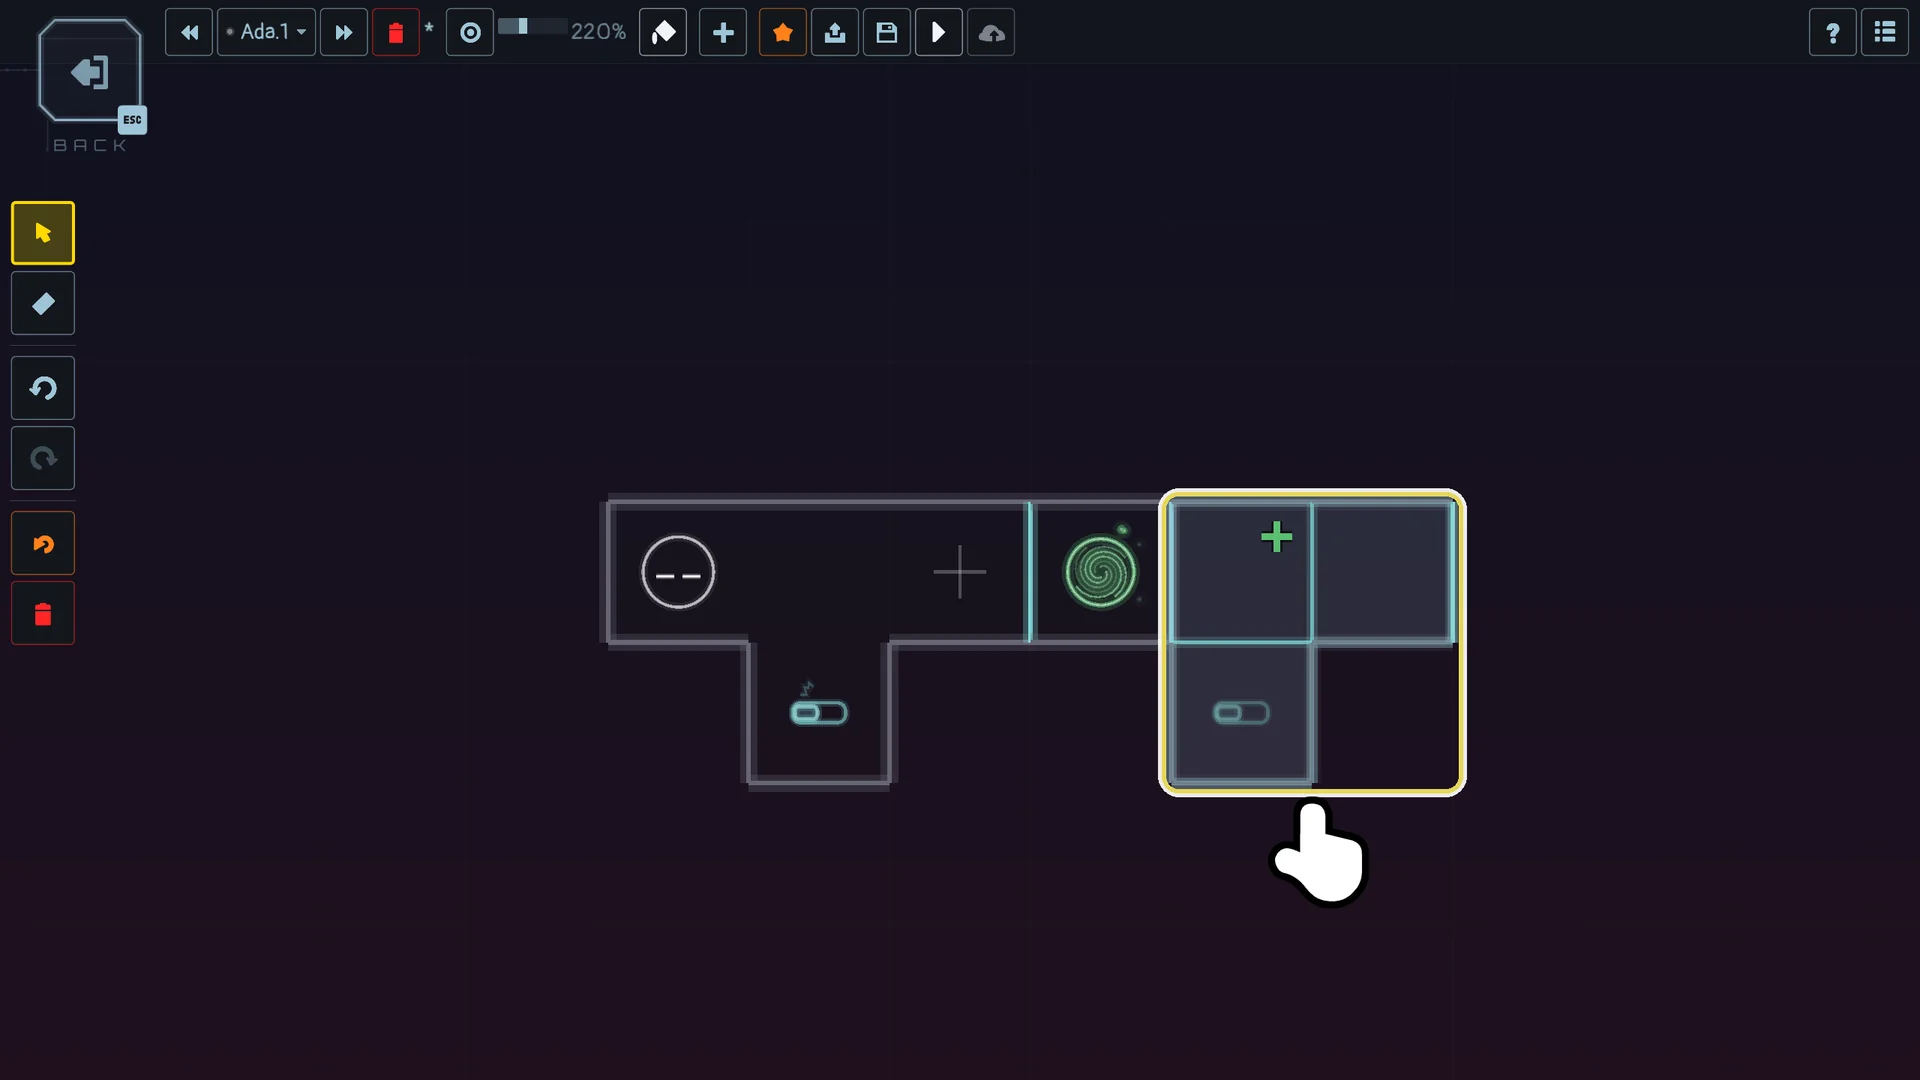
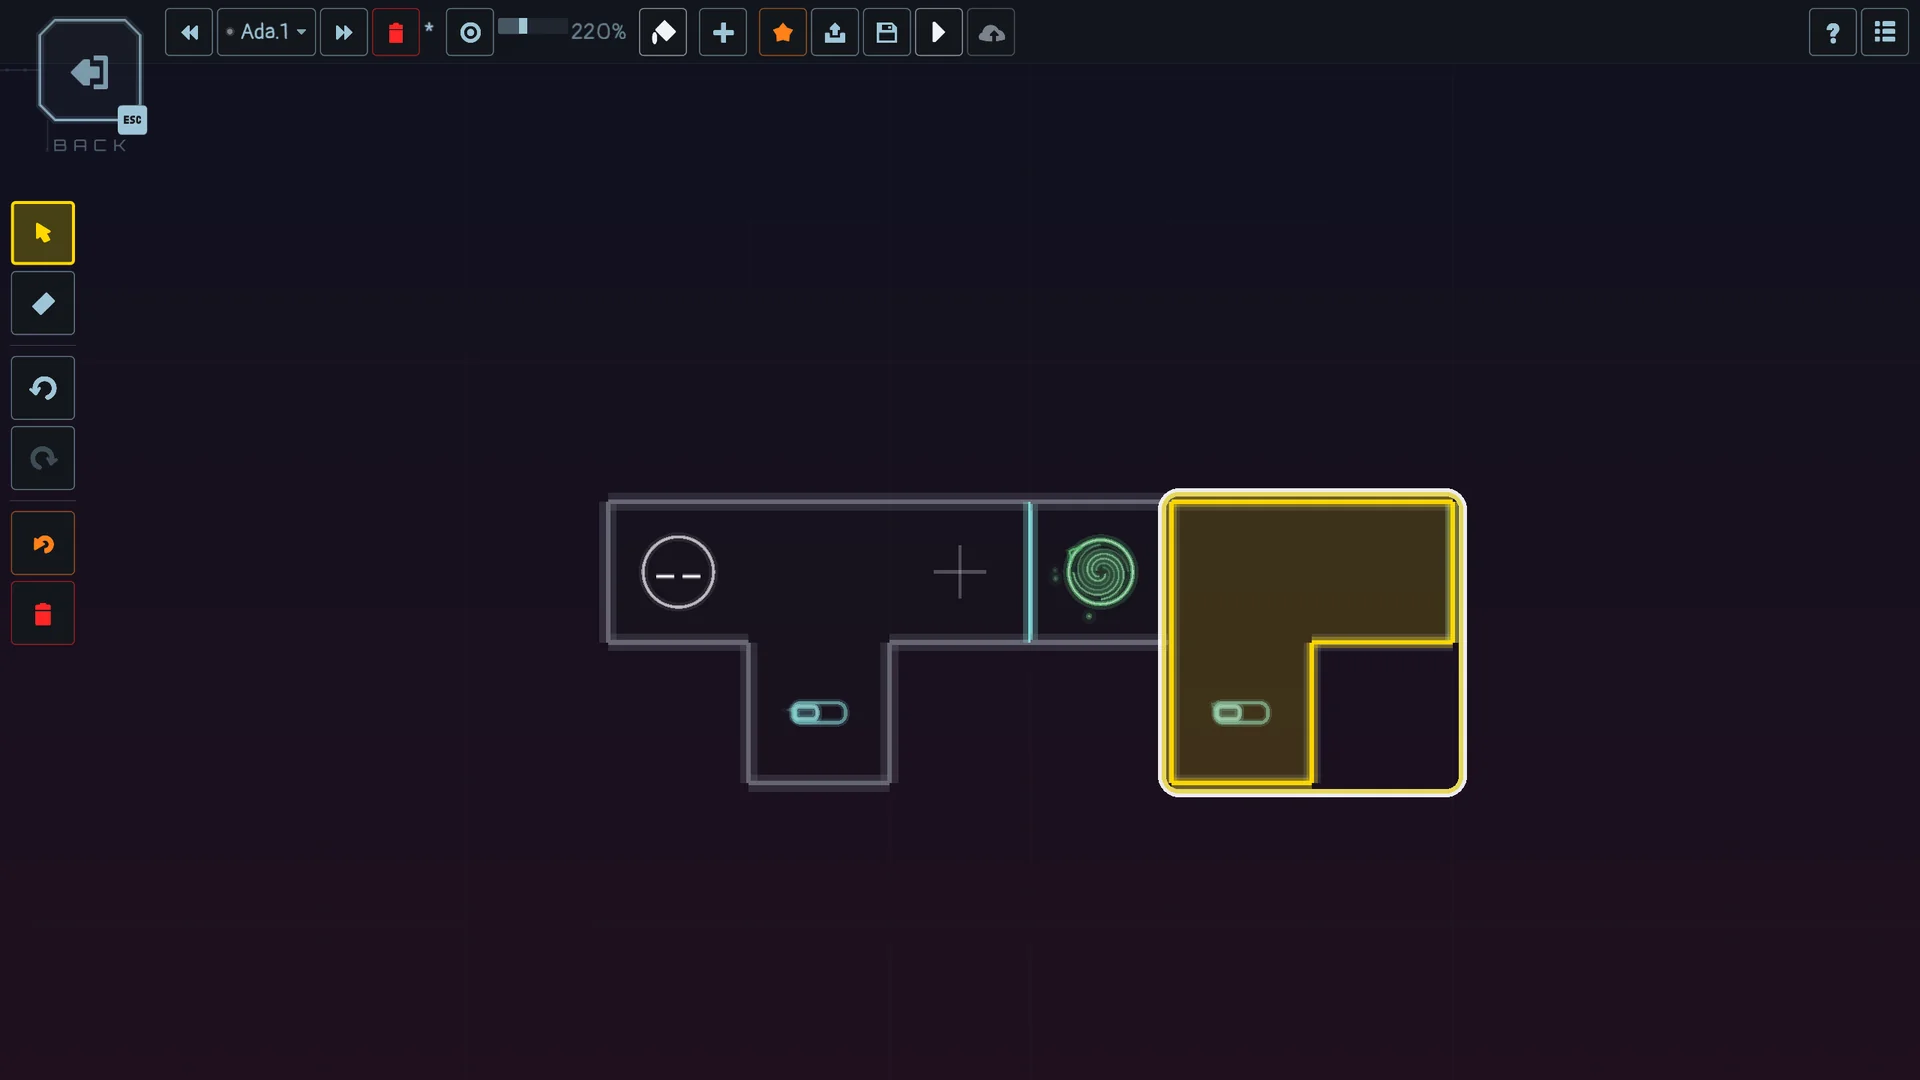
A group lands exactly as it was: same rooms, same walls, doors, triggers and elements, only somewhere else. Its walls do not change to meet its new neighbours, so close the gaps yourself, or open a passage by clicking a wall and turning it into a door. What the group lands on is replaced, and the cells a moved group leaves behind become holes that the rooms around them wall off.
The dropped group stays selected: drag it again, copy it again, or press Delete to remove it. Esc during a drag cancels it and puts everything back, and Ctrl/Cmd + Z undoes a drop.
Tip: to copy rooms into another step of the level, select them, press Ctrl/Cmd + C, switch step, point at where they go and press Ctrl/Cmd + V.
7. Name your level and set its chrono targets
Click the last button of the top band, at its far right, to open the PROPERTIES panel (with a gamepad: START, then that button and A).
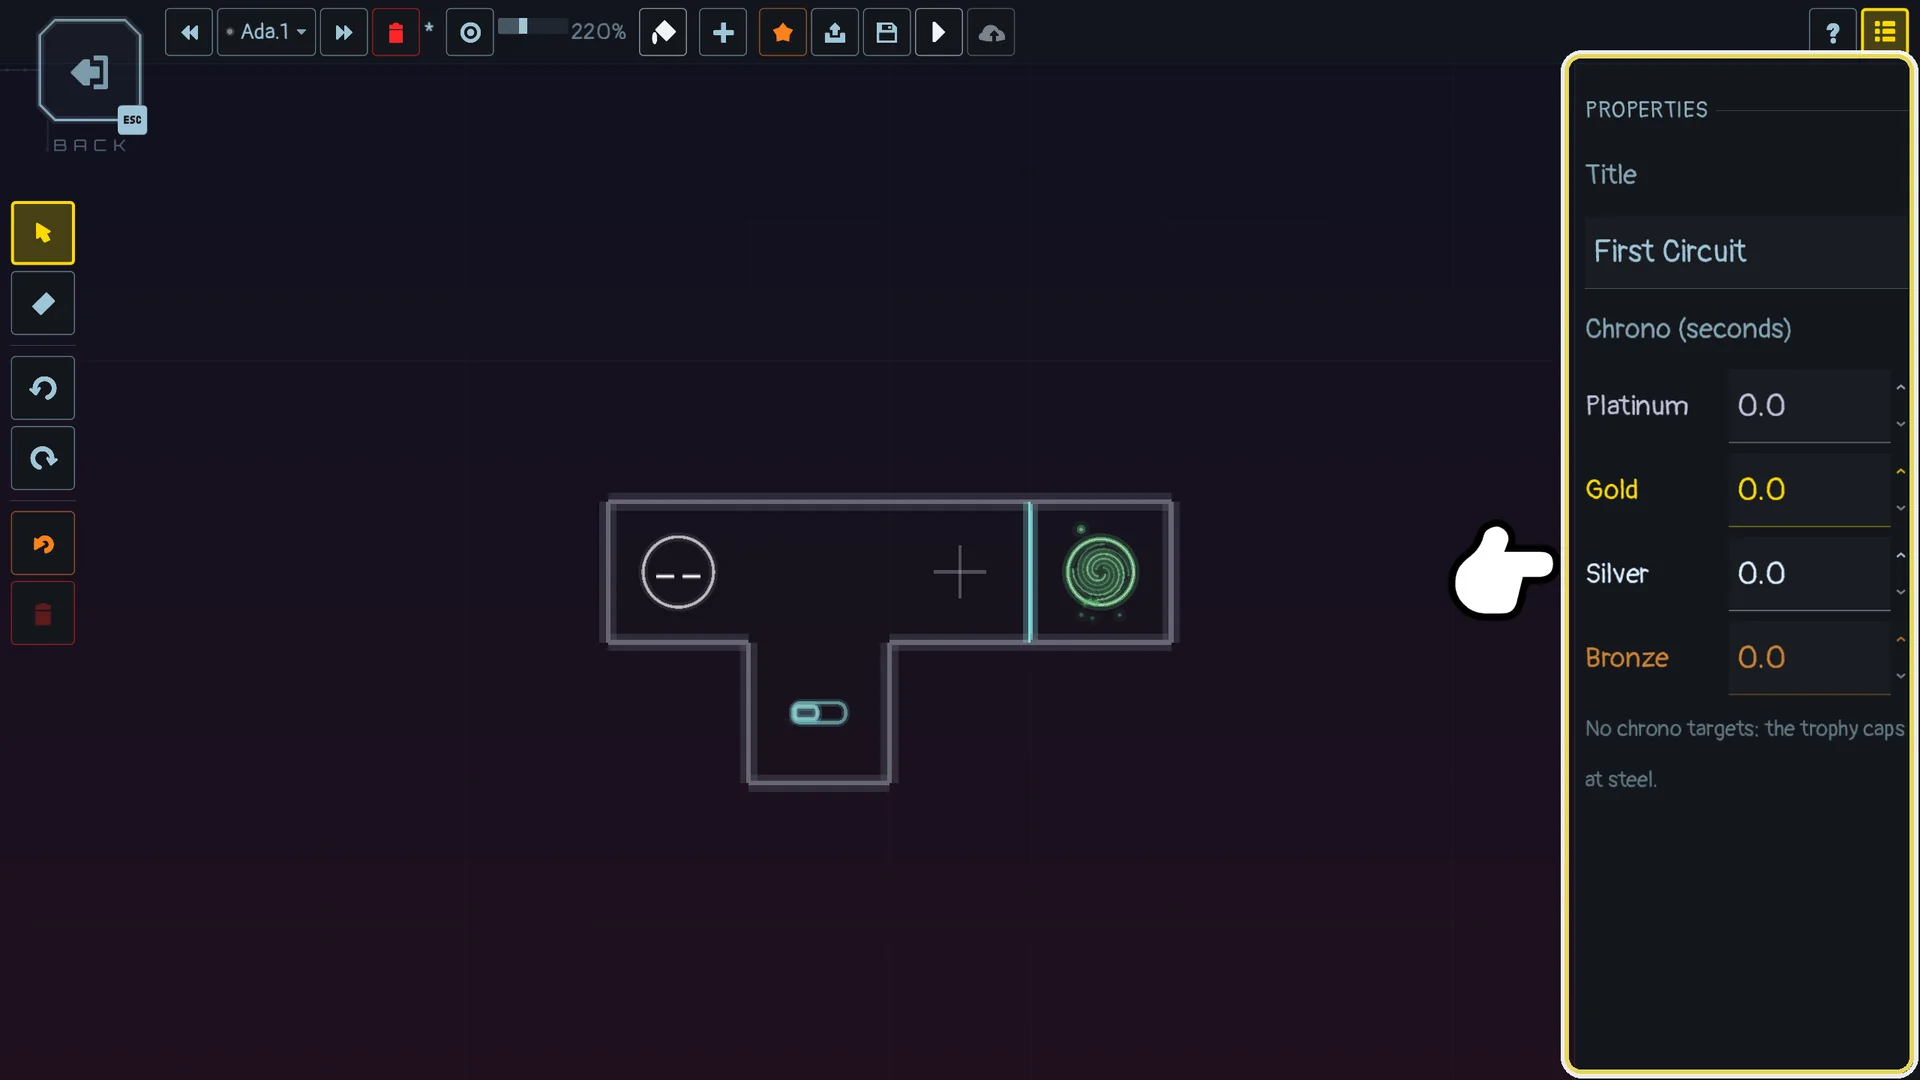
- Title: the name shown in the level list, in game, and on the Workshop.
- Chrono (seconds): the four time targets, fastest first: Platinum, Gold, Silver, Bronze. Leave them at 0 and the best trophy of your level is steel.
8. Levels in several steps
A step is a new layout of the same level, revealed when a pawn reaches a NEXT STEP portal (section 4). The player does not change level: the new rooms appear around the ones already on screen, and the pawn carries on.
Add a step
- Click the + of the top band (its tooltip reads "Add a step"): a second step opens, and the band now shows <, 2/2 and >, followed by a red -.
- Draw the new layout. The other steps stay visible, dimmed, underneath, so you can line the new rooms up with the old ones.
- Go back to step 1 with < and place a NEXT STEP portal (GAME KEYS). It opens step 2.
< and > walk the steps; > on the last step adds another one.
Turn rooms you already drew into a step
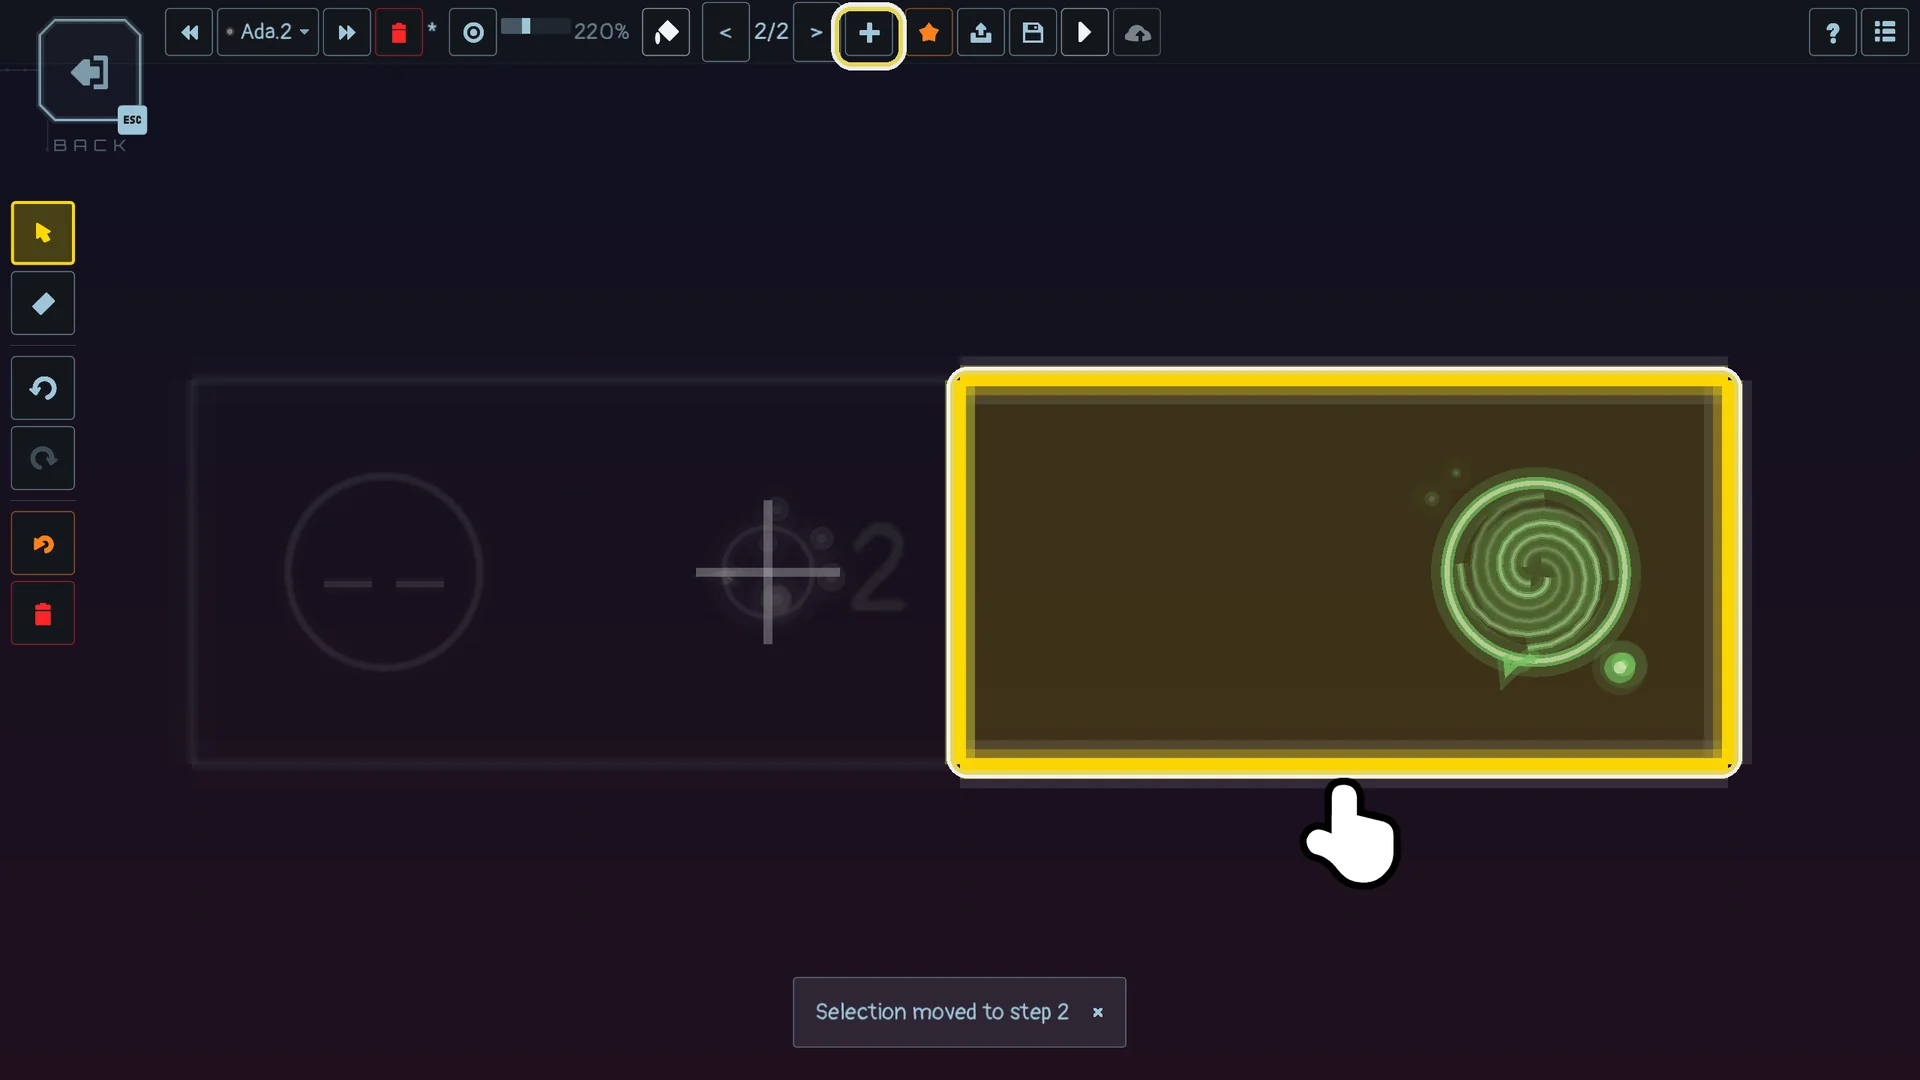
You often draw the whole level first and decide afterwards where it splits. Select the rooms that should appear later (drag a frame from empty space, see section 6), then click +: those rooms leave the current step and become a new step, exactly as they were, with their walls, doors and elements. The editor opens that step with the rooms still selected, and a message says "Selection moved to step 2". A side that was open towards the rooms left behind stays open: it is the passage the new step opens. Ctrl/Cmd + Z puts everything back in one go.
On a level that already has several steps, + comes back in the band as soon as rooms are selected, in place of the red -, and always adds the new step after the last one. A step must keep at least one room: selecting all of its rooms and clicking + is refused, with "Keep at least one room in step 1".
Find your way between steps
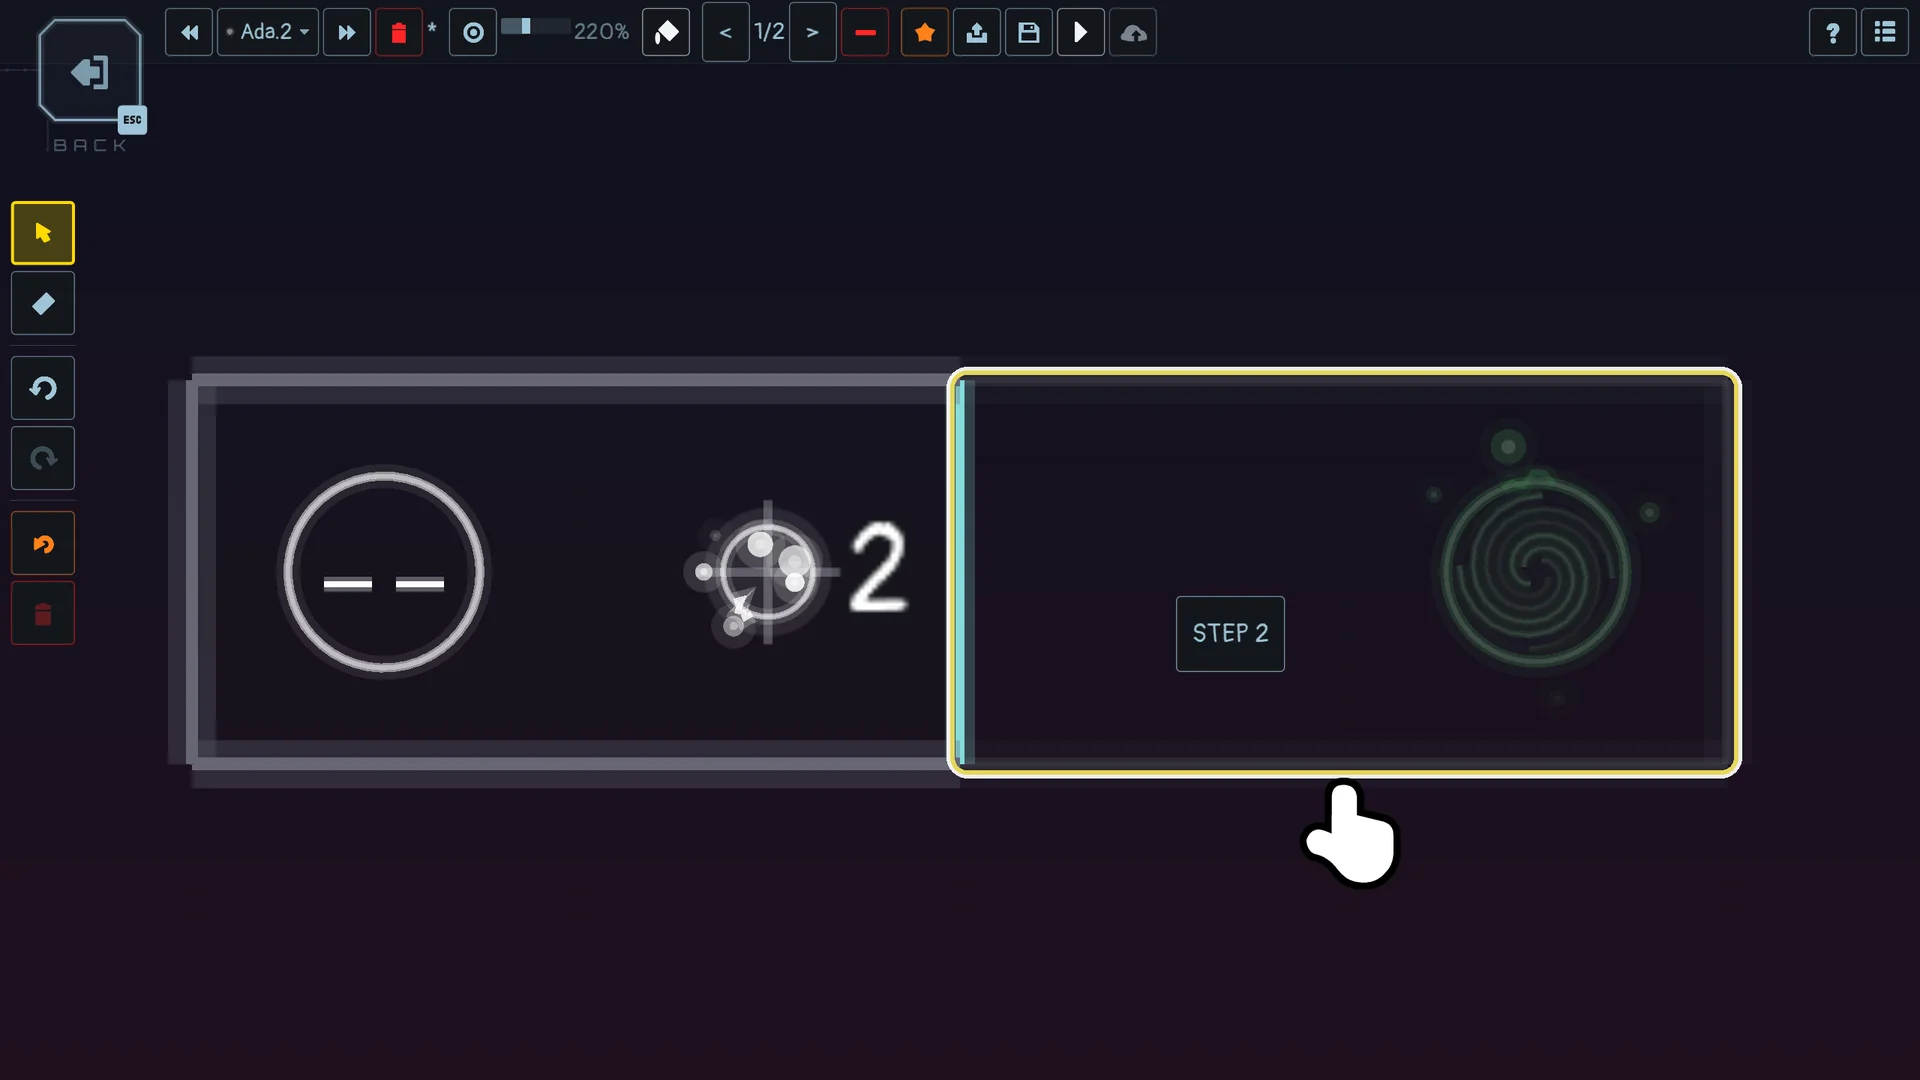
On any step, the rooms of the other steps are drawn dimmed. Point at an empty cell that belongs to another step: that step lights up and a label names it ("STEP 2"), to show which one a click there opens. Click, and the editor jumps to that step.
Portals number themselves
In the editor, a portal shows the number of the step it opens. A NEXT STEP portal you place opens the step after the highest one the level already opens: the first portal opens step 2, the next one step 3, and so on, without touching its pop-up. Change its Step field to send it elsewhere. A copied, pasted or Alt-dragged portal keeps its number.
Rules
- The starting pawn must be on step 1.
- To remove a step, go to it and click the red -. The editor asks first, then deletes the step and everything in it. The steps after it move down one number, and a portal that opened one of them still opens the same layout under its new number. The - only shows when the level has at least two steps: a level always keeps its step 1.
- A door can wait for a step: give it that step number (section 3), and it opens by itself when the step appears.
9. Save, test, and beat your level

The actions on the level sit in the middle of the top band, each icon framed in the colour of what it does: NEW (the star, orange because it drops unsaved changes), CLONE, SAVE (the disk), TEST (the play arrow) and PUBLISH (the cloud).
- SAVE writes the level, every step included. The * next to its name disappears. A level still missing its pawn or its exit is saved all the same, and a message says what it lacks before it can be played.
- TEST plays the level exactly as it is on screen, even unsaved. Press Esc to come back: the editor is as you left it. A level with no pawn on step 1, or no exit at all, cannot be tested: a red message at the bottom of the screen says which one is missing.
- NEW starts a new empty level. If the level open has unsaved changes, it asks first: CREATE WITHOUT SAVING drops them, CANCEL keeps you on your level.
- CLONE copies the current level, unsaved changes included, into a new level and opens the copy. The copy is a new level in every way: it is not linked to the Workshop item of the original, and publishing it creates a Workshop item of its own.
- Revert (the orange arrow of the left column) drops every unsaved change and reloads the saved level, after asking.
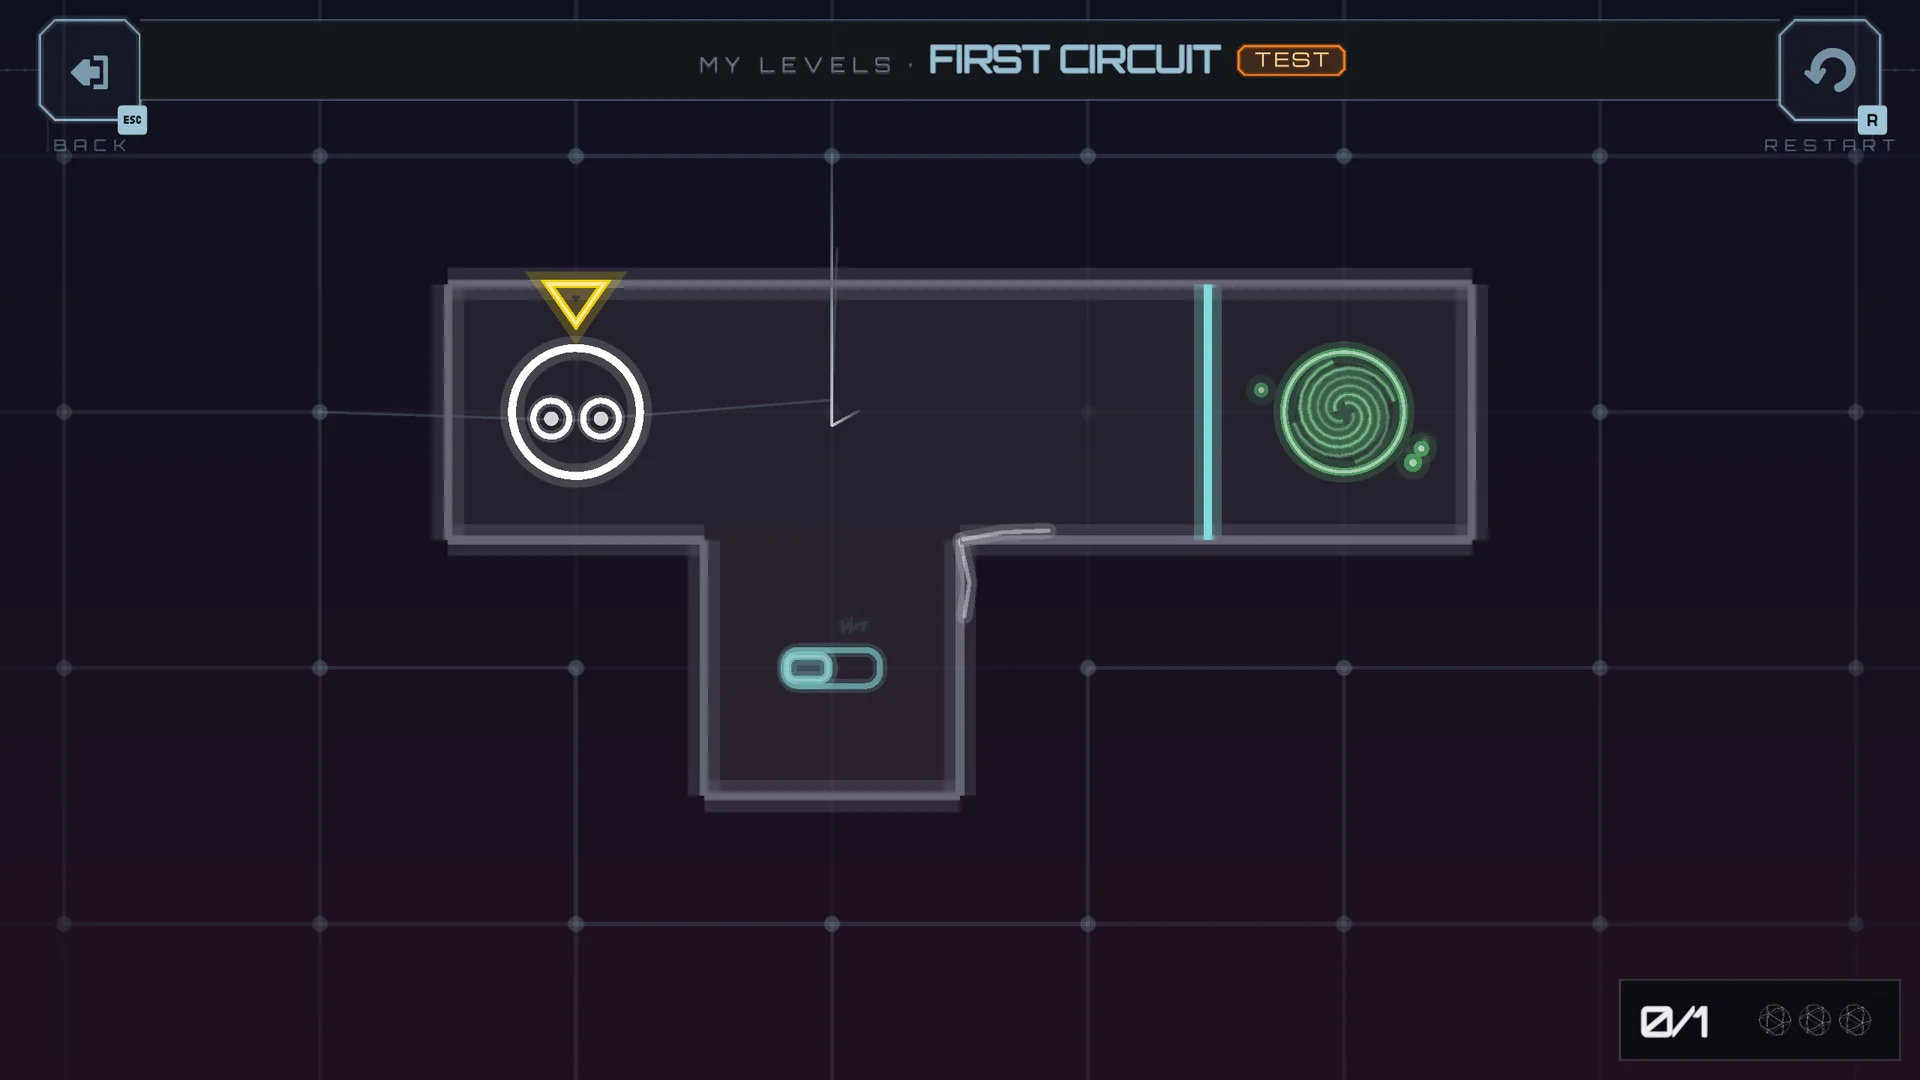
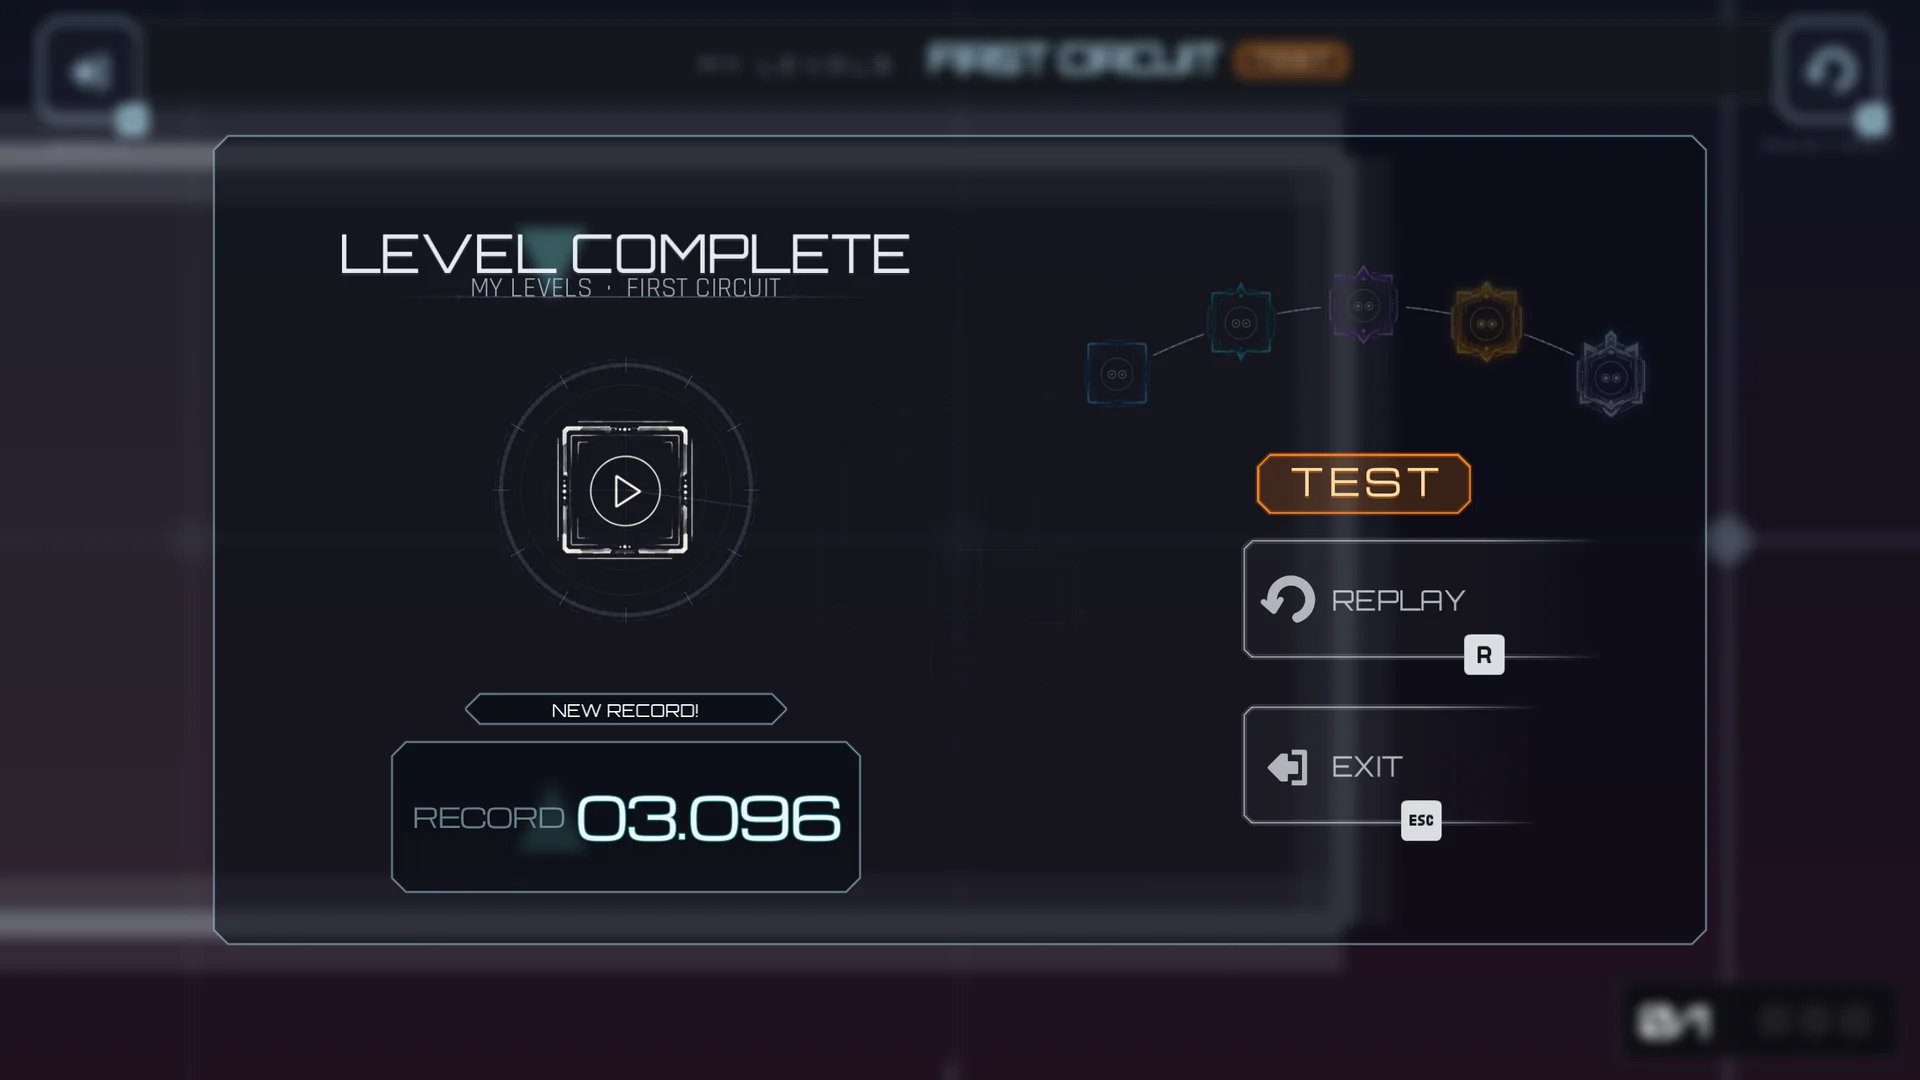
Beat this exact version of your level before publishing it: the Workshop only accepts a level its author has beaten. Reaching the exit during a TEST counts, and it counts for the level as it was during that TEST. Any change made afterwards, even a new title, asks for a new TEST victory before PUBLISH or UPDATE accepts the level.
10. Publish to the Steam Workshop
Launch the game through Steam, open your level in the editor, and click PUBLISH (the cloud of the top band).
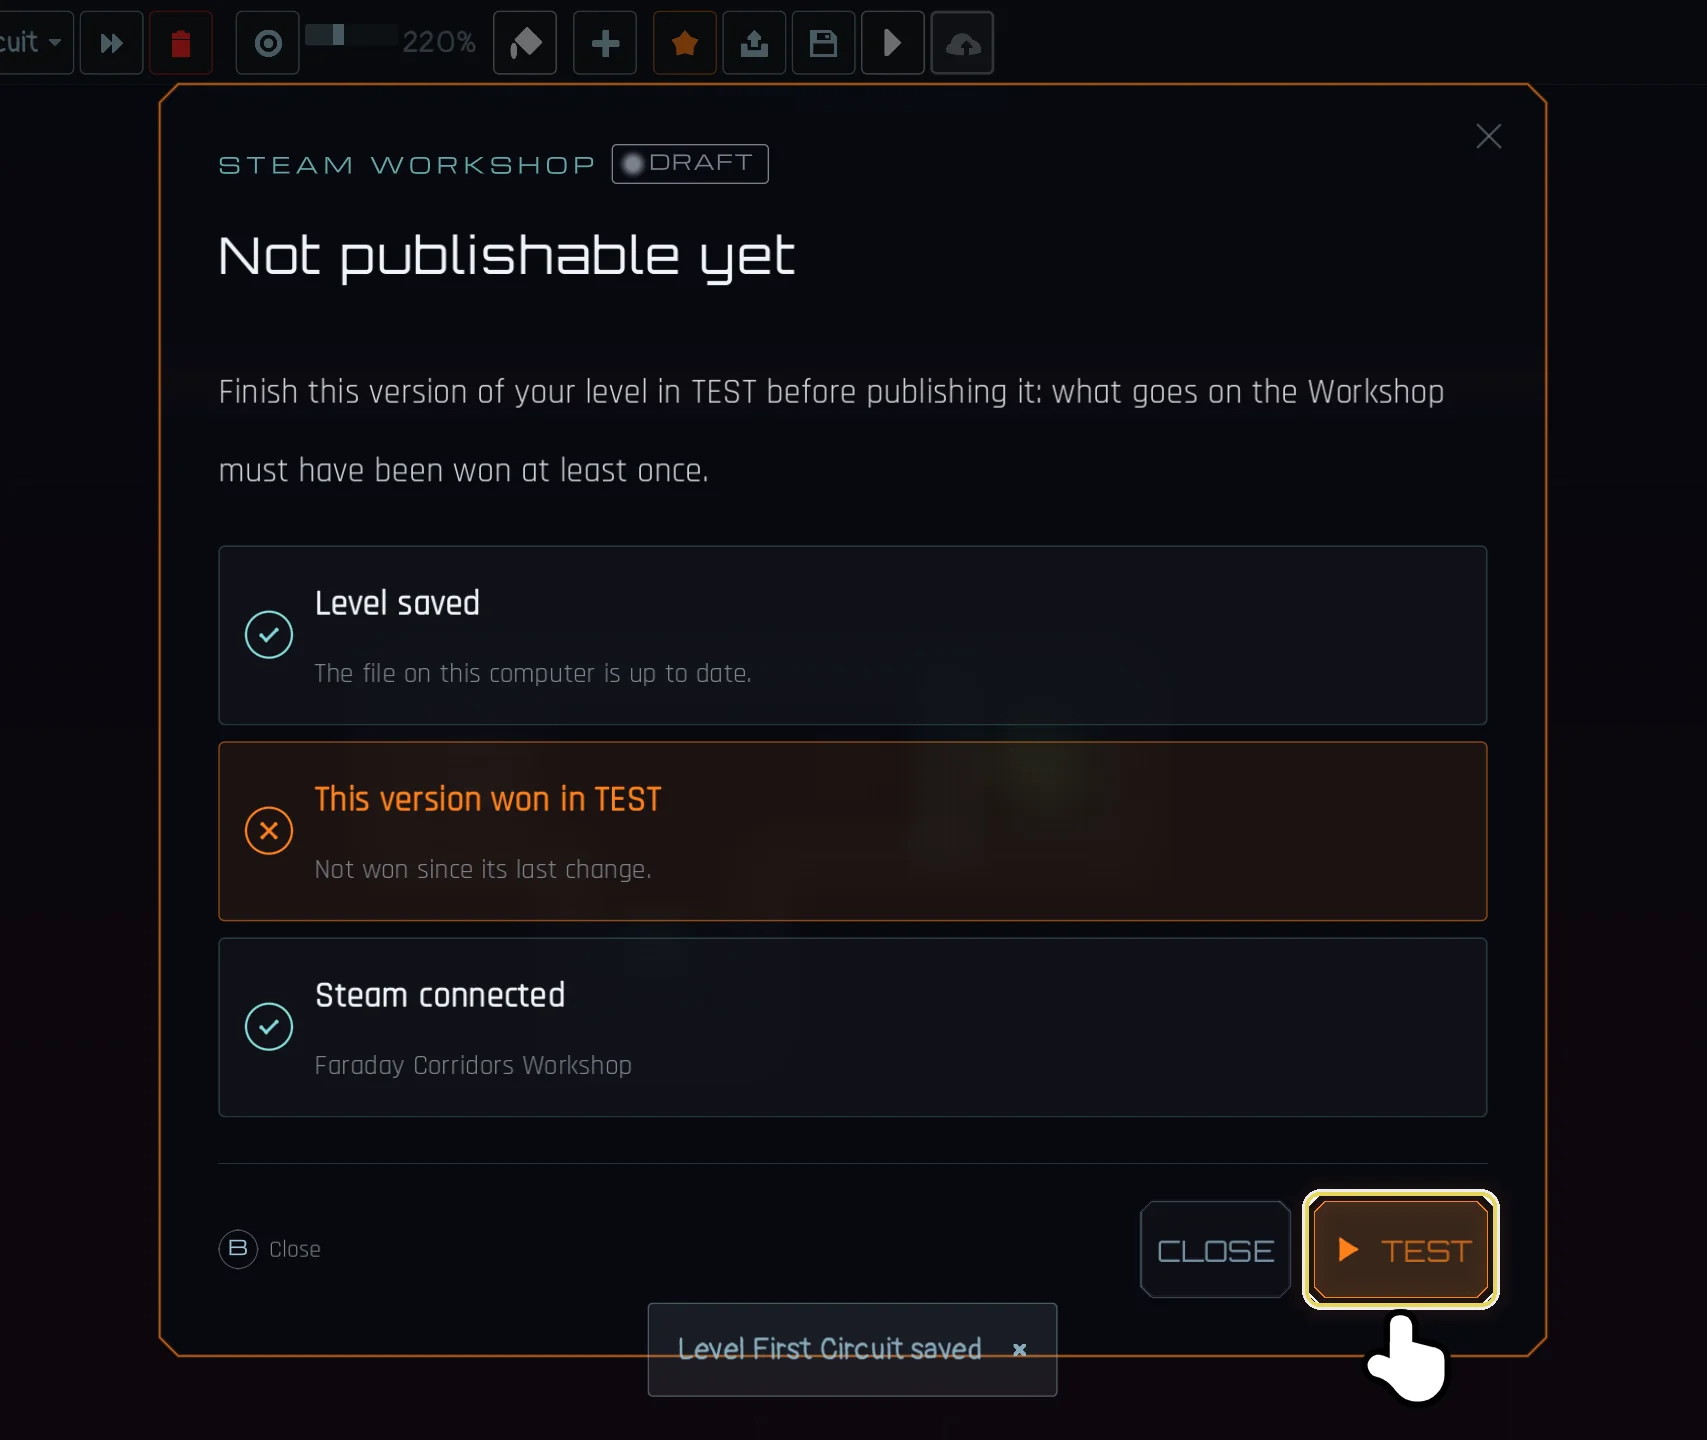
Not publishable yet
If something is missing, the window "Not publishable yet" lists what PUBLISH checks, each line with a tick or a cross:
- Level saved: the file on this computer is up to date;
- Steam connected: the game runs through Steam;
- This version won in TEST: you reached the exit of the level as it is now, in a TEST.
Click TEST to play the level right away, or CLOSE to go back to the editor.
The first publication
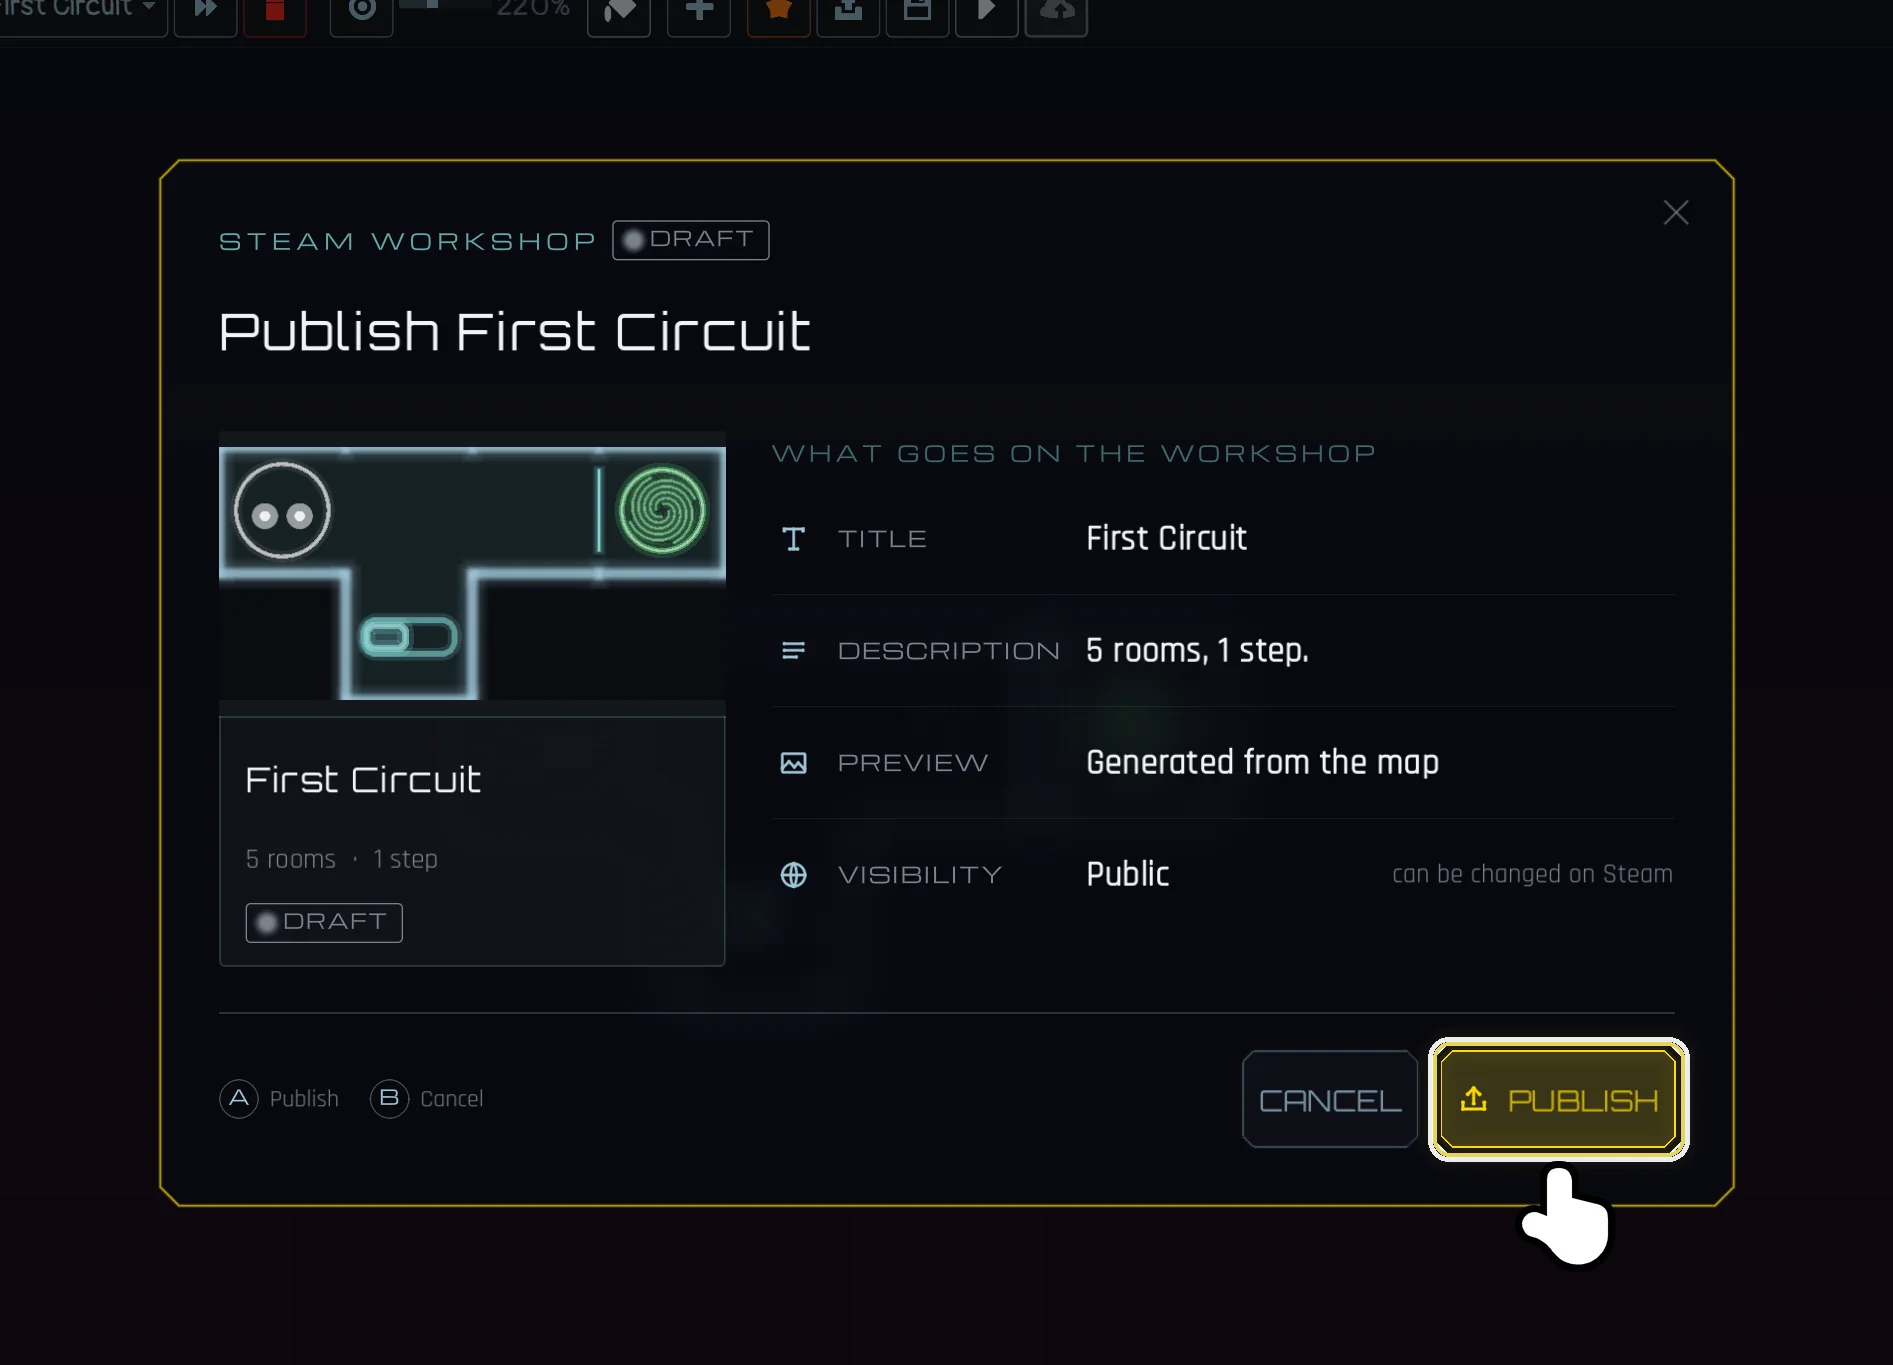
- A window "Publish" followed by the name of your level shows what goes on the Workshop: the title, the description, the preview generated from the map, and the visibility (Public, which you can change later on Steam). If you have unsaved changes, it says that they will be saved first. Click PUBLISH to confirm, or CANCEL: nothing is saved nor sent.
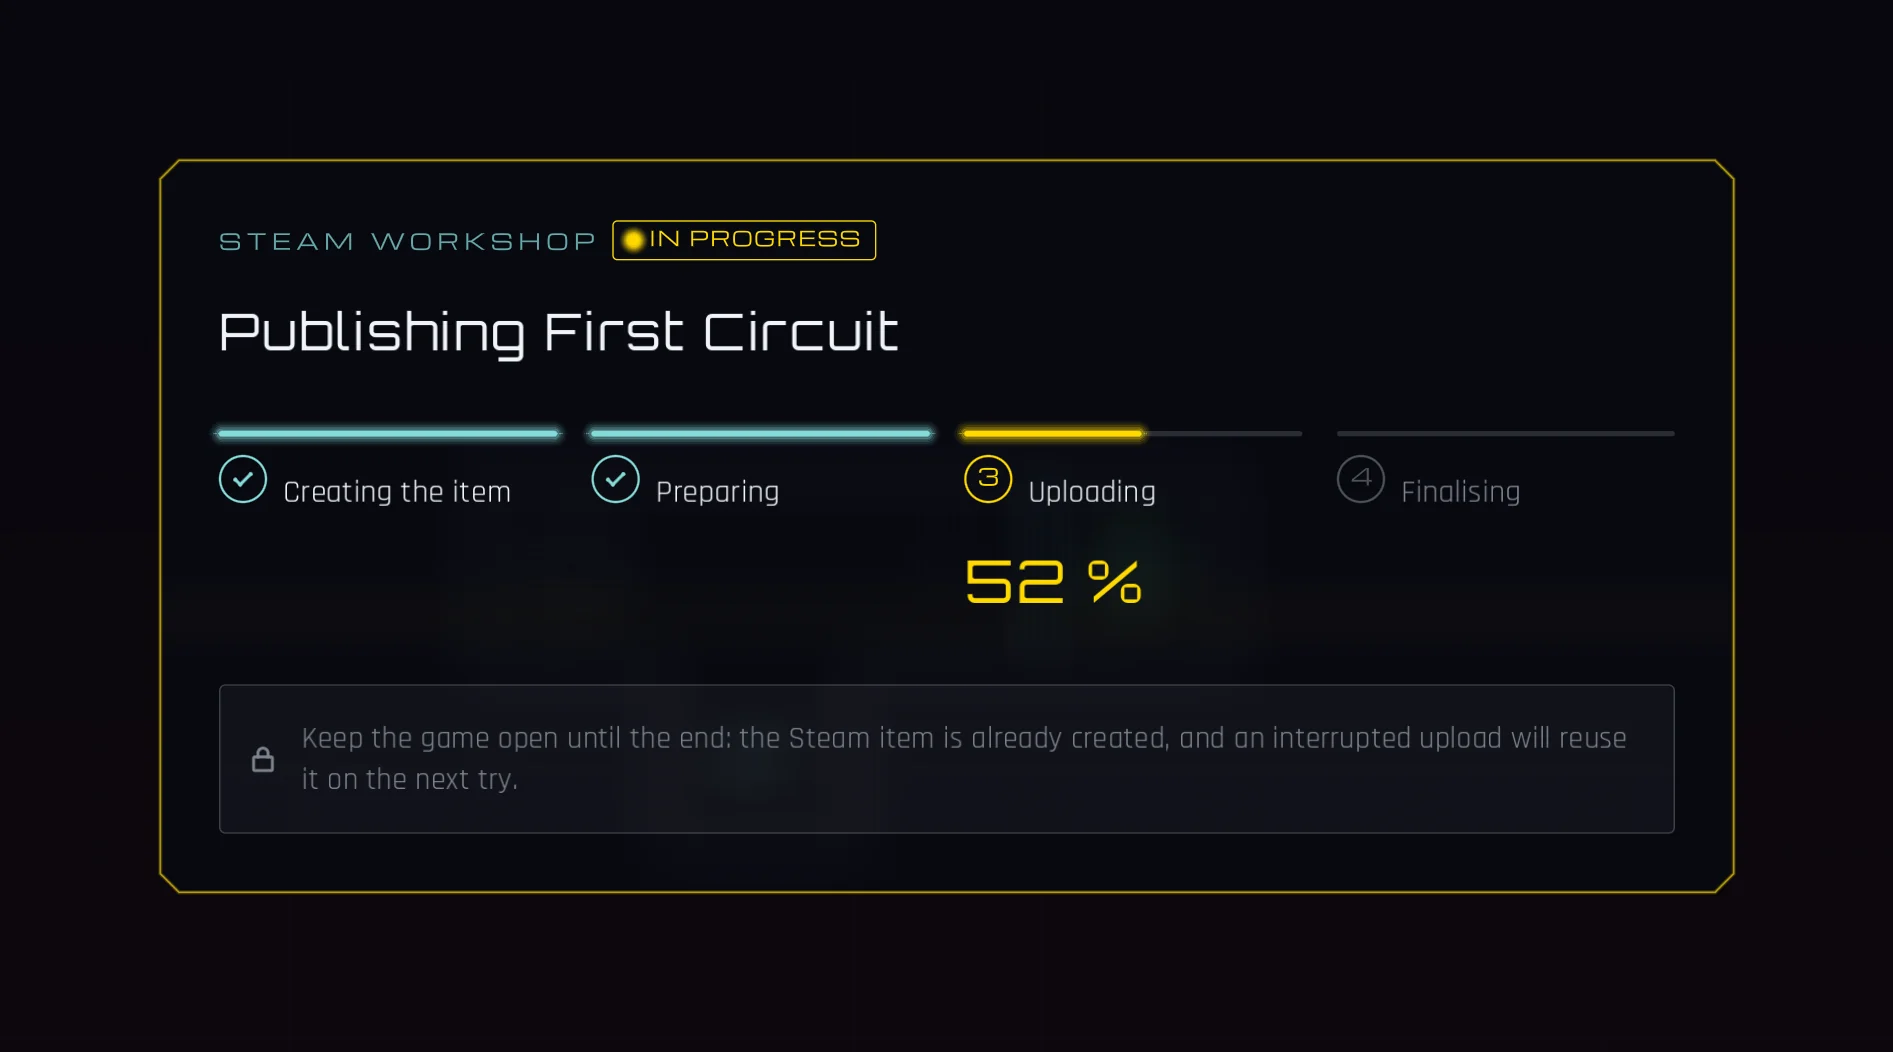
- A window follows the upload in four steps, with a percentage: Creating the item, Preparing, Uploading, Finalising. Keep the game open until the end. If the upload stops halfway, the Workshop item already exists, and the next try reuses it.
- The window "{your level} is online" gives the number of your Workshop item. The first time you publish on the Steam Workshop, it adds One last step on Steam: your level stays hidden until you accept the Steam Workshop agreement on its page. Click OPEN THE PAGE: the Workshop page of your level opens in the Steam overlay. Accept the agreement there. LATER closes the window, and the level stays hidden until you accept.
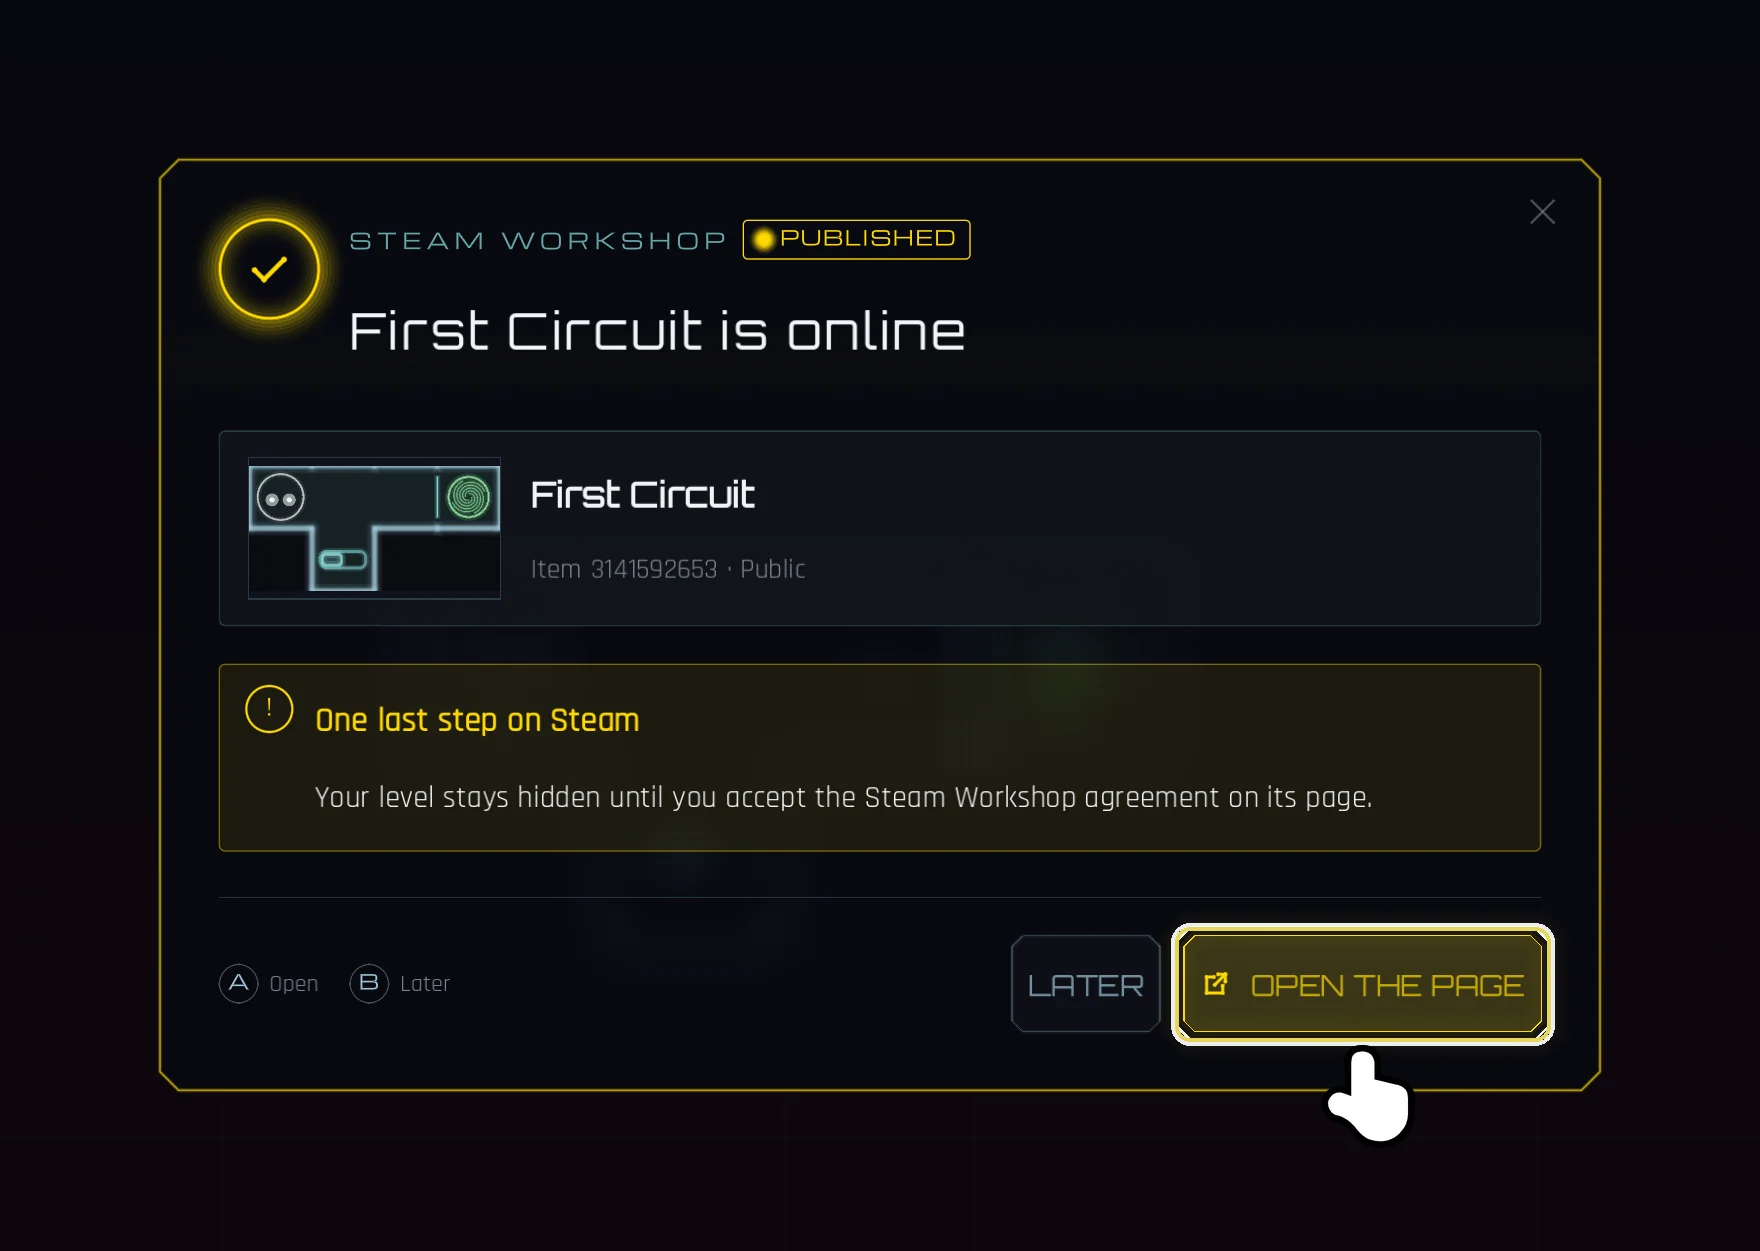
Once your account has accepted the agreement, for this game or any other, the window has no last step: SEE ON STEAM opens the page, OK closes the window.
The demo and the full game each have their own Workshop: a level you publish from the demo lives in the Workshop of the demo, where demo players find it, and the full game never lists it.
The game fills in the Workshop item for you:
- Title: the title of your level;
- Description: generated from the map, for instance "5 rooms, 1 step.";
- Preview: a picture of your map, made when you save;
- Visibility: public, set once at the first upload.
Update a published level
After the first upload, the dot before the level name in the top band turns gold, and so does the cloud of PUBLISH, which now updates the same Workshop item: its tooltip reads "Upload this version to its Steam Workshop item", followed by the state of the level. The colour gives that state: DRAFT in grey (never published), PUBLISHED in gold, MODIFIED in orange (changed since the last upload).

Change your level, beat it again in TEST, and click the cloud. The window "Update" followed by the name of your level compares what is ONLINE with what is ON THIS COMPUTER, line by line: CONTENT, TITLE, DESCRIPTION and VISIBILITY, each marked UPDATED, UNCHANGED or KEPT. It also says how many subscribers will get the new version. Click UPDATE: the same Workshop item gets the new version, subscribers receive it automatically, and the window "{your level} is up to date" confirms it.
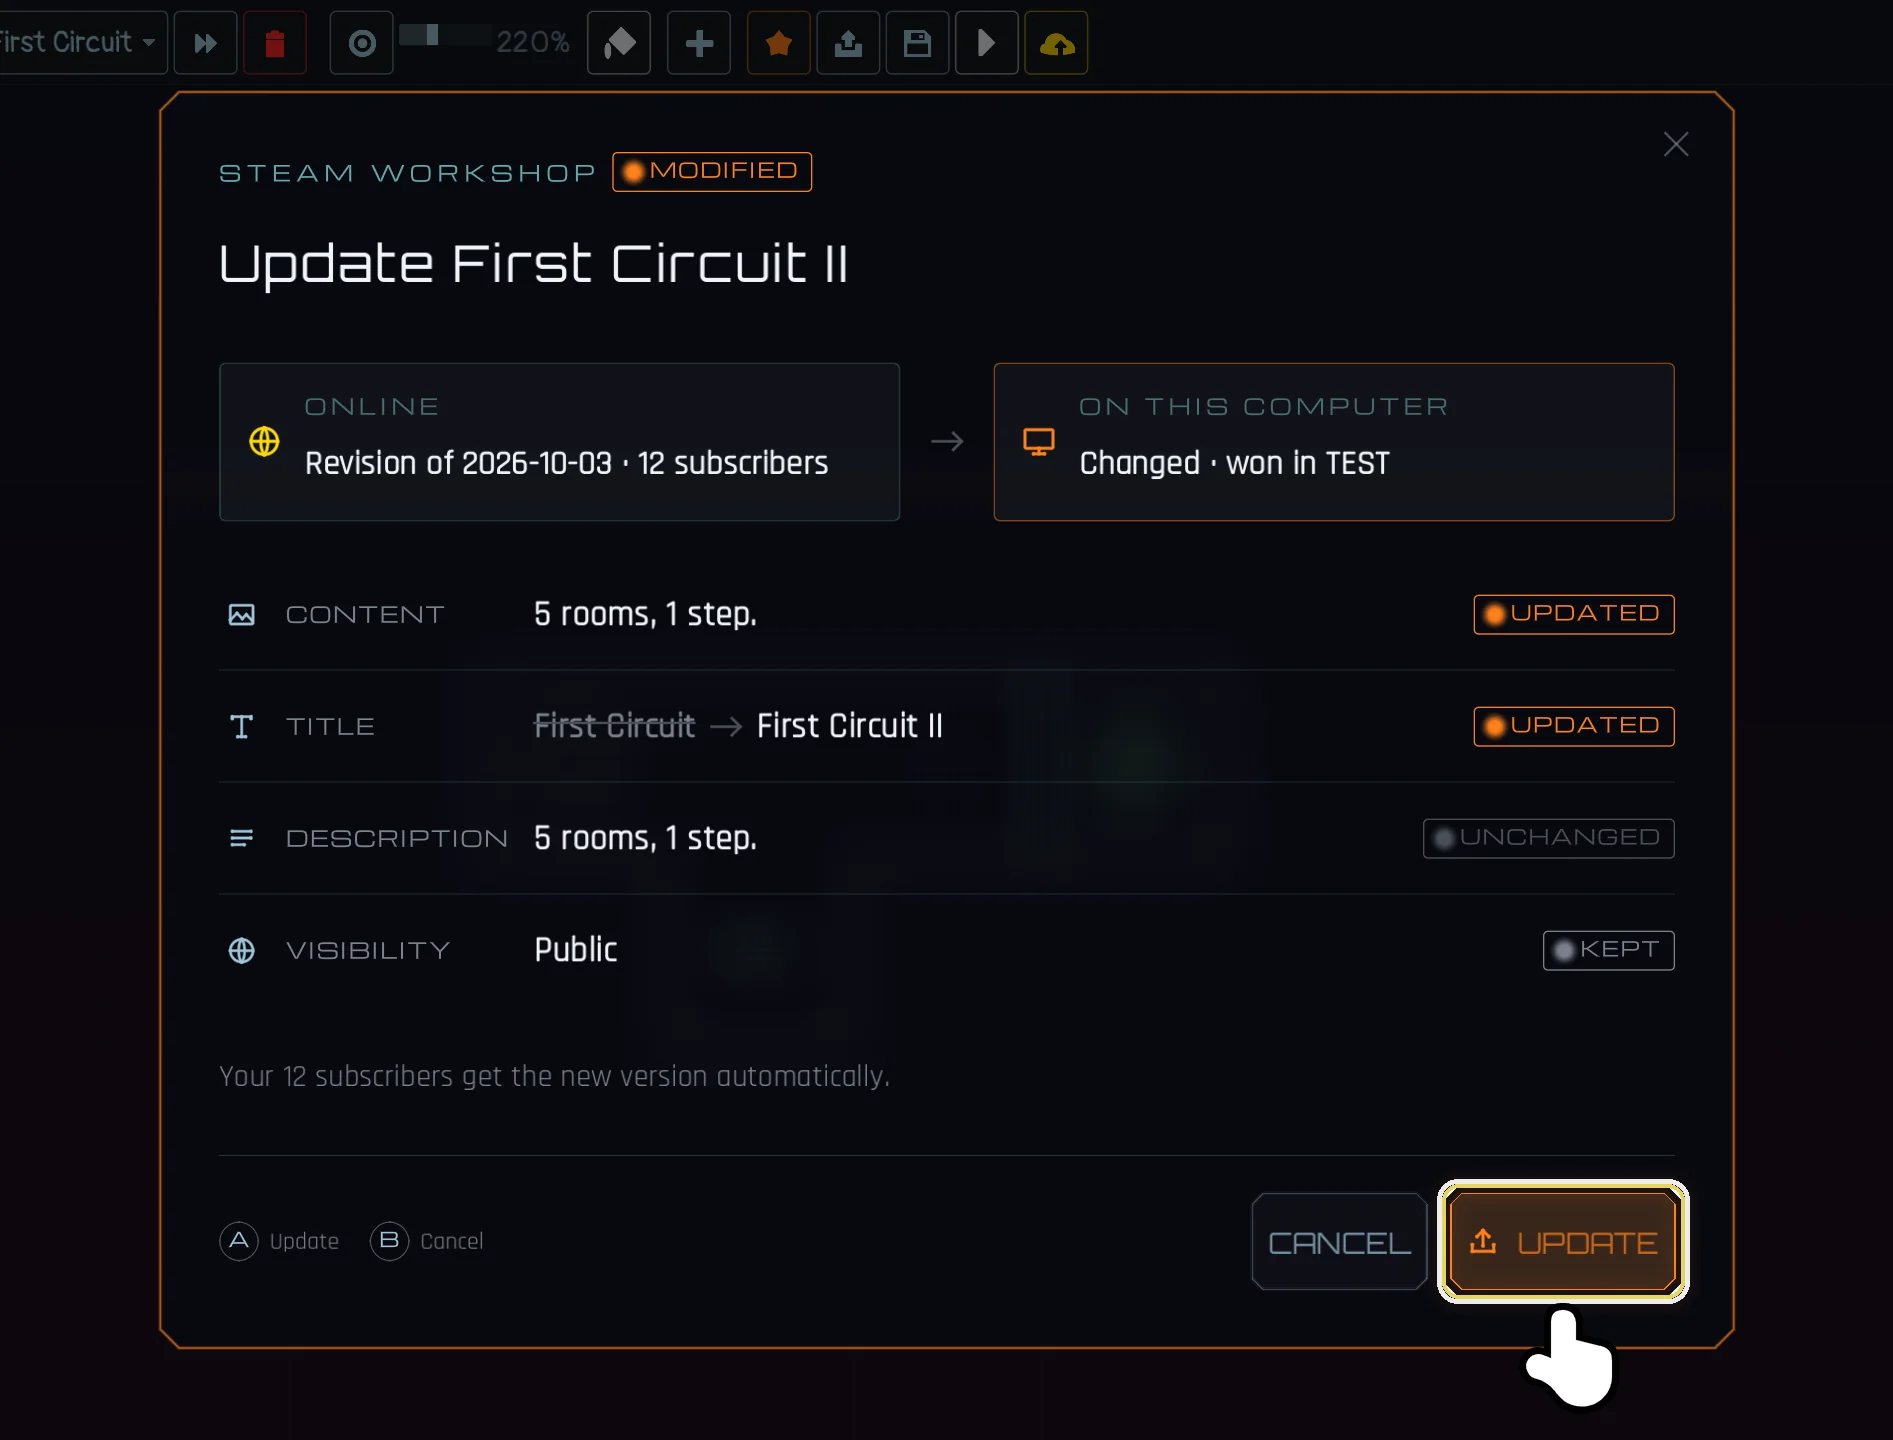
Once published, your level is timed and ranked like the levels of the campaign: every player who finishes it, with every collectible picked up, posts a time on its public leaderboard, and so do you. While your level is MODIFIED, runs on it post no time: UPDATE it and its leaderboard counts again.
An update sends the new version of the level, its preview and its settings. It never sends the visibility again: if you made your item friends-only or hidden on its Steam page, it stays that way (the line VISIBILITY reads KEPT). The title and the description are sent again only when they changed in the game since the last upload: a new title in the editor replaces the one on Steam, and the description the game writes ("5 rooms, 1 step.") is sent again only when the number of rooms or steps changes. As long as they do not change, a title or a description you rewrote on the Steam page stays as you wrote it.
Like TEST, PUBLISH refuses a level with no pawn on step 1 or no exit, with the same red message.
When the upload fails
The window "Publication failed" says why, and what did not move: your level is intact on this computer, and a Workshop item already created is kept for the next try. The code Steam answered stays apart, under TECHNICAL DETAIL. Click RETRY to send the same version again, without going through the confirmation, or CLOSE.
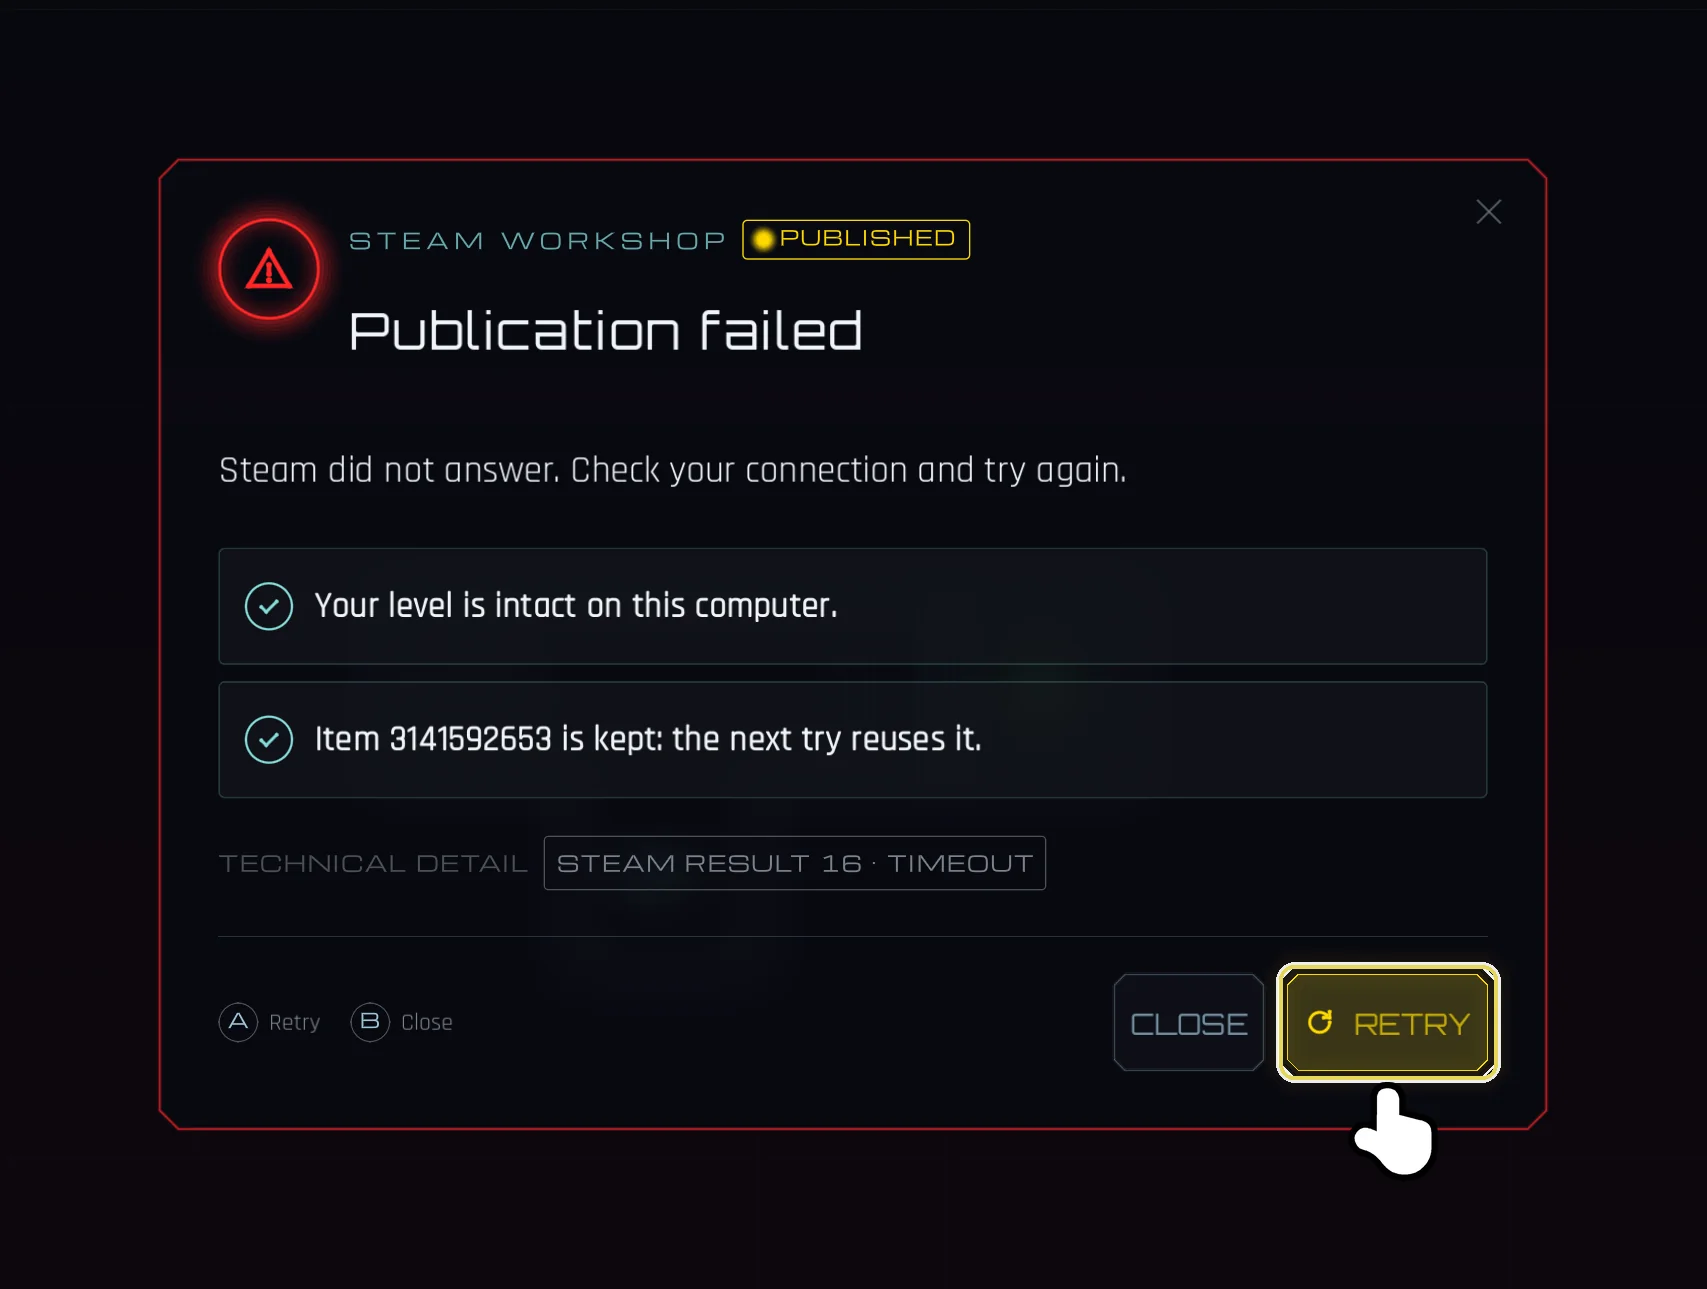
| Message | What to do |
|---|---|
| This level cannot be published: it is empty or its file is damaged. | Draw at least one room on step 1, then save |
| You are not connected to Steam. Reconnect and try again. | Go back online in Steam |
| Steam refused the upload. Check that Steam Cloud is enabled for this game. | Turn Steam Cloud on in the game's properties in Steam |
| Your Steam account is not allowed to publish (Family Sharing, or a limited account). | Publish from the account that owns the game |
| Steam did not answer. Check your connection and try again. | Try again later |
Delete a published level
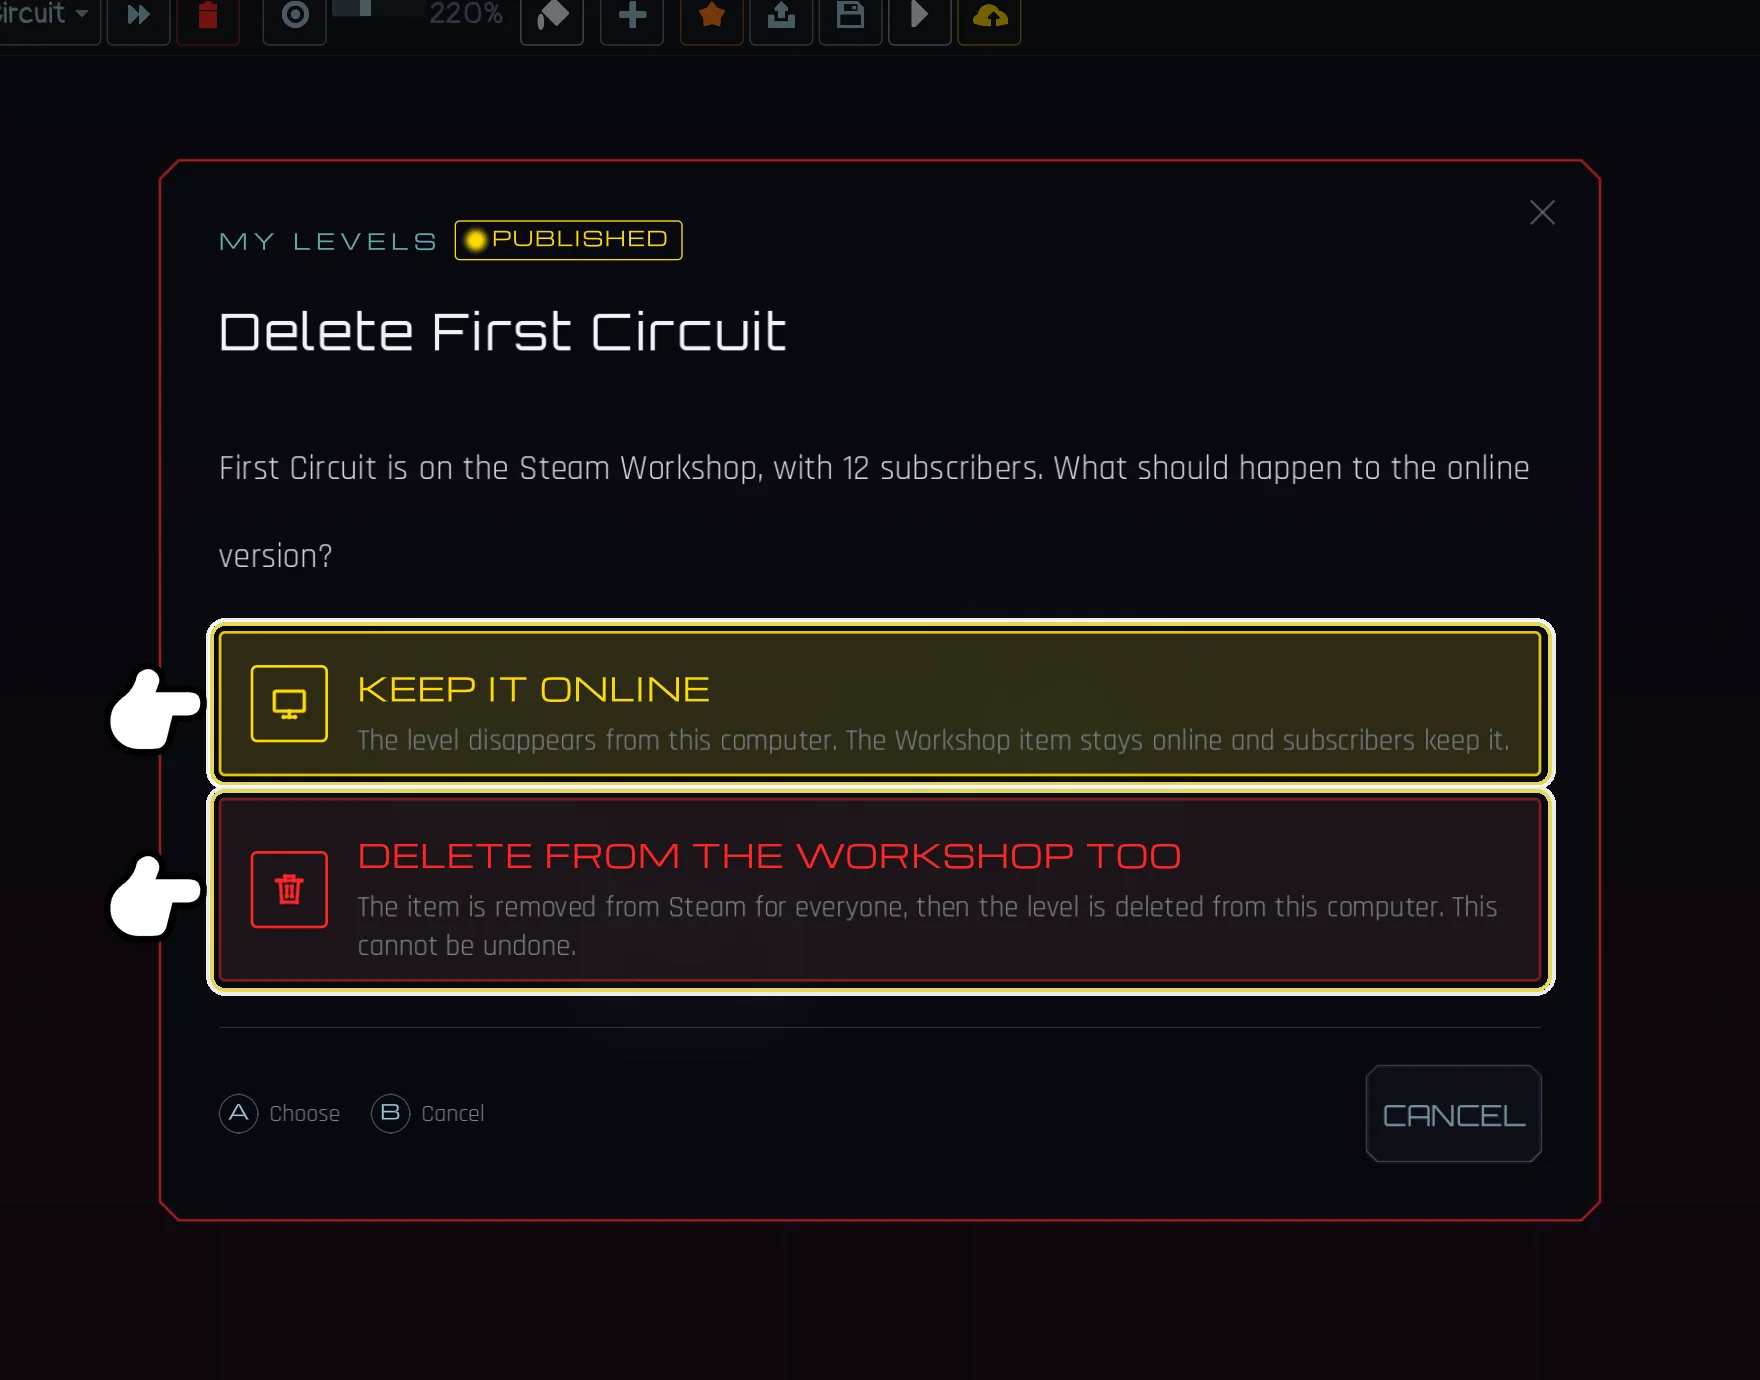
The red bin of the level switcher asks what to do with its Workshop item, in a window "Delete" followed by the name of your level, which says how many subscribers the item has. Pick one of the two cards:
- KEEP IT ONLINE deletes your level from this computer only: the item stays on the Workshop, and its subscribers keep playing it. You can still delete it later from its Steam page;
- DELETE FROM THE WORKSHOP TOO removes the item from Steam for everyone, then deletes your level from this computer. This cannot be undone. The game waits for Steam: if Steam refuses (offline, or the game was launched outside Steam), the "Deletion failed" window says why, and your level stays on this computer and online.
CANCEL changes nothing.
Outside Steam
The Workshop lives on Steam. In the version of the game sold on itch.io, PUBLISH opens the window "Share your level", which explains that levels are shared on the Steam Workshop, in the Steam version of Faraday Corridors. Your levels stay saved on your device. WISHLIST NOW opens the Steam page of the game, and CLOSE goes back to the editor.
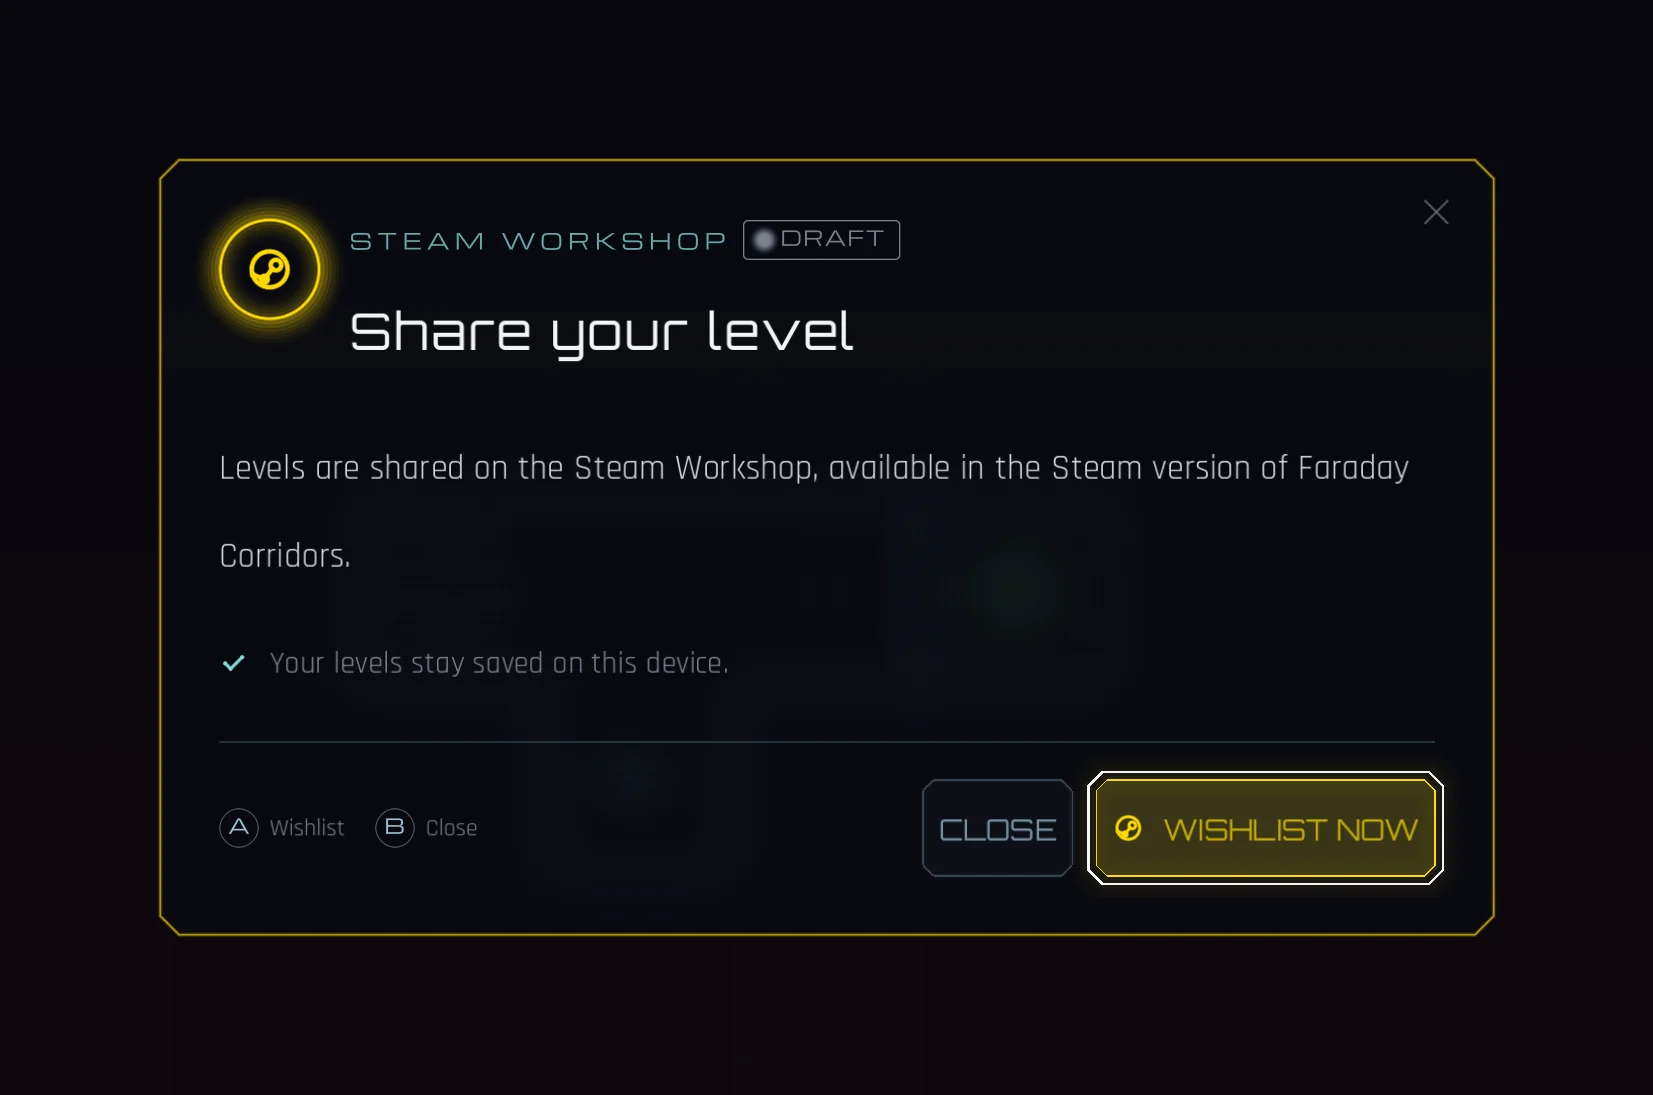
While Steam has not answered an upload or a deletion, the editor cannot be left: BACK says to wait a moment. Steam always answers, or gives up, within two minutes.
11. Play your levels and the levels of the community
Your own levels are playable like any chapter: in the chapter select, scroll to the MY LEVELS chapter (it appears once you have one level). The same name shows in the editor, on the playground banner and on the Level Complete screen, next to the name of your level.
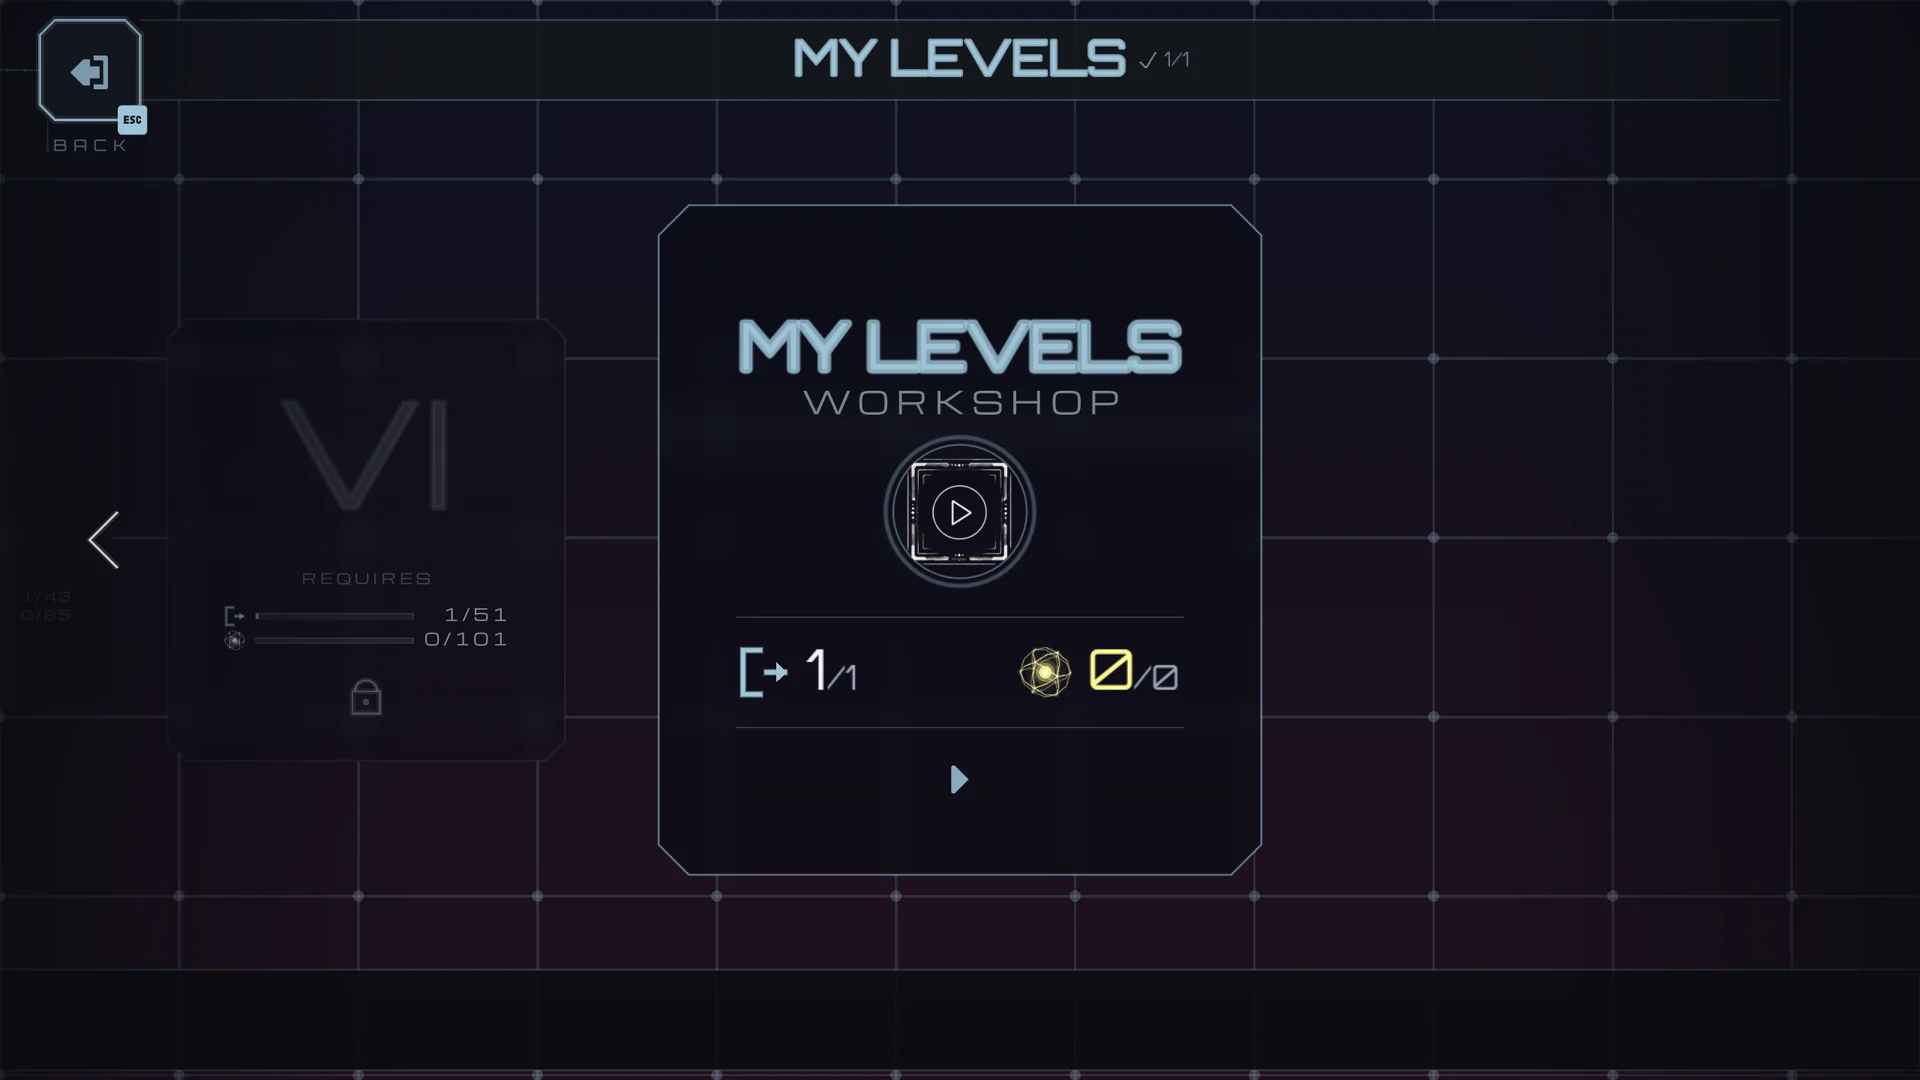
To play the levels of other players:
- In the chapter select, click WORKSHOP, at the top right (whenever the game runs through Steam, the demo included).
- Sort with the tabs BEST, TRENDING, NEW and MY CREATIONS, or type in "Search corridors…" and click SEARCH.
- Click SUBSCRIBE on a level. Steam downloads it, and it appears in the Community chapter, without restarting the game.
- Once you finish a Community level, rate it with the thumbs up or down: "Rate this corridor on the Workshop".
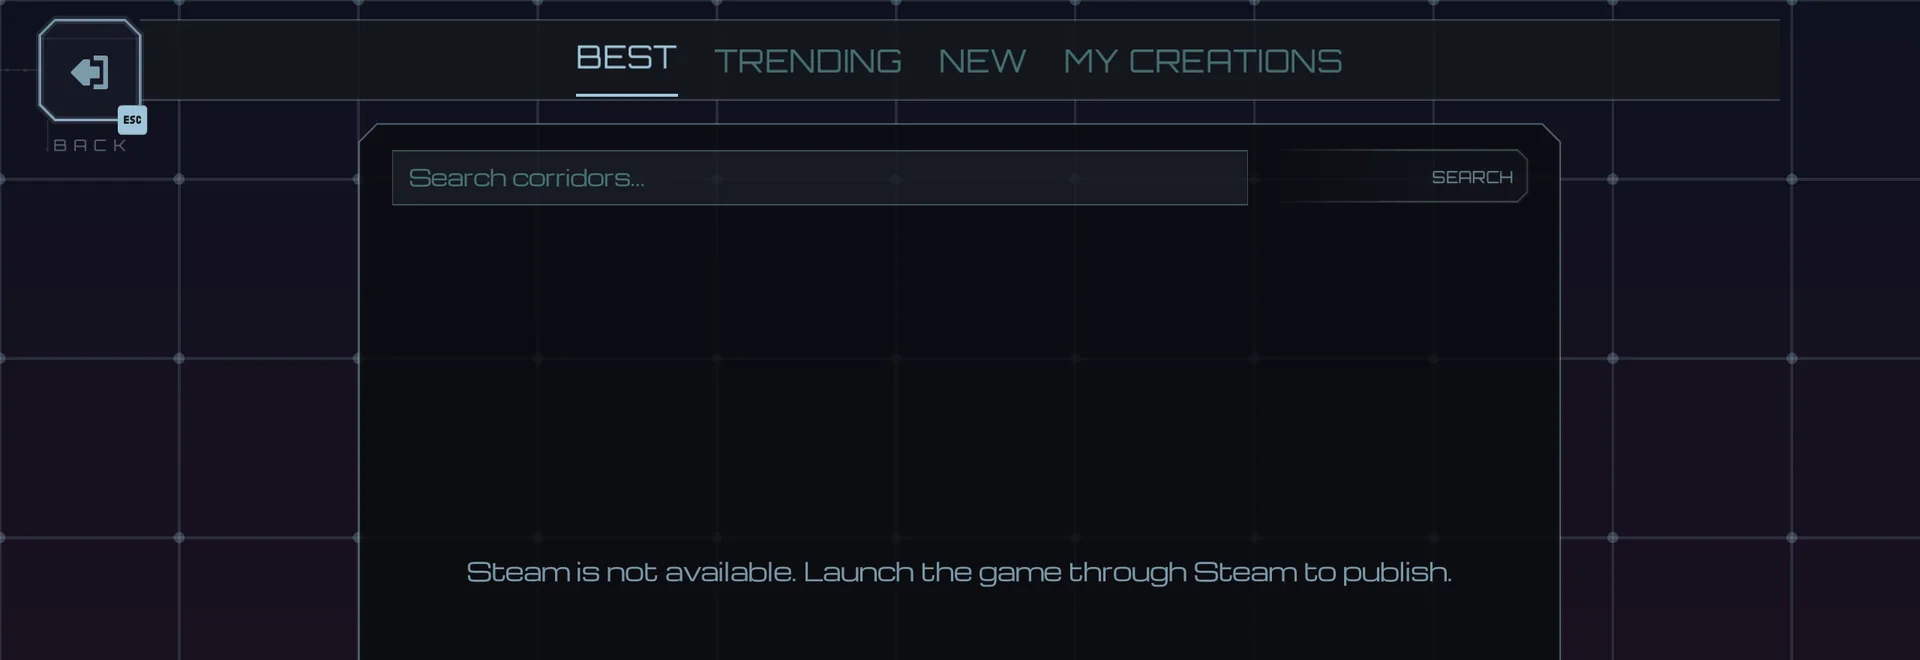
With a gamepad, Up and Down pick a level, Left and Right change tab, LB and RB change page, A subscribes or unsubscribes, and B goes back.
Enter the corridors
© Uralys 2010-2026Privacy